Safe mode mikrotik
Safe mode mikrotik
Overview
This article describes a set of commands used for configuration management.
Configuration Undo/Redo
A simple example to demonstrate the addition of firewall rule and how to undo and redo the action:
We have added firewall rule and in /system history we can see all what is being done.
Let’s undo everything:
As you can see firewall rule disappeared.
Now redo the last change:
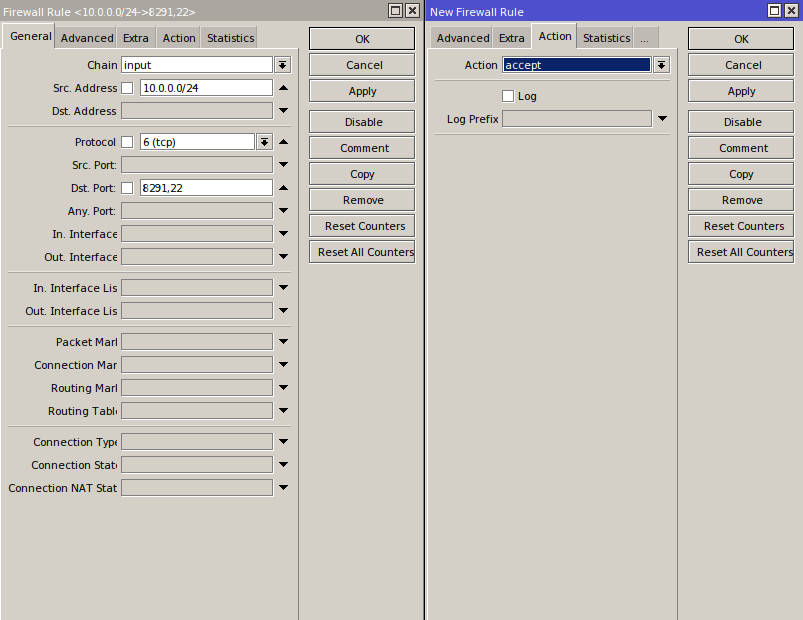
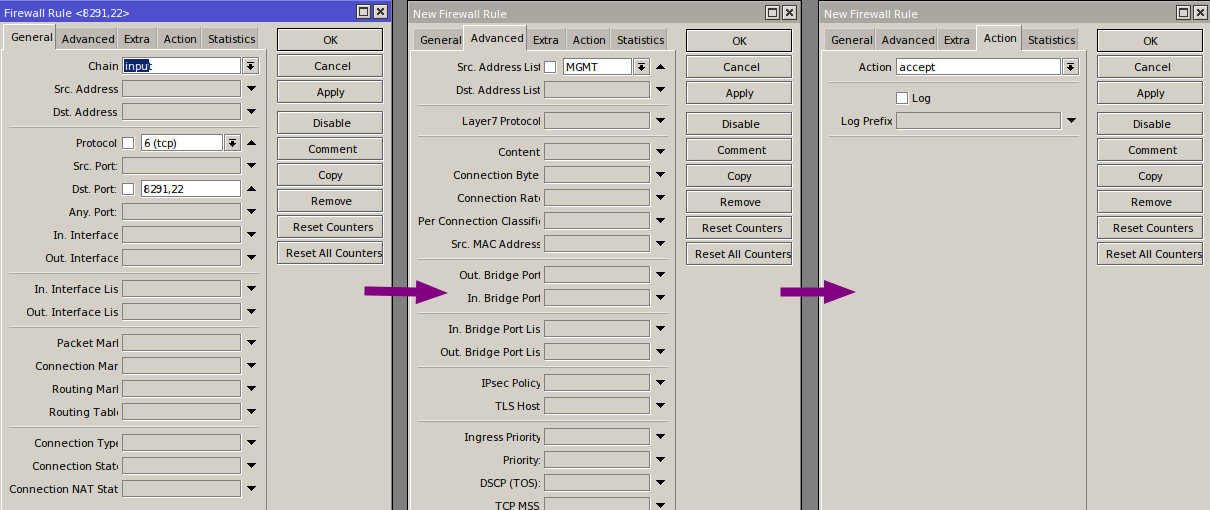
System history is capable of showing exact CLI commands that will be executed during Undo or Redo actions even if we perform the action from GUI, for example, detailed history output after adding TCP accept rule from WinBox:
Safe Mode
Sometimes it happens that the router’s configuration is changed in a way that will make the router inaccessible (except local console). Usually, this is done by accident, but there is no way to undo the last change when the connection to the router is already cut. Safe mode can be used to minimize such risk.
Safe mode is entered by pressing Ctrl-X. To save changes and quit safe mode, press Ctrl-X again. To exit without saving the made changes, hit Ctrl-D

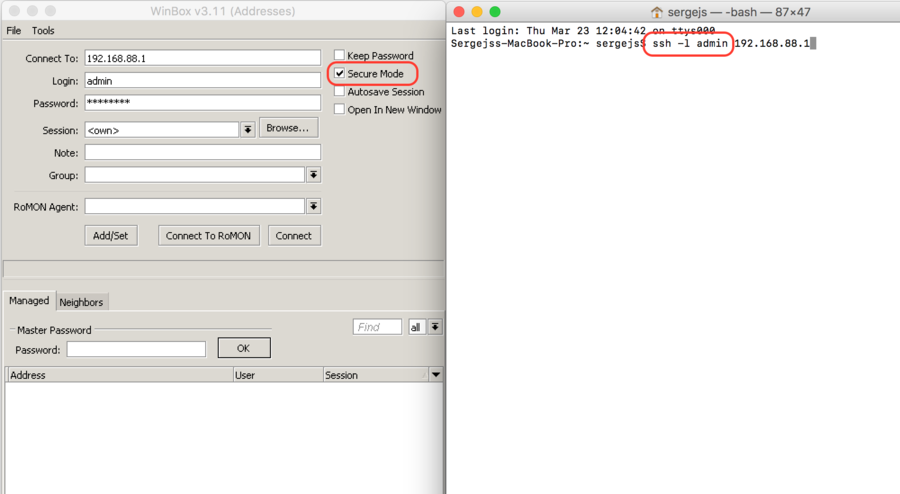
Message Safe Mode taken is displayed and prompt changes to reflect that session is now in safe mode. In WinBox safe mode is enabled by toggling the Safe Mode toggle button on the left side of the toolbar.
All configuration changes that are made (also from other login sessions), while the router is in safe mode, are automatically undone if the safe mode session terminates abnormally. You can see all such changes that will be automatically undone tagged with an F flag in system history:
Now, if telnet connection, WinBox terminal (if the safe mode was enabled on WinBox terminal window), or WinBox connection is cut, then after a while (TCP timeout is 9 minutes) all changes that were made while in safe mode will be undone. Exiting session by Ctrl-D also undoes all safe mode changes, while /quit does not.
If another user tries to enter safe mode, he’s given the following message:
If too many changes are made while in safe mode, and there’s no room in history to hold them all (currently history keeps up to 100 most recent actions), then the session is automatically put out of the safe mode, no changes are automatically undone. Thus, it is best to change the configuration in small steps, while in safe mode. Pressing Ctrl—X twice is an easy way to empty the safe mode action list.
System Backup/Restore
System backup is the way to completely clone routers configuration in binary format. The backup file contains not just configuration, but also statistics data, logs, etc. The backup file is best used to save and restore configuration on the same device, for moving configuration to other devices, use export files instead.
Backup files contain sensitive information (passwords, keys, certificates). The file can be encrypted, but even then backups should be stored only in a secure location.
Restoring backup files should be done only on the same router or on a similar router when the previous router fails. A backup must not be used to clone configuration on multiple network routers.
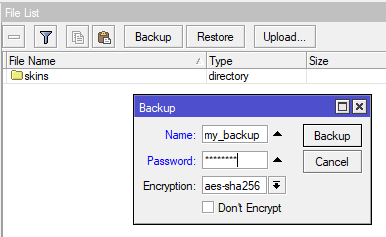
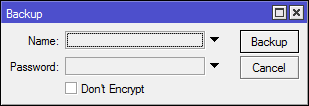
Example to save and load backup file:
Import/Export
RouterOS allows to export and import of parts of the configuration in plain text format. This method can be used to copy bits of configuration between different devices, for example, clone the whole firewall from one router to another.
An export command can be executed from each individual menu (resulting in configuration export only from this specific menu and all its sub-menus) or from the root menu for complete config export.
Following command parameters are accepted:
| Property | Description |
|---|---|
| compact | Output only modified configuration, the default behavior |
| file | Export configuration to a specified file. When the file is not specified export output will be printed to the terminal |
| hide-sensitive | Hide sensitive information, like passwords, keys, etc. |
| verbose | With this parameter, the export command will output whole configuration parameters and items including defaults. |
For example export configuration from /ip address menu and save it to file:
By default export command writes only user-edited configuration, RouterOS defaults are omitted.
For example, IPSec default policy will not be exported, and if we change one property then only our change will be exported:
Notice the * flag, it indicates that entry is system default and cannot be removed manually.
Here is the list of all menus containing default system entries
| Menu | Default Entry |
|---|---|
| /interface wireless security-profiles | default |
| /ppp profile | «default», «default-encryption» |
| /ip hotspot profile | default |
| /ip hotspot user profile | default |
| /ip ipsec policy | default |
| /ip ipsec policy group | default |
| /ip ipsec proposal | default |
| /ip ipsec mode-conf | read-only |
| /ip smb shares | pub |
| /ip smb users | guest |
| /ipv6 nd | any |
| /mpls interface | all |
| /routing bfd interface | all |
| /routing bgp instance | default |
| /routing ospf instance | default |
| /routing ospf area | backbone |
| /routing ospf-v3 instance | defailt |
| /routing ospf-v3 area | backbone |
| /snmp community | public |
| /tool mac-server mac-winbox | all |
| /tool mac-server | all |
| /system logging | «info», «error», «warning», «critical» |
| /system logging action | «memory», «disk», «echo», «remote» |
| /queue type | «default», «ethernet-default», «wireless-default», «synchronous-default», «hotspot-default», «only-hardware-queue», «multi-queue-ethernet-default», «default-small» |
Configuration Import
Root menu command import allows running configuration script from the specified file. Script file (with extension «.rsc») can contain any console command including complex scripts.
For example, load saved configuration file
Import command allows to specify following parameters:
| Property | Description |
|---|---|
| from-line | Start executing the script from the specified line number |
| file-name | Name of the script (.rsc) file to be executed. |
| verbose | Reads each line from the file and executes individually, allowing to debug syntax or other errors more easily. |
Auto Import
It is also possible to automatically execute scripts after uploading to the router with FTP or SFTP. The script file must be named with extension *.auto.rsc. Once the commands in the file are executed, a new *.auto.log file is created which contains import success or failure information.
«.auto.rsc» in the filename is mandatory for a file to be automatically executed.
Configuration Reset
RouterOS allows resetting configuration with /system reset-configuration command
This command clears all configuration of the router and sets it to the factory defaults including the login name and password (‘admin’ with an empty password). For more details on the default configuration see the list.
After the configuration reset command is executed router will reboot and load the default configuration.
The backup file of the existing configuration is stored before reset. That way you can easily restore any previous configuration if reset is done by mistake.
If the router has been installed using Netinstall and had a script specified as the initial configuration, the reset command executes this script after purging the configuration. To stop it from doing so, you will have to reinstall the router.
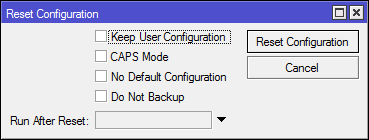
It is possible to override default reset behavior with the parameters below:
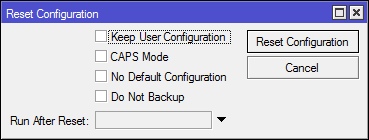
For example hard reset configuration without loading default config and skipping backup file:
And the same using Winbox:

MikroTik Safe Mode: Безопасный режим работы при удаленной настройке RouterOS
В этой статье мы расскажем о MikroTik Safe Mode. Узнаем, зачем и в каких случаях его используют. Чем данная функция облегчает работу системного администратора, важность ее использования на практике.
Научиться настраивать MikroTik с нуля или систематизировать уже имеющиеся знания можно на углубленном курсе по администрированию MikroTik. Автор курса, сертифицированный тренер MikroTik Дмитрий Скоромнов, лично проверяет лабораторные работы и контролирует прогресс каждого своего студента. В три раза больше информации, чем в вендорской программе MTCNA, более 20 часов практики и доступ навсегда.
Safe Mode — это режим работы, при котором MikroTik во время неправильного изменения конфигурации RouterOS, которая привела к разрыву IP-соединения и потери доступа к оборудованию, через 15-20 минут восстановит подключение к устройству, отменив внесенные изменения.
Обратите внимание, что речь идет именно о разрыве IP-соединения. Если устройство перезагрузится по причине потери питания (пропало электричество), то все изменения будут применены.
Mikrotik Safe Mode. Практическое применение.
Обычно Safe Mode применяют при удаленной настройке роутера Микротик. Модифицируя конфигурацию брандмауэра или внешний IP-адрес устройства, используя безопасный режим, вы защитите себя от ошибки, которая может привести к потере доступа до роутера.
Включить Safe Mode на MikroTik можно:
Переход в безопасный режим из консоли осуществляется нажатием клавиш Ctrl + X.
Не забудьте после завершения конфигурирования RouterOS отключить данный режим, чтобы внесенные изменения сохранились.
Отключение Safe Mode из Winbox, производится при помощи повторного нажатия одноименной кнопки.
Для терминального режима – повторным нажатием Ctrl + X.
Пример
Рассмотрим принцип работы Safe Mode на MikroTik, используя Winbox. Для этого откроем графическую утилиту и активируем безопасный режим:
Откроем конфигурацию firewall:
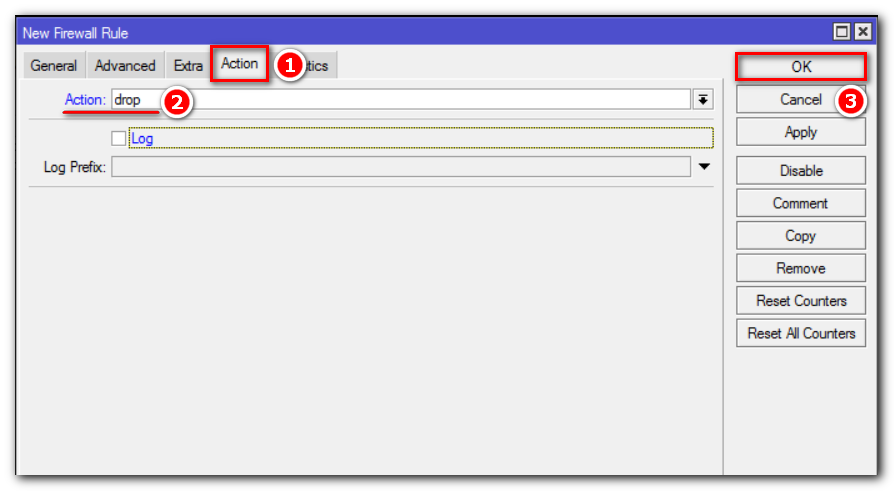
Запретим входящие соединения по 8291(TCP) порту и поставим это правило первым, чем отключим доступ к маршрутизатору по Winbox:
Через некоторое время соединение разорвется. Подождем 15-20 минут и повторим попытку подключения. Увидим, что связь восстановилась.
Не рекомендуем активировать функцию Safe Mode во время одновременной работы двух и более системных инженеров.
Конечно, пользователь RouterOS при попытке включения безопасного режима получит уведомление о том, что данная функция уже используется.
Но это произойдет тогда, когда метод вызова функции идентичный.
В случае, если первый администратор активирует Safe Mode через консоль, а другой при помощи графического интерфейса, то уведомлений не будет и все изменения будут применяться в реальном времени, без возможности откатить их до предыдущей конфигурации. Что вызовет ряд трудностей, приведет к серьезным последствиям и потере времени.
Надеюсь, данная статья была вам полезна. Если возникли вопросы, пишите в комментарии.
Научиться настраивать MikroTik с нуля или систематизировать уже имеющиеся знания можно на углубленном курсе по администрированию MikroTik. Автор курса, сертифицированный тренер MikroTik Дмитрий Скоромнов, лично проверяет лабораторные работы и контролирует прогресс каждого своего студента. В три раза больше информации, чем в вендорской программе MTCNA, более 20 часов практики и доступ навсегда.
Записки IT специалиста
Технический блог специалистов ООО»Интерфейс»
Безопасный режим в Mikrotik или как всегда оставаться на связи
Научиться настраивать MikroTik с нуля или систематизировать уже имеющиеся знания можно на углубленном курсе по администрированию MikroTik. Автор курса, сертифицированный тренер MikroTik Дмитрий Скоромнов, лично проверяет лабораторные работы и контролирует прогресс каждого своего студента. В три раза больше информации, чем в вендорской программе MTCNA, более 20 часов практики и доступ навсегда.
Потерять связь с удаленным роутером можно по множеству причин. Все мы люди и всем нам свойственно ошибаться. Это могут быть как ошибки в сетевой конфигурации, так и просто ошибочные действия, чаще всего непреднамеренные, например, один мой коллега случайно отключил внешний интерфейс на роутере случайно нажав на кнопку с крестиком. Поэтому, насколько бы вы не были уверенны в правильности своих действий, даже если вы уже много раз так делали, никогда нельзя сбрасывать со счетов возможность возникновения нештатных ситуаций.
Его смысл заключается в том, что внесенные изменения не сразу записываются в память устройства, а только после явного подтверждения администратором, которым является ручной выход из безопасного режима. В случае потери связи с устройством через некоторое время будет выполнен откат настроек. Это время определяется тайм-аутом TCP и не превышает 9 минут.
Чтобы включить безопасный режим следует нажать кнопку Safe Mode в Winbox:
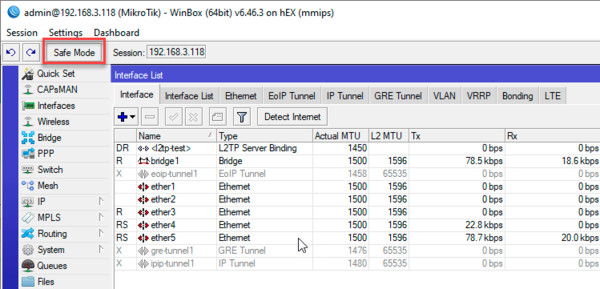
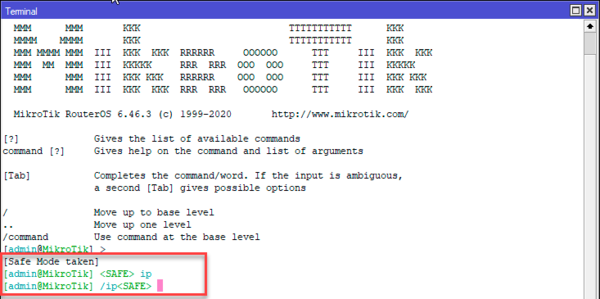
Также к отмене всех сделанных изменений приведет закрытие окна Winbox или терминала с включенным безопасным режимом. Этим можно воспользоваться, если вы просто хотите быстро откатить все внесенные изменения.
Чтобы выйти из безопасного режима с сохранением внесенных изменений следует явно отжать кнопку Safe Mode в Winboх или еще раз выполнить сочетание клавиш Ctrl+x в терминале, также изменения сохраняются при выходе из терминала командой:
Работа в безопасном режиме имеет свои особенности, которые нужно обязательно учитывать. Количество хранимых шагов ограничено, согласно документации, роутер может сохранять в памяти не более 100 действий, если вы превысите это количество, то сеанс автоматически выйдет из безопасного режима и изменения не смогут быть отменены. Поэтому рекомендуется вносить изменения небольшими порциями, каждый раз выходя из безопасного режима и входя в него повторно. В терминале для этого можно использовать двойное нажатие Ctrl+x.
При совместной работе нескольких администраторов может возникнуть ситуация, когда одна из сессий уже находится в безопасном режиме, попытка включить безопасный режим еще в одной сессии через Winbox не увенчается успехом:

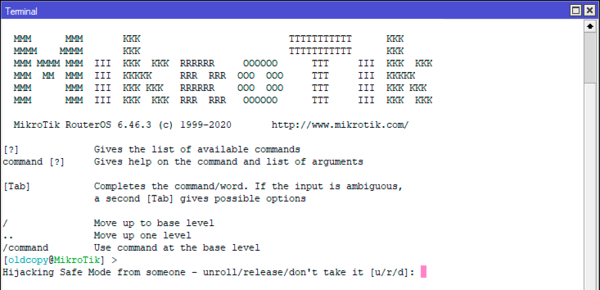
О результатах первых двух действий другой администратор получит уведомление, но только в том случае, если безопасный режим использовался в терминале. Если же один из администраторов включил безопасный режим через Winbox, а второй забрал его через терминал, то никаких уведомлений первый администратор не получит и визуально кнопка Safe Mode будет оставаться нажатой. Это может привести к опасным ситуациям, когда первый администратор будет считать, что безопасный режим у него включен, но на самом деле все изменения будут применяться непосредственно на устройстве.
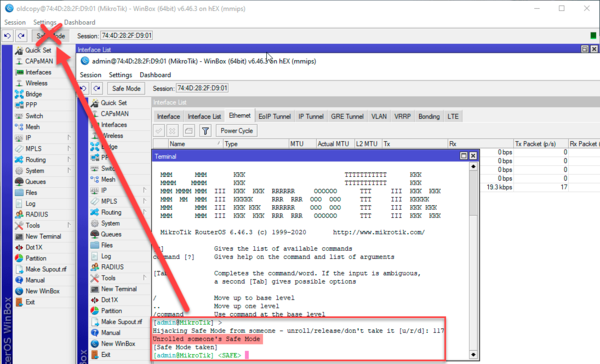
Чтобы обезопасить себя от перехвата безопасного режима следует перед внесением очередных изменений выключить безопасный режим и снова включить. Если вы работаете через Winbox, то столкнетесь с описанной выше ошибкой, а в терминале получите запрос на захват режима. При возникновении подобной ситуации мы рекомендуем сразу связаться с коллегами и согласовать последующие действия.
Еще одной особенностью безопасного режима является его реакция на выключение питания устройства или его аварийную перезагрузку, в этом случае все изменения внесенные в безопасном режиме будут применены. Поэтому если ваше оборудование находится в местах, где возможны перебои с энергоснабжением, то рекомендуем обязательно позаботиться о бесперебойном питании.
Обрыва интернет-соединения указанная особенность не касается, такая ситуация будет обработана как обрыв связи с последующим откатом изменений. Аналогичная реакция будет и на аварийное завершение работы клиентского устройства, где был запущен Winbox или терминал.
Научиться настраивать MikroTik с нуля или систематизировать уже имеющиеся знания можно на углубленном курсе по администрированию MikroTik. Автор курса, сертифицированный тренер MikroTik Дмитрий Скоромнов, лично проверяет лабораторные работы и контролирует прогресс каждого своего студента. В три раза больше информации, чем в вендорской программе MTCNA, более 20 часов практики и доступ навсегда.
Дополнительные материалы:
Mikrotik
The Dude
Помогла статья? Поддержи автора и новые статьи будут выходить чаще:
Configuration Management
This article describes a set of commands used for configuration management.
A simple example to demonstrate the addition of firewall rule and how to undo and redo the action:
We have added firewall rule and in /system history we can see all what is being done.
Let’s undo everything:
As you can see firewall rule disappeared.
Now redo the last change:
System history is capable of showing exact CLI commands that will be executed during Undo or Redo actions even if we perform the action from GUI, for example, detailed history output after adding TCP accept rule from WinBox:
Safe Mode
Sometimes it happens that the router’s configuration is changed in a way that will make the router inaccessible (except local console). Usually, this is done by accident, but there is no way to undo the last change when the connection to the router is already cut. Safe mode can be used to minimize such risk.
Safe mode is entered by pressing Ctrl-X. To save changes and quit safe mode, press Ctrl-X again. To exit without saving the made changes, hit Ctrl-D
Message Safe Mode taken is displayed and prompt changes to reflect that session is now in safe mode. In WinBox safe mode is enabled by toggling the Safe Mode toggle button on the left side of the toolbar.
All configuration changes that are made (also from other login sessions), while the router is in safe mode, are automatically undone if the safe mode session terminates abnormally. You can see all such changes that will be automatically undone tagged with an F flag in system history:
Now, if telnet connection, WinBox terminal (if the safe mode was enabled on WinBox terminal window), or WinBox connection is cut, then after a while (TCP timeout is 9 minutes) all changes that were made while in safe mode will be undone. Exiting session by Ctrl-D also undoes all safe mode changes, while /quit does not.
If another user tries to enter safe mode, he’s given the following message:
If too many changes are made while in safe mode, and there’s no room in history to hold them all (currently history keeps up to 100 most recent actions), then the session is automatically put out of the safe mode, no changes are automatically undone. Thus, it is best to change the configuration in small steps, while in safe mode. Pressing Ctrl—X twice is an easy way to empty the safe mode action list.
System Backup/Restore
System backup is the way to completely clone routers configuration in binary format. The backup file contains not just configuration, but also statistics data, logs, etc. The backup file is best used to save and restore configuration on the same device, for moving configuration to other devices, use export files instead.
Backup files contain sensitive information (passwords, keys, certificates). The file can be encrypted, but even then backups should be stored only in a secure location.
Restoring backup files should be done only on the same router or on a similar router when the previous router fails. A backup must not be used to clone configuration on multiple network routers.
Example to save and load backup file:
Import/Export
RouterOS allows to export and import of parts of the configuration in plain text format. This method can be used to copy bits of configuration between different devices, for example, clone the whole firewall from one router to another.
An export command can be executed from each individual menu (resulting in configuration export only from this specific menu and all its sub-menus) or from the root menu for complete config export.
Following command parameters are accepted:
| Property | Description |
|---|---|
| compact | Output only modified configuration, the default behavior |
| file | Export configuration to a specified file. When the file is not specified export output will be printed to the terminal |
| hide-sensitive | Hide sensitive information, like passwords, keys, etc. |
| verbose | With this parameter, the export command will output whole configuration parameters and items including defaults. |
For example export configuration from /ip address menu and save it to file:
By default export command writes only user-edited configuration, RouterOS defaults are omitted.
For example, IPSec default policy will not be exported, and if we change one property then only our change will be exported:
Notice the * flag, it indicates that entry is system default and cannot be removed manually.
Here is the list of all menus containing default system entries
| Menu | Default Entry |
|---|---|
| /interface wireless security-profiles | default |
| /ppp profile | «default», «default-encryption» |
| /ip hotspot profile | default |
| /ip hotspot user profile | default |
| /ip ipsec policy | default |
| /ip ipsec policy group | default |
| /ip ipsec proposal | default |
| /ip ipsec mode-conf | read-only |
| /ip smb shares | pub |
| /ip smb users | guest |
| /ipv6 nd | any |
| /mpls interface | all |
| /routing bfd interface | all |
| /routing bgp instance | default |
| /routing ospf instance | default |
| /routing ospf area | backbone |
| /routing ospf-v3 instance | defailt |
| /routing ospf-v3 area | backbone |
| /snmp community | public |
| /tool mac-server mac-winbox | all |
| /tool mac-server | all |
| /system logging | «info», «error», «warning», «critical» |
| /system logging action | «memory», «disk», «echo», «remote» |
| /queue type | «default», «ethernet-default», «wireless-default», «synchronous-default», «hotspot-default», «only-hardware-queue», «multi-queue-ethernet-default», «default-small» |
Configuration Import
Root menu command import allows running configuration script from the specified file. Script file (with extension «.rsc») can contain any console command including complex scripts.
For example, load saved configuration file
Import command allows to specify following parameters:
| Property | Description |
|---|---|
| from-line | Start executing the script from the specified line number |
| file-name | Name of the script (.rsc) file to be executed. |
| verbose | Reads each line from the file and executes individually, allowing to debug syntax or other errors more easily. |
Auto Import
It is also possible to automatically execute scripts after uploading to the router with FTP or SFTP. The script file must be named with extension *.auto.rsc. Once the commands in the file are executed, a new *.auto.log file is created which contains import success or failure information.
«.auto.rsc» in the filename is mandatory for a file to be automatically executed.
Configuration Reset
RouterOS allows resetting configuration with /system reset-configuration command
This command clears all configuration of the router and sets it to the factory defaults including the login name and password (‘admin’ with an empty password). For more details on the default configuration see the list.
After the configuration reset command is executed router will reboot and load the default configuration.
The backup file of the existing configuration is stored before reset. That way you can easily restore any previous configuration if reset is done by mistake.
If the router has been installed using Netinstall and had a script specified as the initial configuration, the reset command executes this script after purging the configuration. To stop it from doing so, you will have to reinstall the router.
It is possible to override default reset behavior with the parameters below:
For example hard reset configuration without loading default config and skipping backup file:
Mikrotik safe mode
Скорее всего, ответ на ваш вопрос такой: mikrotik в режиме safe mode откатывается обратно где-то через 9 минут по тайм-ауту TCP. Если я не угадал сходу, то возможно вы найдете ответ на ваш вопрос далее по тексту 😉
Настраивая роутер, рано или поздно, но с вероятностью близкой к ста процентам, наступит тот момент, когда вы побежите этот роутер либо перезагружать, либо подключаться с консоли и исправлять то, что вы натворили.
И хорошо, если серверная — это соседнее помещение. А это может быть и соседнее здание. И вполне возможно, что роутер вообще в другом городе, и вы пытаетесь удаленно что-то там настроить.
Safe mode — это защита от фатальных ошибок. И дело не в кривизне рук — никто не застрахован от ошибки, независимо от опыта.
Механизм прост до безобразия: вы включаете безопасный режим и, если вы из этого режима корректно не выйдете, то роутер откатывает те изменения, которые были сделаны во время сессии safe mode. Под корректным выходом из безопасного режима mikrotik подразумевает отключение безопасного режима вами собственноручно. Т.е. «все хорошо, связь не пропала, админ сам отключил…» и изменения, которые были внесены в конфигурацию, применяются.
В winbox безопасный режим включается кнопкой:
Отключается ей же.
Для входа в безопасный режим в терминале надо нажать CTRL+X. Терминал сообщит вам, что вы находитесь в безопасном режиме:
Manual:Console
Applies to RouterOS: 2.9, v3, v4
Contents
Overview
The console is used for accessing the MikroTik Router’s configuration and management features using text terminals, either remotely using serial port, telnet, SSH or console screen within Winbox, or directly using monitor and keyboard. The console is also used for writing scripts. This manual describes the general console operation principles. Please consult the Scripting Manual on some advanced console commands and on how to write scripts.
Hierarchy
The console allows configuration of the router’s settings using text commands. Since there is a lot of available commands, they are split into groups organized in a way of hierarchical menu levels. The name of a menu level reflects the configuration information accessible in the relevant section, eg. /ip hotspot.
Example
For example, you can issue the /ip route print command:
Instead of typing ip route path before each command, the path can be typed only once to move into this particular branch of menu hierarchy. Thus, the example above could also be executed like this:
Notice that the prompt changes in order to reflect where you are located in the menu hierarchy at the moment. To move to the top level again, type » / «
To move up one command level, type » .. «
You can also use / and .. to execute commands from other menu levels without changing the current level:
Item Names and Numbers
Many of the command levels operate with arrays of items: interfaces, routes, users etc. Such arrays are displayed in similarly looking lists. All items in the list have an item number followed by flags and parameter values.
To change properties of an item, you have to use set command and specify name or number of the item.
Item Names
Some lists have items with specific names assigned to each of them. Examples are interface or user levels. There you can use item names instead of item numbers.
You do not have to use the print command before accessing items by their names, which, as opposed to numbers, are not assigned by the console internally, but are properties of the items. Thus, they would not change on their own. However, there are all kinds of obscure situations possible when several users are changing router’s configuration at the same time. Generally, item names are more «stable» than the numbers, and also more informative, so you should prefer them to numbers when writing console scripts.
Item Numbers
Since version 3 it is possible to use item numbers without running print command. Numbers will be assigned just as if the print command was executed.
You can specify multiple items as targets to some commands. Almost everywhere, where you can write the number of item, you can also write a list of numbers.
Warning: Do not use Item numbers in scripts, it is not reliable way to edit items in scheduler. scripts, etc. Instead use find command. More info here also look at scripting examples.
Quick Typing
If there is more than one match, but they all have a common beginning, which is longer than that what you have typed, then the word is completed to this common part, and no space is appended:
/interface set e[Tab]_ becomes /interface set ether_
If you’ve typed just the common part, pressing the tab key once has no effect. However, pressing it for the second time shows all possible completions in compact form:
Another way to press fewer keys while typing is to abbreviate command and argument names. You can type only beginning of command name, and, if it is not ambiguous, console will accept it as a full name. So typing:
It is possible to complete not only beginning, but also any distinctive substring of a name: if there is no exact match, console starts looking for words that have string being completed as first letters of a multiple word name, or that simply contain letters of this string in the same order. If single such word is found, it is completed at cursor position. For example:
General Commands
There are some commands that are common to nearly all menu levels, namely: print, set, remove, add, find, get, export, enable, disable, comment, move. These commands have similar behavior throughout different menu levels.
Modes
Console line editor works either in multiline mode or in single line mode. In multiline mode line editor displays complete input line, even if it is longer than single terminal line. It also uses full screen editor for editing large text values, such as scripts. In single line mode only one terminal line is used for line editing, and long lines are shown truncated around the cursor. Full screen editor is not used in this mode.
Choice of modes depends on detected terminal capabilities.
List of keys
up, down and split keys leave cursor at the end of line.
Built-in Help
The console has a built-in help, which can be accessed by typing ?. General rule is that help shows what you can type in position where the ? was pressed (similarly to pressing [Tab] key twice, but in verbose form and with explanations).
Safe Mode
It is sometimes possible to change router configuration in a way that will make the router inaccessible (except from local console). Usually this is done by accident, but there is no way to undo last change when connection to router is already cut. Safe mode can be used to minimize such risk.
Safe mode is entered by pressing [CTRL]+[X]. To save changes and quit safe mode, press [CTRL]+[X] again. To exit without saving the made changes, hit [CTRL]+[D]
Message Safe Mode taken is displayed and prompt changes to reflect that session is now in safe mode. All configuration changes that are made (also from other login sessions), while router is in safe mode, are automatically undone if safe mode session terminates abnormally. You can see all such changes that will be automatically undone tagged with an F flag in system history:
Now, if telnet connection (or winbox terminal) is cut, then after a while (TCP timeout is 9 minutes) all changes that were made while in safe mode will be undone. Exiting session by [Ctrl]+[D] also undoes all safe mode changes, while /quit does not.
If another user tries to enter safe mode, he’s given following message:
If too many changes are made while in safe mode, and there’s no room in history to hold them all (currently history keeps up to 100 most recent actions), then session is automatically put out of the safe mode, no changes are automatically undone. Thus, it is best to change configuration in small steps, while in safe mode. Pressing [Ctrl]+[X] twice is an easy way to empty safe mode action list.
HotLock Mode
When HotLock mode is enabled commands will be auto completed.
To enter/exit HotLock mode press [CTRL]+[V].
Quick Help menu
F6 key enables menu at the bottom of the terminal which shows common key combinations and their usage.
MikroTik Safe Mode
Есть такая сис.админская мудрость «Удаленная настройка FireWall это к дальней дороге». Попробуем этого избежать.
Данный функционал используется для проведения потенциально опасных работ. Например, при неправильной настройки FireWall или маршрутов, да даже VPN-клиента можно потерять доступ к своему MikroTik.
Чтобы избежать ненужных поездок или попыток восстановить доступ через костыли, разработчики внедрили «безопасный режим». Для себя я открыл два способа подстраховки. Официальный и неофициальный. 🙂
Кнопка Safe Mode (официальный)
Для того чтобы начать работу в безопасном режиме достаточно нажать на кнопку Safe Mode в левом верхнем углу. Далее все наши действия не записываются в память устройства, а ждут подтверждения, это происходит только после повторного нажатия на кнопку. В случае, разрыва связи
через 10 минут изменения внесённые в этом режиме откататься обратно.
Скрипт (неофициальный)
Режим Safe Mode не всегда подходит. Например, если перед нами стоит задача в удаленной замене провайдера/настроек провайдера, то в случае обрыва связи — все равно всё откатиться, даже если нам не нужно. Поэтому я честно украл этот скрипт у Zerox.
Заходим в System->Scripts, добавляем скрипт, который ниже.
Обратите внимание на параметр delay это время в секундах до отката обратно
MikroTik: Разбираемся с Safe Mode.
Safe Mode — режим настройки, в котором изменения конфигурации не записываются в постоянную память MikroTik, пока Вы собственноручно не выйдете из этого режима.
Последовательность работы с режимом Safe Mode:
— Включить режим нажатием Ctrl+X в терминале или кнопкой Safe Mode в верхнем левом углу окна Winbox.
— Сделать требуемые настройки.
— Если настройка правильная и связь с MikroTik не потеряна, выйти из Safe Mode повторым нажатием Ctrl+X в терминале или кнопкой Safe Mode в Winbox. Это сохранит внесенные изменения конфигурации в постоянную память MikroTik.
— Если связь потеряна, то надо просто подождать около 10 минут и конфигурация MikroTik вернется к состоянию до включения Safe Mode.
Дополнительно в CLI, при включенном Safe Mode:
— комбинация Ctrl+D отменяет все изменения внесенные в режиме Safe Mode;
— чтобы посмотреть все внесенные изменения, ожидающие выхода из Safe Mode, наберите
— Не забывайте выходить из Safe Mode! Закрыли терминал или Winbox, забыв выйти из режима? Ваши изменения конфигурации откатятся назад.
— Количество изменений, которое возможно при включенном режиме Safe Mode ограничено. В вики указано число внесенных действий — 100, поэтому в режиме Safe Mode старайтесь не вносить изменения большими объемами.
— Время, через которое MikroTik считает, что связь потеряна и требуется откатить конфигурацию, основано на TCP timeout. — Если Вы не хотите ждать столько времени, то можете либо перезагрузить MikroTik по питанию, если оборудование в непосредственной близости или уменьшить время таймаута командой, например 5 минут,
Но надо понимать как это повлияет на устройство в целом.
Не забудьте обновить Winbox. В версии 3.4 нашел баг с включением Safe Mode. Как вариант приходилось запускать New Terminal, в нем нажимать Ctrl+X, а только потом проводить настройки в GUI. В версии 3.7 этого бага уже нет.
Murray’s Blog
About the things I make and do
Technical
Making Mikrotik Safe
Un-nuking it from orbit.
Background
And I learned there was already a way to save me from my own stupidity: safe mode.
Safe Mode
Safe Mode is a feature of WinBox, Webmin, TikApp and the Mikrotik console.
It provides an undo stack of changes you’ve made on your router. And if your changes involve… errr… nuking your router from orbit, they’ll automatically roll back after 9 minutes. Or, you exit without confirming your changes, you are given the option to undo them Or, you can hit the undo button to undo something bad.
To be clear, this isn’t queuing up changes ready to be applied; all your changes are made as normal. All it does is allow you to hit CTRL+Z if you mucked something up really badly. (Impressively, “something” also includes “removing all router connectivity”).
When you’re all done making changes, click Safe Mode again so they won’t be done when you exit.
Limitations
The manual says the router will only store the last 100 actions. I’m not exactly sure what one action may encompass (my guess is each action is one console command), but you could configure quite a bit in 100 actions. Also, this should encourage you to make small changes and then test they are working.
Safe mode is a global router setting. If multiple users are logged onto the router, they fight to hold safe mode. Given I’m a home user, if more than one people is connected to my router, I’ve probably been hacked.
The 9 minute timeout relates to TCP timeouts (apparently). That is, you need to confirm your changes for them to take effect. If you don’t, it takes the router 9 minutes to notice your connection wasn’t closed cleanly and roll the changes you made back. 9 minutes is rather a long time in my book, but better than nothing. (As a reference, I managed to repair my router’s deleted bridge interface in around 15 minutes, which included time to panic and troubleshoot).
The documentation doesn’t mention any actions which aren’t supported by safe mode. But it’s a pretty safe bet that commands like restart or shutdown can’t be undone.
Default to Safe Mode
There was some talk of making a Winbox option for safe mode to be on by default. And I amended my feature request to allow individual connections to save if safe mode is on or not.
However, it appears you need to opt into safe mode every time you connect.
Sadly, that means 90% of the time, I’ll forget.
Conclusion
Mikrotik lets you do almost everything. Including using Safe Mode to un-nuke your router.
Turn it on today! And keep turning it on tomorrow!
Console
Overview
The console is used for accessing the MikroTik Router’s configuration and management features using text terminals, either remotely using serial port, telnet, SSH or console screen within Winbox, or directly using monitor and keyboard. The console is also used for writing scripts. This manual describes the general console operation principles. Please consult the Scripting Manual on some advanced console commands and on how to write scripts.
Hierarchy
The console allows the configuration of the router’s settings using text commands. Since there is a lot of available commands, they are split into groups organized in a way of hierarchical menu levels. The name of a menu level reflects the configuration information accessible in the relevant section, eg. /ip hotspot.
Example
For example, you can issue the /ip route print command:
Instead of typing / ip route path before each command, the path can be typed only once to move into this particular branch of menu hierarchy. Thus, the example above could also be executed like this:
Notice that the prompt changes in order to reflect where you are located in the menu hierarchy at the moment. To move to the top level again, type » / «
To move up one command level, type » .. «
You can also use / and .. to execute commands from other menu levels without changing the current level:
Item Names and Numbers
Many of the command levels operate with arrays of items: interfaces, routes, users, etc. Such arrays are displayed in similarly looking lists. All items in the list have an item number followed by flags and parameter values.
To change properties of an item, you have to use set command and specify name or number of the item.
Item Names
Some lists have items with specific names assigned to each of them. Examples are interface or user levels. There you can use item names instead of item numbers.
You do not have to use the print command before accessing items by their names, which, as opposed to numbers, are not assigned by the console internally, but are properties of the items. Thus, they would not change on their own. However, there are all kinds of obscure situations possible when several users are changing router’s configuration at the same time. Generally, item names are more «stable» than the numbers, and also more informative, so you should prefer them to numbers when writing console scripts.
Item Numbers
Since version 3 it is possible to use item numbers without running print command. Numbers will be assigned just as if the print command was executed.
You can specify multiple items as targets to some commands. Almost everywhere, where you can write the number of item, you can also write a list of numbers.
Warning: Do not use Item numbers in scripts, it is not a reliable way to edit items in the scheduler. scripts, etc. Instead use find command. More info here also look at scripting examples.
Quick Typing
/inte[Tab]_ becomes /interface _
If there is more than one match, but they all have a common beginning, which is longer than that what you have typed, then the word is completed to this common part, and no space is appended:
/interface set e[Tab]_ becomes /interface set ether_
If you’ve typed just the common part, pressing the tab key once has no effect. However, pressing it for the second time shows all possible completions in compact form:
Another way to press fewer keys while typing is to abbreviate command and argument names. You can type only beginning of command name, and, if it is not ambiguous, console will accept it as a full name. So typing:
It is possible to complete not only the beginning, but also any distinctive substring of a name: if there is no exact match, the console starts looking for words that have string being completed as first letters of a multiple word name, or that simply contain letters of this string in the same order. If single such word is found, it is completed at cursor position. For example:
General Commands
There are some commands that are common to nearly all menu levels, namely: print, set, remove, add, find, get, export, enable, disable, comment, move. These commands have similar behavior throughout different menu levels.
You can combine commands, here are two variants of the same command that will place a new firewall filter entry, by looking up comment:
/ip firewall/filter/add chain=forward place-before=[find where comment=CommentX]
/ip/firewall/filter/add chain=forward place-before=»CommentX»
Modes
Console line editor works either in multiline mode or in single-line mode. In multiline mode line editor displays complete input line, even if it is longer than single terminal line. It also uses a full-screen editor for editing large text values, such as scripts. In single-line mode only one terminal line is used for line editing, and long lines are shown truncated around the cursor. A full-screen editor is not used in this mode.
Choice of modes depends on detected terminal capabilities.
List of keys
up, down and split keys leave cursor at the end of line.
Built-in Help
The console has a built-in help, which can be accessed by typing ?. The general rule is that helps shows what you can type in a position where the ? was pressed (similarly to pressing [Tab] key twice, but in verbose form and with explanations).
Safe Mode
It is sometimes possible to change router configuration in a way that will make the router inaccessible (except from local console). Usually this is done by accident, but there is no way to undo last change when connection to router is already cut. Safe mode can be used to minimize such risk.
Safe mode is entered by pressing [CTRL]+[X]. To save changes and quit safe mode, press [CTRL]+[X] again. To exit without saving the made changes, hit [CTRL]+[D]
Message Safe Mode taken is displayed and prompt changes to reflect that session is now in safe mode. All configuration changes that are made (also from other login sessions), while router is in safe mode, are automatically undone if safe mode session terminates abnormally. You can see all such changes that will be automatically undone tagged with an F flag in system history:
Now, if telnet connection (or winbox terminal) is cut, then after a while (TCP timeout is 9 minutes) all changes that were made while in safe mode will be undone. Exiting session by [Ctrl]+[D] also undoes all safe mode changes, while /quit does not.
If another user tries to enter safe mode, he’s given following message:
If too many changes are made while in safe mode, and there’s no room in history to hold them all (currently history keeps up to 100 most recent actions), then session is automatically put out of the safe mode, no changes are automatically undone. Thus, it is best to change configuration in small steps, while in safe mode. Pressing [Ctrl]+[X] twice is an easy way to empty safe mode action list.
HotLock Mode
When HotLock mode is enabled commands will be auto-completed.
To enter/exit HotLock mode press [CTRL]+[V].
Quick Help menu
F6 key enables a menu at the bottom of the terminal which shows common key combinations and their usage.
Command Line Interface
The console is used for accessing the MikroTik Router’s configuration and management features using text terminals, either remotely using a serial port, telnet, SSH, console screen within WinBox, or directly using monitor and keyboard. The console is also used for writing scripts. This manual describes the general console operation principles. Please consult the Scripting Manual on some advanced console commands and on how to write scripts.
Login Options
Console login options enable or disable various console features like color, terminal detection, and many other.
Additional login parameters can be appended to the login name after the ‘+’ sign.
If the parameter is not present, then the default value is used. If the number is not present then the implicit value of the parameter is used.
| Param | Default | Implicit | Description |
|---|---|---|---|
| «w» | auto | auto | Set terminal width |
| «h» | auto | auto | Set terminal height |
| «c» | on | off | disable/enable console colors |
| «t» | on | off | Do auto-detection of terminal capabilities |
| «e» | on | off | Enables «dumb» terminal mode |
Banner and Messages
The login process will display the MikroTik banner and short help after validating the user name and password.
After the banner can be printed other important information, like system note set by another admin, the last few critical log messages, demo version upgrade reminder, and default configuration description.
For example, the demo license prompt and last critical messages are printed
Command Prompt
At the end of the successful login sequence, the login process prints a banner that shows the command prompt, and hands over control to the user.
Default command prompt consists of user name, system identity, and current command path />
For example, change the current path from the root to the interface then go back to the root
Use up arrow to recall previous commands from command history, TAB key to automatically complete words in the command you are typing, ENTER key to execute the command, Control-C to interrupt currently running command and return to prompt and ? to display built-in help, in RouterOS v7, F1 has to be used instead.
The easiest way to log out of the console is to press Control-D at the command prompt while the command line is empty (You can cancel the current command and get an empty line with Control-C, so Control-C followed by Control-D will log you out in most cases).
It is possible to write commands that consist of multiple lines. When the entered line is not a complete command and more input is expected, the console shows a continuation prompt that lists all open parentheses, braces, brackets, and quotes, and also trailing backslash if the previous line ended with backslash-white-space.
When you are editing such multiple line entries, the prompt shows the number of current lines and total line count instead of the usual username and system name.
Sometimes commands ask for additional input from the user. For example, the command ‘ /password ‘ asks for old and new passwords. In such cases, the prompt shows the name of the requested value, followed by colon and space.
Hierarchy
The console allows the configuration of the router’s settings using text commands. Since there is a lot of available commands, they are split into groups organized in a way of hierarchical menu levels. The name of a menu level reflects the configuration information accessible in the relevant section.
For example, you can issue the /ip route print command:
Instead of typing `/ip route` path before each command, the path can be typed only once to move into this particular branch of the menu hierarchy. Thus, the example above could also be executed like this:
Each word in the path can be separated by space (as in the example above) or by «/»
Notice that the prompt changes in order to reflect where you are located in the menu hierarchy at the moment. To move to the top level again, type » / «
You can also use / and .. to execute commands from other menu levels without changing the current level:
Item Names and Numbers
Many of the command levels operate with arrays of items: interfaces, routes, users, etc. Such arrays are displayed in similarly-looking lists. All items in the list have an item number followed by flags and parameter values.
To change the properties of an item, you have to use the set command and specify the name or number of the item.
Item Names
Some lists have items with specific names assigned to each of them. Examples are interface or user levels. There you can use item names instead of item numbers.
You do not have to use the print command before accessing items by their names, which, as opposed to numbers, are not assigned by the console internally, but are properties of the items. Thus, they would not change on their own. However, there are all kinds of obscure situations possible when several users are changing the router’s configuration at the same time. Generally, item names are more «stable» than the numbers, and also more informative, so you should prefer them to numbers when writing console scripts.
Item Numbers
You can specify multiple items as targets to some commands. Almost everywhere, where you can write the number of items, you can also write a list of numbers.
General Commands
| Property | Description |
|---|---|
| add | This command usually has all the same arguments as a set, except the item number argument. It adds a new item with the values you have specified, usually at the end of the item list, in places where the order of items is relevant. There are some required properties that you have to supply, such as the interface for a new address, while other properties are set to defaults unless you explicitly specify them. |
Input Modes
It is possible to switch between several input modes:
Quick Typing
/inte[Tab]_ becomes /interface _
If there is more than one match, but they all have a common beginning, which is longer than that what you have typed, then the word is completed to this common part, and no space is appended:
/interface set e[Tab]_ becomes /interface set ether_
If you’ve typed just the common part, pressing the tab key once has no effect. However, pressing it for the second time shows all possible completions in compact form:
Another way to press fewer keys while typing is to abbreviate command and argument names. You can type only the beginning of the command name, and, if it is not ambiguous, the console will accept it as a full name. So typing:
It is possible to complete not only the beginning, but also any distinctive sub-string of a name: if there is no exact match, the console starts looking for words that have string being completed as first letters of a multiple word name, or that simply contain letters of this string in the same order. If a single such word is found, it is completed at the cursor position. For example:
Console Search
Console search allows performing keyword search through the list of RouterOS menus and the history. The search prompt is accessible with the [Ctrl+r] shortcut.
Internal Chat System
RouterOS console has a built-in internal chat system. This allows remotely located admins to talk to each other directly in RouterOS CLI. To start the conversation prefix the intended message with the # symbol, anyone who is logged in at the time of sending the message will see it.
Safe mode mikrotik
All MikroTik RouterOS devices keep a history of user actions. The history is accessible through Winbox ⇢ System ⇢ History or through terminal/ssh using /system history print detailed. Note that Winbox shows the latest change at the bottom, while the terminal shows the latest at the top.
In the top left section of the Winbox interface you can use the arrow back to undo (go back) and the arrow forward to redo (go forward again, after going back). Using terminal you can type /undo or /redo.
In the history list, you will see an U at the left side if the action can be undone, and an R if it can be redone. If you can’t see anything in the column in Winbox, try to increase the column width.
The history list is global for all users, so what one user changes can be undone and redone by other users. If one user undo some changes, they can only be redone, while no other changes have been made in the router. Say, if you undo 5 changes, and you yourself or another user then make another change, the undid changes are removed from the history list, and it will only show the older changes, and the new change that was done by you or another user.
Safe mode
Safe mode is also very convenient when you are making changes, you are not really sure will work. If something breaks, you can then quickly close the connection and all your changes will be dropped, and everything is back as it was.
While you are in safe mode, RouterOS adds «floating-undo» actions, marked with a «F» in the history. If you leave safe mode normally your changes are saved, and the F actions, will become U actions that can be undone. If you quit safe mode without saving, the F actions are removed.
In the terminal, you can enter safe mode with CTRL+X, and leave safe again with CTRL+X which saves your changes. If you want to leave safe mode and drop your changes, in the terminal you can press CTRL+D.
Note that there can at any time only be one user on the same device with safe on. If somebody else has safe mode on and you need to use it, you can use CTRL+X in the terminal, which will allow you to take the safe mode session from the other user. You will be presented with 3 options:
If you happen to press CTRL+V you enter hot lock mode, which is shown in the console with command lines begginning with >>. In hotlock mode, the console will complete (auto-complete) your words even without pressing tab. You can disable hotlock again with CTRL+V.
Also note, that if you in Winbox use the New Terminal icon in the menu, to enter terminal commands, you are actually doing a local telnet login to the router. This means you can’t release safe mode from the terminal if you have started safe mode with the Winbox button. But RouterOS still reverts changes both in Winbox and in your New terminal if you disconnect without leaving safe mode first. That is because disconnecting without closing safe mode, reverts all changes done by you or any other user, while you where in safe mode.
If you quit Winbox while in safe mode, Winbox will alert you that you need to stop safe mode before you quit, to save your changes. If you proceed, all your changes are dropped immediately. But if you loose the connection while using Winbox, RouterOS will per default wait 9 minutes before it drops your changes. This allows you to regain the connection, if you lost it due to bad internet connectivity and save your changes, that would otherwise be lost.
As a default the history stores the last 100 commands since last reboot. If you while you are in safe mode enter more than 100 commands, all the commands will be saved!
There is one case where safe mode will not save you. If the port you are connecting to the MikroTik to, is a slave port to another master port, and you set the port you connect to as «None», to create it as a new master, you will loose access and safe mode will not help you.
Tikdis is official danish distributor of MikroTik routers, switches, WiFi equipment and all other MikroTik devices. We are certified administrators and engineers in MikroTik equipment.
Contact Us
Tikdis
Aarhusvej 201
DK-8464 Galten
Denmark
Mikrotik – Safe Mode
Whenever you work on a network device there is a chance that you execute the wrong command and you lose connection. This can be bad, mostly if you are far away from the device or many people are affected.
In situations like this is when safe mode can be a lifesaver. When safe mode is enabled changes take affect but are not saved. If connection is dropped unexpectedly all changes are going to be reverted. When? Timeout is 9 minutes. If you are logged in via web or Winbox you’ll find the safe mode button on bottom left, if you use ssh press CTRL+X to enable or disable safe mode. When you exit safe mode changes are saved. To exit click again the button; via ssh you exit with /quit – changes are also saved, with CTRL+D they are not.
Also good to know that in case another user logs in while the device is in safe mode they are prompted about safe mode. When in safe mode on web/Winbox the button stays pushed, via ssh there is text before each line. In history the are also flagged with F – floating-undo.
You can find more details in the official documentation: https://wiki.mikrotik.com/wiki/Manual:Console#Safe_Mode
Leave a Reply Cancel reply
This site uses Akismet to reduce spam. Learn how your comment data is processed.
Безопасная удаленная работа с MikroTik. Как не потерять связь с устройством
Включение Safe Mode (Безопасного режим) в оборудовании MikroTik позволяет, в случае потери связи с устройством, отменить последние сделанные изменения.
В консоли Safe Mode включается комбинацией клавиш CTRL+X, в интерфейсе Winbox вверху есть кнопка «Safe Mode». Если из-за неправильной настройки связь с устройством оборвется, то максимум через 9 минут изменения будут отменены.
Отменять неправильно выполненную конфигурацию можно также через скрипт.
Для начала сохраним текущую рабочую конфигурацию:
После создания его необходимо запустить командой:
и через 900 секунд (это 15 минут) он восстановит настройки из сохраненного ранее файла настроек. Если выполняя настройки связь с устройством не прервалась до истечения 15 минут, скрипт можно остановить командой:
Вновь сохранить конфигурацию, запустить скрипт и продолжить настройку устройства.
Однако если перезагрузить устройство скрипт не будет выполнен.
На случай зависания также можно настроить Watchdog, который будет пинговать какой нибудь хост или сайт, и если с ним пропадет связь, то будет выполнена перезагрузка устройства. Однако неправильные введенные вами настройки из-за которых возможно пропала связь, останутся как были и устройство будет постоянно перезагружаться через указанное количество времени.
Приведу пример команды для его настройки:
Вливайтесь в общение
Добавить комментарий Отменить ответ
Создаем файлы текущей конфигурации zzz.backup и xxx.rsc (последний читабелен в текстовом редакторе)
system backup save name=zzz
export compact file=xxx или export file=xxx
Создаем два скрипта: первый, пере заливает конфиг из файла zzz.backup с ребутом по прошествии 10 минут после запуска; второй, применяет конфиг поверх текущего из файла xxx.rsc без ребутания по прошествии 10 минут после запуска.
/system script
add name=zzz owner=admin policy=\
ftp,reboot,read,write,policy,test,password,sniff,sensitive source=\
«:delay 600;\r\
\n:log info message=\»Restore config ZZZ.BACKUP (SCRIPT ZZZ)\»;\r\
\n/system backup load name=zzz.backup»
add name=xxx owner=admin policy=ftp,reboot,read,write,policy,test,password,sniff,sensitive source=»:delay 600;\r\
\n:log info message=\»Restore settings after a failed change (SCRIPT XXX)\»;\r\
\n/import file-name=xxx.rsc»
Примененние скрипта:
system script run zzz
system script run xxx
Но есть проблема при выполнении скрипта zzz
[admin@MikroTik] > system script run zzz
Проходит 10 минут и выдает запрос на ввод пароля:
password:
а после пароля ещё и подтверди:
Restore and reboot? [y/N]:
Что естественно гадит всю задумку…
Убрать из скриптов owner=admin не помогает, он добавляется по дефолту. Кто знает, как обойти запрос на ввод пароля и последующее подтверждение, отпишите сюда.
:log info message=\»Restore config ZZZ.BACKUP (SCRIPT ZZZ)\»;
Данная запись в лог тоже бесполезна (добавил в скрипт для идеи), т.к. при пере заливке лог обнулится. Но очень неплохо было бы придумать как это обойти, чтоб можно было видеть события до пере заливки!
С safe Mode весело.
Открыл winbox. открыл терминал. Нажал ctrl+x. safe mode taken, все дела. Удалил в стенке правило входа по www и сменил себе ip. Произошло отсоединение. Через несколько секунд все восстановилось.
Ок, подумал я. Снова нажал ctrl+x и начал менять правила. Связь прервалась и больше я его не увидел. Я в Одинцово. Устройство в Липецке. Звоню туда и прошу поставить старый добрый asus rt-n65u вместо этого микротика. С ним все снова заработало, но ехать придется все равно, ибо роутер им отдавать в выходные, а с понедельника работать. класс.
Меня Safe Mode тоже подводил на RouterOS 6.20. Как-то раз включил его через Winbox, изменил IP-адрес интерфейсу, связь оборвалась, IP-адрес оказался не рабочий, прождал когда вернется предыдущая конфигурация, но она так и не вернулась, попросил чтобы устройство перезагрузили, а ему хоть бы что — все изменения сохранены. Как вариант чтобы не ехать могут сбросить MikroTik на стандартные, подключить ethernet кабелем к компьютеру или консольным, и подключить интернет к компьютеру через вторую сетевую, или Wi-Fi, или мобильный телефон подключенный по USB. Потом запустить например TeamViewer для управления.
На одной фирме делал так, но не здесь. Тут полные дубы, в плане компьютеров. Не то, что бы не смогли бы. Страх у них.
Если только разбираться с шедулером, что бы в фоновом режиме и только в нем он отсчитывал время перед восстановлением конфига. Ну и прибивание задания, если все ок.
Никаких шеллов. Шелл может «развалиться» сам и все его защиты и планировщики вместе с ним при определенной ситуации.
В шелле, что в cui, что в gui настраивай, что хочешь. стенки и прочие. но только не систему отсчета и восстановления. ее как-то в фон нужно засунуть.
Что надо сделать при удалённой работе с Mikrotik. Аналог Reload у Cisco.
1. Safe Mode.
При входе в терминал, нажимаете Ctrl-X – теперь при разрыве связи с роутером настройки скинуться на конфигурацию которая была ДО нажатия. В отличии от reload не надо задавать время и в случае ошибки ждать когда сработает таймер – срабатывает сразу, как пропадает связь между тем кто конфигурирует и MikroTik. Также нет вечной проблемы с тем, что забываешь отменить reload :).
После окончание конфигурирования опять нажимаем Ctrl-X и выходим из сейфмода. Так же можно нажать Ctrl+D и отменить все внесённые изменения (к примеру если вам не нравится, что вы сделали и хотите сделать откат настроек).
Плюсы:
Минусы:
Также можно включить через WinBox:
2. Эмуляция reload – делается с помощью скриптовой системы RouterOS.
Создадим скрипт reload (ну или с любым другим именем, следующего содержания
Теперь перед началом изменения конфигурации запускаем данный скрипт. И через заданное в delay время он заменит конфигурацию и перезагрузит роутер. Отменить выполнение можно либо командой –
system script job remove [find script=reload]
(вместо reload имя скрипта), либо через WinBox (Systems – Scripts – вкладка jobs – и удаляем нашу задачу)
Плюсы:
Минусы:
Winbox
Winbox is a small utility that allows the administration of MikroTik RouterOS using a fast and simple GUI. It is a native Win32 binary but can be run on Linux and macOS (OSX) using Wine. All Winbox interface functions are as close as possible mirroring the console functions, that is why there are no Winbox sections in the manual. Some advanced and system critical configurations are not possible from the Winbox, like MAC address change on an interface Winbox changelog
From Winbox v3.14, the following security features are used:
Starting Winbox
Winbox loader can be downloaded from the MikroTik download page. When winbox.exe is downloaded, double click on it, and the Winbox loader window will pop up. There are two Winbox loader modes: simple which is enabled by default and advanced.
Simple mode
When you open Winbox loader for the first time simple mode layout will be used:
To connect to the router enter the IP or MAC address of the router, specify username and password (if any) and click on the Connect button. You can also enter the port number after the IP address, separating them with a colon, like this 192.168.88.1:9999. The port can be changed in the RouterOS services menu.
It is recommended to use an IP address whenever possible. MAC session uses network broadcasts and is not 100% reliable.
You can also use neighbor discovery, to list available routers use the Neighbors tab:
From the list of discovered routers, you can click on the IP or MAC address column to connect to that router. If you click on IP address then IP will be used to connect, but if you click on MAC Address then the MAC address will be used to connect to the router.
Buttons/check-boxes and Other Fields
Menu Items
Advanced mode
Additional Winbox loader parameters are revealed when an advanced mode is enabled with Tools → Advanced Mode:
Buttons/check-boxes and Other Fields
Managed routers list is encrypted, but it can still be loaded in other Winbox without problems IF the master password is not set for it!
Command Line
It is possible to use the command line to pass connect to, user and password parameters automatically:
For example (with no password):
Will connect to router 10.5.101.1 with user «admin» without a password.
It is possible to use the command line to pass connect to, user, and password parameters automatically to connect to the router through RoMON. In this case, RoMON Agent must be saved on the Managed routers list so Winbox would know the user and password for this device:
For example (with no password):
Will connect to router D4:CA:6D:E1:B5:7D through 10.5.101.1 RoMON Agent with user «admin» without a password.
IPv6 connectivity
Winbox supports IPv6 connectivity. To connect to the router’s IPv6 address, it must be placed in square braces the same as in web browsers when connecting to the IPv6 server. Example:
when connecting to the link-local address interface index must be entered after the %:
Port number is set after the square brace when it is necessary to connect Winbox to other port than the default:
Winbox neighbor discovery is capable of discovering IPv6 enabled routers. There are two entries for each IPv6 enabled router, one entry is with IPv4 address and another one with IPv6 link-local address. You can easily choose which one you want to connect to.
Run Winbox on macOS
Starting with macOS 10.15 Catalina, Apple has removed support for 32bit applications, meaning it is no longer possible to use regular Wine and regular Winbox in this OS. Wine has made available a 64bit version for macOS, and MikroTik has released a special Winbox64.exe version as well.
If you have used Wine previously, we recommend you first delete the previous Wine application and the Wine settings directory in your home folder:
To run Winbox64 the following steps are required.
The file should look like this (make sure your paths are correct here):
If you are running macOS Big Sur, instead of «nano
/.zprofile», you have to edit «nano
The above now works also on M1 processor-based Apple devices if you install Wine64 v6 or above (See link in article).
Run Winbox on Linux
It is possible to run Winbox on Linux by using Wine emulation software. Make sure that the Microsoft font pack is installed, otherwise, you may see distortions.
Interface Overview
Winbox interface has been designed to be intuitive for most of the users. The interface consists of:
The title bar shows information to identify with which router Winbox session is opened. Information is displayed in the following format:
From screenshot above we can see that user krisjanis is logged into router with IPv4/IPv6 address [fe80::4e5e:cff:fef6:c0ab%3]. Router’s ID is 3C18-Krisjanis_GW, currently installed RouterOS version is v6.36rc6, RouterBoard is CCR1036-12G-4S and platform is tile.
On the Main toolbar’s left side is located:
More about Safe mode and undoing performed actions read in this article.
On the right side is located:
Work Area and Child Windows
Winbox has an MDI interface meaning that all menu configuration (child) widows are attached to the main (parent) Winbox window and is showed in the work area.
Child windows can not be dragged out of the working area. Notice in the screenshot above that the Interface window is dragged out of the visible working area and a horizontal scroll bar appeared at the bottom. If any window is outside visible work area boundaries the vertical or/and horizontal scrollbars will appear.
Child window menu bar
Each child window has its own toolbar. Most of the windows have the same set of toolbar buttons:
Almost all windows have a quick search input field on the right side of the toolbar. Any text entered in this field is searched through all the items and highlighted as illustrated in the screenshot below
Notice that on the right side next to the quick find input filed there is a drop-down box. For the currently opened (IP Route) window, this drop-down box allows to quickly sort out items by routing tables. For example, if the main is selected, then only routes from the main routing table will be listed.
A similar drop-down box is also in all firewall windows to quickly sort out rules by chains.
Sorting out displayed items
Almost every window has a Sort button. When clicking on this button several options appear as illustrated in the screenshot below
The example shows how to quickly filter out routes that are in the 10.0.0.0/8 range
As you can see from the screenshot Winbox sorted out only routes that are within the 10.0.0.0/8 range.
Comparison operators (Number 3 in the screenshot) may be different for each window. For example «Ip Route» window has only two is and in. Other windows may have operators such as «is not», «contains», «contains not».
Winbox allows building a stack of filters. For example, if there is a need to filter by destination address and gateway, then
You can also remove unnecessary filters from the stack by pressing the [-] button.
Customizing list of displayed columns
By default, Winbox shows the most commonly used parameters. However sometimes it is needed to see other parameters, for example, «BGP AS Path» or other BGP attributes to monitor if routes are selected properly.
Winbox allows to customize displayed columns for each individual window. For example to add BGP AS path column:
Changes made to window layout are saved and next time when Winbox is opened the same column order and size are applied.
Detail mode
It is also possible to enable Detail mode. In this mode all parameters are displayed in columns, the first column is the parameter name, the second column is the parameter’s value.
To enable detail mode right mouse click on the item list and from the popup menu pick Detail mode
Category view
It is possible to list items by categories. In this mode, all items will be grouped alphabetically or by another category. For example, items may be categorized alphabetically if sorted by name, items can also be categorized by type like in the screenshot below.
To enable Category view, right mouse click on the item list and from the popup menu pick Show Categories
Drag & Drop
It is possible to upload and download files to/from the router using Winbox drag & drop functionality. You can also download the file by pressing the right mouse button on it and selecting «Download».
Traffic monitoring
Winbox can be used as a tool to monitor the traffic of every interface, queue, or firewall rule in real-time. The screenshot below shows Ethernet traffic monitoring graphs.
Item copy
This shows how easy it is to copy an item in Winbox. In this example, we will use the COPY button to make a Dynamic PPPoE server interface into a Static interface.
This image shows us the initial state, as you see DR indicates «D» which means Dynamic:
Double-Click on the interface and click on COPY:
A new interface window will appear, a new name will be created automatically (in this case pppoe-in1)
After this Down/Up event this interface will be Static:
Transferring Settings
Troubleshooting
Winbox cannot connect to the router’s IP address
Make sure that the Windows firewall is set to allow Winbox connections or disable the windows firewall.
I get an error ‘(port 20561) timed out’ when connecting to routers mac address
Windows (7/8) does not allow mac connection if file and print sharing is disabled.
I can’t find my device in WinBox IPv4 Neighbors list or MAC connection fails with «ERROR could not connect to XX-XX-XX-XX-XX-XX»
Most of the network drivers will not enable IP stack unless your host device has an IP configuration. Set IPv4 configuration on your host device.
Sometimes the device will be discovered due to caching, but MAC connection will still fail with «ERROR: could not connect to XX:XX:XX:XX:XX:XX
Safe mode mikrotik
Mon May 23, 2016 7:50 pm
Re: Winbox Safe mode
Tue May 24, 2016 12:40 pm
Re: Winbox Safe mode
Tue May 24, 2016 8:29 pm
On Winbox doesnt work well.
I was remotely logged in, used Safe Mode, deleted the WAN interface, obviously got kicked out.
Instructed a helper to reboot the Router (unplugging/plugging the PSU) and the WAN interface never came back.
Went physically next to the router and plugged an ethernet cable, used the LAN interface and I see the WAN interface is not there,
Added the WAN interface and everything came online.
Doesnt protect you much from deleting stuff and then asking a person on the remote site to reboot the router.
Im using Winbox 3.4 on RouterOS 6.35.2 running on a CRS125-24G-1S
Re: Winbox Safe mode
Wed May 25, 2016 2:45 pm
I have the same problem. I was connected by a PPTP connection to a remote Omnitik. I enabled Safe mode, changed the IP address on an ethernet port, and Winbox disconnected after a couple of seconds.
Winbox version 3.4, Router OS is 6.35.2
Re: Winbox Safe mode
Wed May 25, 2016 3:19 pm
Re: Winbox Safe mode
Wed May 25, 2016 3:23 pm
Re: Winbox Safe mode
Wed May 25, 2016 7:12 pm
Well, the link came back after 20 minutes, and I was able to login.
It is a pretty long time. Can the time be set to lower that?
In my Ubiquity Nano station M2, the «timeout» is 15 seconds. Which is sometimes too short, but 1 minute would be fast enough for Mikrotik.
Can that be a setting added in Winbox in the next release? For example, if you press Safe mode button, a new window will appear where you can fill in the minutes (or seconds) to wait for a response.
Re: Winbox Safe mode
Wed May 25, 2016 8:01 pm
Re: Winbox Safe mode
Wed May 25, 2016 9:55 pm
Re: Winbox Safe mode
Wed Jun 01, 2016 2:32 pm
i am using Ubuntu with wine, RB433AH and CRS125-24G-1S-2HnD-IN with ROS 6.35.2
on console, the config will revert after 20 seconds disconnected
on winbox (v3.4), the config never revert after waiting for 1o minutes..
Re: Winbox Safe mode
Tue Jun 28, 2016 1:20 pm
same here with metal2 SHPn running 6.35.4 and winbox v3.4.
safe mode does not revert to previous settings (e.g. wlan client mode changed).
mikrotik please have a look at ubiquiti’s solution for safe-mode. it’s better in my oppinion.
Re: Winbox Safe mode
Tue Jun 28, 2016 3:57 pm
Re: Winbox Safe mode
Tue Jun 28, 2016 9:42 pm
Seriously.. This just cost me 2 HOURS OF DRIVING.
Sheesh. fix the stupid button already. Wifi auto scanned, lost connection.
This is a joke guys, c’mon.
Re: Winbox Safe mode
Wed Jun 29, 2016 10:53 am
Re: Winbox Safe mode
Mon Jul 04, 2016 11:51 am
I had the same issue.
I was in Safe Mode, while testing I’ve disabled the WAN interface by accident, off course it disconnected me but never reconnected again. So Safe Mode doesn’t work.
The router is 951G-2HnD, firmware v3.24, routerOS v6.32.4.
OS is Windows 7 Pro 64bit (fully updated), Winbox v3.4.
Please fix this, now I need to drive there and lose a lot of time.
Re: Winbox Safe mode
Tue Dec 05, 2017 10:55 am
Any updates?
I’m working with different ROs versions (some RB using 6.19 and others 6.34), I have big troubles with RSTP and I’m not sure I can get connection with remote device if changing some parameter.
Why don’t do this:
— Safe Mode OFF = pressing any OK or Apply buttons, configuration is stored
— Safe Mode ON = pressing OK configuration is set, but not stored permamently, pressing Apply configuration is stored permanntly
Or set a timeout somewhere.
Re: Winbox Safe mode
Mon Apr 15, 2019 4:40 pm
Planning to make some changes remotely and I need to know if this «bug» is still a problem or if safe mode working remotely in winbox 6.44.1 in win10 with a CCR 1009 8G 1S 1S+ is truly «safe». One thing I noticed is that by default «Autosave on Close» is checked and I’m wondering if this might be the root of the problems experienced by others.
Another question about this is how and where the settings changes are stored when in safe mode. I know there is a backup configuration but I’m using that as the primary because for some reason the primary config kept failing and «forgetting» it’s configuration. So I set it to boot to the backup config by default. No problems since but if «safe mode» uses the backup configuration. that could be a problem.
I know this is an old thread but I REALLY need to know if I can trust this to work or not. I need to build a bridge across a couple ports and apply the changes and test it but if it breaks the configuration then 300+ customers will be down for several hours. If I can trust «safe mode» to revert the changes if I break it, then I can do this tonight. Otherwise it will have to wait several days.
Re: Winbox Safe mode
Sun Sep 29, 2019 3:00 pm
Planning to make some changes remotely and I need to know if this «bug» is still a problem or if safe mode working remotely in winbox 6.44.1 in win10 with a CCR 1009 8G 1S 1S+ is truly «safe». One thing I noticed is that by default «Autosave on Close» is checked and I’m wondering if this might be the root of the problems experienced by others.
Another question about this is how and where the settings changes are stored when in safe mode. I know there is a backup configuration but I’m using that as the primary because for some reason the primary config kept failing and «forgetting» it’s configuration. So I set it to boot to the backup config by default. No problems since but if «safe mode» uses the backup configuration. that could be a problem.
I know this is an old thread but I REALLY need to know if I can trust this to work or not. I need to build a bridge across a couple ports and apply the changes and test it but if it breaks the configuration then 300+ customers will be down for several hours. If I can trust «safe mode» to revert the changes if I break it, then I can do this tonight. Otherwise it will have to wait several days.
Основные принципы работы в командной строке RouterOS
В данной статье рассмотрим работы в командной строке RouterOS Консоль (CLI Command Line Interface) используется для настройки и управления маршрутизаторами MikroTik средствами текстового терминала. Доступ может быть получен с помощью: Серийного порта SSH telnet Окна терминала в утилитах WinBox/WebFig. Консоль так же может быть использована для написания и использования различных скриптов. Однако написание и использование […]
В данной статье рассмотрим работы в командной строке RouterOS
Консоль (CLI Command Line Interface) используется для настройки и управления маршрутизаторами MikroTik средствами текстового терминала. Доступ может быть получен с помощью:
Консоль так же может быть использована для написания и использования различных скриптов. Однако написание и использование скриптов мы в данной статье рассматривать не будем, и коснемся только основных принципов работы с консолью.
Иерархический порядок:
Существует огромное множество команд и для удобства их разбили на группы, отсортированные в иерархическом порядке. Название уровня меню отражает информацию о конфигурации, доступную в соответствующем разделе, например давайте выведем таблицу маршрутизации следующей командой: ip route print
Как видите, у нас появилась таблица маршрутизации. Однако, если ввести команду ip route, то вы попадете в меню управления этой ветки:
а чтоб вернуться назад, то наберите /.
Так же можно выполнить команду из основного уровня, если добавить / и после команду, к примеру, /ping ip-адрес. Пусть будет DNS гугла.
Имена и номера элементов
Многие из уровней команды работают с массивами элементов: интерфейсы, маршруты, пользователей и.т.д. Подобные массивы отображаются в виде списков, где у каждого элемента есть номер элемента с последующим флагом и значениями параметров. Чтоб изменить свойства используйте команду set + имя или номер элемента
Выводим интерфейсы и их номера: interface print
После чего меняем на произвольный номер, к примеру, на 1601: interface set 0,5 mtu=1601
Автозаполнение
В RouterOS есть полезная особенность – автозаполнение. При наборе команды вместо того, чтоб прописывать ее полностью можно нажать tab, после чего команда или заполниться (если существовал единственный вариант такой команды) или же предложит несколько вариантов команды.
Основные команды
Некоторые команды применимы практически на всех уровнях, эти команды — print, set, remove, add, find, get, export, enable, disable, comment, move.
Сочетания клавиш
Безопасный режим
Иногда может случиться так, что после изменения конфигарции маршрутизатора делает маршрутизатор недоступным (исключая, конечно, доступ из локальной консоли). Естественно, чаще всего это происходит случайно, но нет никакого способа отменить последние изменения когда подключение к маршрутизатору прервано. Тут и помогает безопасный режим способный минимизировать риск.
Безопасный режим вводится нажатием CTRL+X
Сообщение Safe Mode taken отобразилось и это означает что консоль теперь перешла в безопасный режим. Все изменения конфигурации, которые сделаны (также из других сеансов входа в систему), в то время как маршрутизатор находится в безопасном режиме, автоматически отменяются, если безопасный режим сеанса завершается аварийно.
Для выключения безопасного режима и сохранения настроек повторно наберите CTRL+X
Для выхода без сохранения внесенных изменений наберите CTRL+D
Режим HotLock
После включения данного режима будет активировано автозавершение команд
Для входа и выхода наберите сочетание клавиш CTRL+V
Safe mode mikrotik
Thu Oct 29, 2015 9:28 am
Hi all.
I do understand these can be seen as a silly questions.
Does the «safe mode» work in webfig?
Is the 9 minutes timeout in force?
Can it be configured?
Is it working with HTTPS as well?
Thanks in advance.
Re: Safe mode in webfig
Thu Oct 29, 2015 10:10 am
Yes, it does work. It checks if anything you do in the config will not block you. If it does, it makes «Undo».
For example, click on «Safe mode» then go to IP Firewall filter and add a new rule, chain «input» action «drop». You will be blocked from Webfig, but after a minute, it will reconnect and the rule will be gone.
Re: Safe mode in webfig
Tue Nov 03, 2015 4:58 pm
Yes, it does work. It checks if anything you do in the config will not block you. If it does, it makes «Undo».
For example, click on «Safe mode» then go to IP Firewall filter and add a new rule, chain «input» action «drop». You will be blocked from Webfig, but after a minute, it will reconnect and the rule will be gone.
Safe mode mikrotik
Wed Jun 09, 2004 7:14 pm
we haven’t had luck with safe mode invoked by ctrl-x on remote console. We were logged in on remote end of wireless connection and despite of using ctrl-x in ssh session, we locked us out when we changed the wireless config (freq. change with band change) and we had to ‘truck roll’, drive to the other destionation and do everything manually.
Suggestion : wouldn’t it be nice feature to implement ctrl-y or some kind of ‘another’ safe-mode setting, when the last change done from local console or remotely will be AUTOMATICALLY undone in 30seconds or 1 minute if it is not confirmed? Like in windows, when you change resolution / frequency : if you don’t confirm the new setting in 15 seconds, it is taken back.
Thu Jun 10, 2004 1:28 pm
The 30 second confirm idea is good, actually, when you go out of safe mode, then it actually does not. We will have to test the safe mode again, if you can send a supout, maybe we can see what happenned. You can also look at the logs.
Fri Jun 11, 2004 1:50 pm
I can’t send supout file, because we needed to solve the situation immediately and it happened 3 weeks ago. We just drove to the other end and changed parameters with notebook / ethernet, but this would be very handy feature. If you can implement «second» type of safe mode (timed as I proposed with settable timeout for whatever seconds the customer will like, default 60 seconds or so), it would be very fine.
You know, when you bridge interfaces, change firewall rules etc, etc, you can cut yourself off and it could be soooo easy to correct 🙂 it is always better to have 2 minute outage than two hours, because there is traffic jam in the city.
Fri Jun 11, 2004 5:25 pm
Safe mode works fine for me (I am using v2.8.11). It is easy to test, just telnet and hit cntrl-x for safe mode and disable the Ethernet interface. In 10 seconds, you can telnet again.
Maybe you made some loop that locked up the router and then safe mode couldn’t work because the router was too busy.
Safe mode mikrotik
Fri Mar 16, 2018 12:50 pm
I know that there have been a couple of threads on this kind of thing in the past but not quite like this (as far as I have found).
I wanted to make some changes to ip>Firewall>Filter
I had the appropriate window open in Winbox but wanted to cut and paste from a script to a terminal so.
In a new terminal window.
IP>Firewall>Filter
add blah blah blah
add blah blah blah
Then the bit that could go wrong so click on the Safe Mode button and
add next rule
As I wasn’t completely happy and didn’t want to commit as I was being called away, I closed Winbox without committing the change that I had made
If I go to a new terminal window and go to ip>firewall>filter and then print, I can see all of the rules listed which I would expect up to the point that I clicked the Safe Mode button, the one rule that I entered after enabling Safe Mode having been dropped as I would have expected.
I’m puzzled. I can see the rules in terminal but not in the firewall filters window.
Safe mode mikrotik
Wed Feb 16, 2011 10:31 pm
It could be usefull to have a user setting to enable safe mode on the account.
So that each time this user connect he is in safe mode.
Re: User with default Safe Mode
Fri Feb 18, 2011 1:00 am
If you mean, a user that can not damage anything by accident? Give them only read access. If they also need to make changes, but only rarely, give them two accounts. One read only one for general day to day use and a full one for when they know exactly what they wish to change.
Re: User with default Safe Mode
Fri Feb 18, 2011 1:19 am
I prefer trusting machines than myself or other users.
Read only is rarely used in the field simply because if you need to make a modification then you need to logoff and logon.
I think than default safe mode can be interesting.
Having to drive 300 or 500 km to a remote site because you forgotted to use safe mode is no good.
I prefer things that are safe by default, and removing safe mode if needed.
Re: User with default Safe Mode
Fri Feb 18, 2011 4:01 am
Re: User with default Safe Mode
Fri Feb 18, 2011 7:49 am
Re: User with default Safe Mode
Fri Feb 18, 2011 7:58 am
Re: User with default Safe Mode
Fri Feb 18, 2011 8:25 am
Re: User with default Safe Mode
Fri Feb 18, 2011 10:22 am
The safe mode button could be flashing and orange when in safe mode. So that you can’t miss it.
Then allowing default safe mode by user basis could be interesting as well, so that if you don’t like it you can disable it for you.
As we are in management things, i think it could be usefull for V6 to have a better remote console terminal, with shared session and more than one screen possible like localy, something we can have easily with «screen» terminal deamon under Linux.
Re: User with default Safe Mode
Sat Feb 19, 2011 8:38 pm
I have found the system of a ‘read-only’ account very straightforward. I use it for all day to day business, I can see most things with no problems and cannot break anything! I found in the past that it far too easy to make changes to the order of firewall rules by accidentally drag and dropping rules when moving the mouse cursor using my laptop trackpad. So a read account is perfect for investigation and just looking.
When I am ready to make a change, it only takes a few seconds to log back in with a full account to make those changes.
I have only ever used safe mode for performing changes where I think it might possibly go wrong and it will take too long to drive (or with two customers) to fly to the radio site to repair the damage I caused.
Re: User with default Safe Mode
Sun Sep 15, 2013 9:01 pm
Any news on this feature? This is probably one of main features that prohibits me from considering Mikrotik devices for any kind of serious production usage (yes, I am spoiled by Juniper’s commit confirmed that saved my ass a couple of times).
P.S. Maybe I didn’t look hard enough, but while I could find a note saying that default timeout for safe mode is 9 minutes, I couldn’t find any information on where and how to change those settings.
Re: User with default Safe Mode
Fri Nov 11, 2016 5:30 pm
Let me give another reason this is important:
We have a NOC with many people having access to many routers. Our core infrastructure is redundant enough and locked down so no one can login and cause major damage in the core.
However, any users could write a script to cause serious damage to the endpoint devices (Mikrotik routers on customer premise). We’ve never had an issue with a malicious technician in
15 years but it is an outlying risk. In order to provide the best service, we want our technicians to have access to these routers. Any tech has enough access to destroy all routers in a matter of minutes. If safe mode was required for these users, it would be much more difficult to cause serious damage.
For this purpose, safemode would have to be required (not just default) for specified users. Maybe «Safemode required» could be a permission setting on the group policy?
Re: User with default Safe Mode
Sat Nov 12, 2016 12:52 am
I’m reading this topic and still cannot decide would it be better to have safe mode activated by default.
But for sure would be great that you can chose which user would have safe mode by default.
Like someone said before, driving 400-500km to remote site is hassle, why not to save it?
You have one user which you use for critical things and one which you use for monitoring/small changes.
Manual:Initial Configuration
Contents
Summary
Congratulations, you have got hold of MikroTik router for your home network. This guide will help you to do initial configuration of the router to make your home network a safe place to be.
The guide is mostly intended in case if default configuration did not get you to the internet right away, however some parts of the guide is still useful.
Connecting wires
Router’s initial configuration should be suitable for most of the cases. Description of the configuration is on the back of the box and also described in the online manual.
The best way to connect wires as described on the box:
Configuring router
Initial configuration has DHCP client on WAN interface (ether1), rest of the ports are considered your local network with DHCP server configured for automatic address configuration on client devices. To connect to the router you have to set your computer to accept DHCP settings and plug in the ethernet cable in one of the LAN ports (please check routerboard.com for port numbering of the product you own, or check front panel of the router).
Logging into the router
To access the router enter address 192.168.88.1 in your browser. Main RouterOS page will be shown as in the screen shot below. Click on WebFig from the list.
You will be prompted for login and password to access configuration interface. Default login name is admin and blank password (leave empty field as it is already).
Router user accounts
To access this menu, click on System on the left panel and from the dropdown menu choose Users (as shown in screenshot on the left)
You will see this screen, where you can manage users of the router. In this screen you can edit or add new users:
Both screens are similar as illustrated in screenshot below. After editing user’s data click OK (to accept changes) or Cancel. It will bring you back to initial screen of user management.
In user edit/Add new screen you can alter existing user or create new. Field marked with 2. is the user name, field 1. will open password screen, where old password for the user can be changed or added new one (see screenshot below).
Configure access to internet
If initial configuration did not work (your ISP is not providing DHCP server for automatic configuration) then you will have to have details from your ISP for static configuration of the router. These settings should include
Less important settings regarding router configuration:
DHCP Client
Static IP Address
You have to fill only fields that are marked. Field 1. should contain IP address provided by your ISP and network mask’. Examples:
both of these notations mean the same, if your ISP gave you address in one notation, or in the other, use one provided and router will do the rest of calculation.
Note: While you type in the address, webfig will calculate if address you have typed is acceptable, if it is not label of the field will turn red, otherwise it will be blue
Note: It is good practice to add comments on the items to give some additional information for the future, but that is not required
Configuring network address translation (NAT)
Since you are using local and global networks, you have to set up network masquerade, so that your LAN is hidden behind IP address provided by your ISP. That should be so, since your ISP does not know what LAN addresses you are going to use and your LAN will not be routed from global network.
Essential fields for masquerade to work:
In screenshot correct rule is visible, note that irrelevant fields that should not have any value set here are hidden (and can be ignored)
Default gateway
In screen presented you will see the following screen:
here you will have to press button with + near red Gateway label and enter in the field default gateway, or simply gateway given by your ISP.
This should look like this, when you have pressed the + button and enter gateway into the field displayed.
After this, you can press OK button to finish creation of the default route.
At this moment, you should be able to reach any globally available host on the Internet using IP address.
Domain name resolution
To be able to open web pages or access Internet hosts by domain name DNS should be configured, either on your router or your computer. In scope of this guide, i will present only option of router configuration, so that DNS addresses are given out by DHCP-Server that you are already using.
Then select Settings to set up DNS cacher on the router. You have to add field to enter DNS IP address, section 1. in image below. and check Allow Remote Requests marked with 2.
The result of pressing + twice will result in 2 fields for DNS IP addresses:
Note: Filling acceptable value in the field will turn field label blue, other way it will be marked red.
SNTP Client
RouterBOARD routers do not keep time between restarts or power failuers. To have correct time on the router set up SNTP client if you require that.
Setting up Wireless
For ease of use bridged wireless setup will be used, so that your wired hosts will be in same ethernet broadcast domain as wireless clients.
To make this happen several things has to be checked:
Check Ethernet interface state
Warning: Changing settings may affect connectivity to your router and you can be disconnected from the router. Use Safe Mode so in case of disconnection made changes are reverted back to what they where before you entered safe mode
To check if ethernet port is switched, in other words, if ethernet port is set as slave to another port go to ‘Interface’ menu and open Ethernet interface details. They can be distinguished by Type column displaying Ethernet.
When interface details are opened, look up Master Port setting.
Available settings for the attribute are none, or one of Ethernet interface names. If name is set, that mean, that interface is set as slave port. Usually RouterBOARD routers will come with ether1 as intended WAN port and rest of ports will be set as slave ports of ether2 for LAN use.
Check if all intended LAN Ethernet ports are set as slave ports of the rest of one of the LAN ports. For example, if ether2. ether3, ether4 and ether5 are intended as LAN ports, set on ether3 to ether5 attribute Master Port to ether2.
Note: If master port is present as bridge port, that is fine, intended configuration requires it there, same applies to wireless interface (wlan)
Security profile
It is important to protect your wireless network, so no malicious acts can be performed by 3rd parties using your wireless access-point.
In This example i will create new security profile, editing it is quite similar. Options that has to be set are highlighted with read and recommended options are outlined by red boxes and pre-set to recommended values. WPA and WPA2 is used since there are still legacy equipment around (Laptops with Windows XP, that do not support WPA2 etc.)
WPA Pre- shared key and WPA2 Pre- shared key should be entered with sufficient length. If key length is too short field label will indicate that by turning red, when sufficient length is reached it will turn blue.
Note: WPA and WPA2 pre-shared keys should be different
Note: When configuring this, you can deselect Hide passwords in page header to see the actual values of the fields, so they can be successfully entered into device configuration that are going to connect to wireless access-point
Wireless settings
Adjusting wireless settings. That can be done here:
In General section adjust settings to settings as shown in screenshot. Consider these safe, however it is possible, that these has to be adjusted slightly.
Interface mode has to be set to ap-bridge, if that is not possible (license resctrictions) set to bridge, so one client will be able to connect to device.
WiFI devices usually are designed with 2.4GHz modes in mind, setting band to 2GHz-b/g/n will enable clients with 802.11b, 802.11g and 802.11n to connect to the access point
Adjust channel width to enable faster data rates for 802.11n clients. In example channel 6 is used, as result, 20/40MHz HT Above or 20/40 MHz HT Below can be used. Choose either of them.
In section HT set change HT transmit and receive chains. It is good practice to enable all chains that are available
When settings are set accordingly it is time to enable our protected wireless access-point
Bridge LAN with Wireless
Open Bridge menu and check if there are any bridge interface available first mark. If there is not, select Add New marked with second mark and in the screen that opens just accept the default settings and create interface. When bridge interface is availbe continue to Ports tab where master LAN interface and WiFI interface have to be added.
First marked area is where interfaces that are added as ports to bridge interface are visible. If there are no ports added, choose Add New to add new ports to created bridge interfaces.
Finished look of bridge configured with all ports required
Troubleshooting & Advanced configuration
This section is here to make some deviations from configuration described in the guide itself. It can require more understanding of networking, wireless networks in general.
General
Check IP address
Adding IP address with wrong network mask will result in wrong network setting. To correct that problem it is required to change address field, first section, with correct address and network mask and network field with correct network, or unset it, so it is going to be recalculated again
Change password for current user
Where all the fields has to be filled. There is other place where this can be done in case you have full privileges on the router.
Change password for existing user
No access to the Internet or ISP network
If you have followed this guide to the letter but even then you can only communicate with your local hosts only and every attempt to connect to Internet fails, there are certain things to check:
Or contact your ISP for details and inform that you have changed device.
Checking link
There are certain things that are required for Ethernet link to work:
What to look for using ping tool:
Wireless
Wireless unnamed features in the guide that are good to know about. Configuration adjustments.
Channel frequencies and width
It is possible to choose different frequency, here are frequencies that can be used and channel width settings to use 40MHz HT channel (for 802.11n). For example, using channel 1 or 2412MHz frequency setting 20/40MHz HT below will not yield any results, since there are no 20MHz channels available below set frequency.
| Channel # | Frequency | Below | Above |
|---|---|---|---|
| 1 | 2412 MHz | no | yes |
| 2 | 2417 MHz | no | yes |
| 3 | 2422 MHz | no | yes |
| 4 | 2427 MHz | no | yes |
| 5 | 2432 MHz | yes | yes |
| 6 | 2437 MHz | yes | yes |
| 7 | 2442 MHz | yes | yes |
| 8 | 2447 MHz | yes | yes |
| 9 | 2452 MHz | yes | yes |
| 10 | 2457 MHz | yes | yes |
| 11 | 2462 MHz | yes | no |
| 12 | 2467 MHz | yes | no |
| 13 | 2472 MHz | yes | no |
Warning: You should check how many and what frequencies you have in your regulatory domain before. If there are 10 or 11 channels adjust settings accordingly. With only 10 channels, channel #10 will have no sense of setting 20/40MHz HT above since no full 20MHz channel is available
Wireless frequency usage
If wireless is not performing very well even when data rates are reported as being good, there might be that your neighbours are using same wireless channel as you are. To make sure follow these steps:
Note: Monitoring is performed on default channels for Country selected in configuration. For example, if selected country would be Latvia, there would have been 13 frequencies listed as at that country have 13 channels allowed.
Change Country settings
By default country attribute in wireless settings is set to no_country_set. It is good practice to change this (if available) to change country you are in. To do that do the following:
Note: Advanced mode is toggle button that changes from Simple to Advanced mode and back.
Port forwarding
To make services on local servers/hosts available to general public it is possible to forward ports from outside to inside your NATed network, that is done from /ip firewall nat menu. For example, to make possible for remote helpdesk to connect to your desktop and guide you, make your local file cache available for you when not at location etc.
Static configuration
A lot of users prefer to configure these rules statically, to have more control over what service is reachable from outside and what is not. This also has to be used when service you are using does not support dynamic configuration.
Following rule will forward all connections to port 22 on the router external ip address to port 86 on your local host with set IP address:
if you require other services to be accessible you can change protocol as required, but usually services are running TCP and dst-port. If change of port is not required, eg. remote service is 22 and local is also 22, then to-ports can be left unset.
Comparable command line command:
Note: Screenshot contain only minimal set of settings are left visible
Dynamic configuration
uPnP is used to enable dynamic port forwarding configuration where service you are running can request router using uPnP to forward some ports for it.
Warning: Services you are not aware of can request port forwarding. That can compromise security of your local network, your host running the service and your data
Configuring uPnP service on the router:
Limiting access to web pages
Set up Web Proxy for page filtering
When required alterations are done applysettings to return to Access tab.
Set up Access rules
This list will contain all the rules that are required to limit access to sites on the Internet.
To add sample rule to deny access to any host that contain example.com do the following when adding new entry:
With this rule any host that has example.com will be unaccessible.
Limitation strategies
There are two main approaches to this problem
For approach A each site that has to be denied is added with Action set to Deny
For approach B each site that has to be allowed should be added with Action set to Allow and in the end is rule, that matches everything with Action set to Deny.
First Time Configuration
There are two types of routers:
More information about the current default configuration can be found in the Quick Guide document that came with your device. The quick guide document will include information about which ports should be used to connect for the first time and how to plug in your devices.
This document describes how to set up the device from the ground up, so we will ask you to clear away all defaults.
When connecting the first time to the router with the default username admin and no password, you will be asked to reset or keep the default configuration (even if the default config has only an IP address). Since this article assumes that there is no configuration on the router you should remove it by pressing «r» on the keyboard when prompted or click on the «Remove configuration» button in WinBox.
Router without Default Configuration
If there is no default configuration on the router you have several options, but here we will use one method that suits our needs.
Connect Routers ether1 port to the WAN cable and connect your PC to ether2. Now open WinBox and look for your router in neighbor discovery. See detailed example in Winbox article.
If you see the router in the list, click on MAC address and click Connect.
The simplest way to make sure you have absolutely clean router is to run
Manual:Etherboot
Contents
Introduction
Etherboot mode is a special state for a MikroTik device that allows you to reinstall your device using Netinstall. There are several ways to put your device into Etherboot mode depending on your device you are using.
Reset button
The Reset can be found on all MikroTik devices, this button can be used to put the device into Etherboot mode. You can read about all possible modes that the Reset button can put your device into by reading the Reset button manual page. An easy way to put a device into Etherboot mode using the Reset button is by powering off the device, hold the Reset button, power on the device while holding the Reset button and keep holding it until the device shows up in your Netinstall window.
Note: Some devices (for example, RB1100 series) don’t have the reset button easily accessible, for these devices the reset button is located inside the device’s enclosure and requires you to remove the device’s cover.
Warning: If you have set up Protected bootloader, then the reset button’s behaviour is changed. Make sure you remember the settings you used to set up the Protected bootloader, otherwise you will not be able to use Eterboot mode and will not be able to reset your device.
RouterOS
If your device is able to boot up and you are able to login, then you can easily put the device into Etherboot mode. To do so, just connect to your device and execute the following command:
After that either reboot the device or do a power cycle on the device. Next time the device will boot up, then it will first try going in to Etherboot mode. Note that after the first boot up, the device will not try going into Etherboot mode and will boot directly of NAND or of the storage type the device is using.
Serial console
Some devices come with a serial console that can be used to put the device into Etherboot mode. To do so, make sure you configure your computer’s serial console. The required parameters for all MikroTik devices (except for RouterBOARD 230 series) are as following:
For RouterBOARD 230 series devices the parameters are as following:
Make sure you are using a proper null modem cable, you can find the proper pinout here. When the device is booting up, keep pressing CTRL+E on your keyboard until the device shows that it is trying bootp protocol:
At this point your device is in Etherboot mode, now the device should show up in your Netinstall window.
Jumper pin/hole reset
Some devices have a special jumper pin/hole reset function. You can read more about Jumper hole and Jumper pin, though not all devices have such a feature.
Manual:Configuration Management
Applies to RouterOS: ALL
Contents
Summary
This manual introduces you with commands which are used to perform the following functions:
Description
The configuration backup can be used for backing up MikroTik RouterOS configuration to a binary file, which can be stored on the router or downloaded from it using FTP for future use. The configuration restore can be used for restoring the router’s configuration, exactly as it was at the backup creation moment, from a backup file. The restoration procedure assumes the configuration is restored on the same router, where the backup file was originally created, so it will create partially broken configuration if the hardware has been changed.
The configuration export can be used for dumping out complete or partial MikroTik RouterOS configuration to the console screen or to a text (script) file, which can be downloaded from the router using FTP protocol. The configuration dumped is actually a batch of commands that add (without removing the existing configuration) the selected configuration to a router. The configuration import facility executes a batch of console commands from a script file.
System reset command is used to erase all configuration on the router. Before doing that, it might be useful to backup the router’s configuration.
System Backup
The system backup feature allows you to effortlessly save and load device’s configuration. Read more about the backup feature in the System/Backup section.
Exporting Configuration
The export command prints a script that can be used to restore configuration. The command can be invoked at any menu level, and it acts for that menu level and all menu levels below it. The output can be saved into a file, available for download using FTP.
Command Description
Example
To make an export file:
To see the files stored on the router:
Compact Export
Starting from v5.12 compact export was added. It allows to export only part of configuration that is not default RouterOS config.
Note: Starting from v6rc1 «export compact» is default behavior. To do old style export use export verbose
For example compact OSPF export:
Compact export introduces another feature that indicates which part of config is default on RouterOS and cannot be deleted. As in example below ‘*’ indicates that this OSPF instance is part of default configuration.
List of default config by menus that cannot be removed:
| Menu | Entries |
|---|---|
| /interface wireless security-profiles | default |
| /ppp profile | «default», «default-encryption» |
| /ip hotspot profile | «default» |
| /ip hotspot user profile | «default» |
| /ip ipsec proposal | «default» |
| /ip smb shares | «pub» |
| /ip smb users | «guest» |
| /ipv6 nd | «all» |
| /mpls interface | «all» |
| /routing bfd interface | «all» |
| /routing bgp instance | «default» |
| /routing ospf instance | «default» |
| /routing ospf area | «backbone» |
| /routing ospf-v3 instance | «default» |
| /routing ospf-v3 area | «backbone» |
| /snmp community | «public» |
| /tool mac-server mac-winbox | «all» |
| /tool mac-server | «all» |
| /system logging | «info», «error», «warning», «critical» |
| /system logging action | «memory», «disk», «echo», «remote» |
| /queue type | «default», «ethernet-default», «wireless-default», «synchronous-default», «hotspot-default», «only-hardware-queue», «multi-queue-ethernet-default», «default-small» |
Importing Configuration
The root level command /import [file_name] executes a script stored in the specified file. It will add the configuration from the specified file to an existing configuration. This file may contain any console commands, including scripts. Can be used to restore configuration or parts of it after configuration loss.
Command Description
Automatic Import
Once the file is uploaded, it is automatically executed. Information about the success of the commands that were executed is written to anything.auto.log
Example
To load the saved export file use the following command:
Configuration Reset
Command name: /system reset-configuration
Description
The command clears all configuration of the router and sets it to the default including the login name and password (‘admin’ and no password), IP addresses and other configuration is erased, interfaces will become disabled. After the reset command router will reboot. The default is either the factory default, that you can see in the article Default configurations, or it can be a custom default, that can be loaded by including an RSC file when doing Netinstall or if specified with a branding package.
Command Description
Note: If run-after-reset is set then no-defaults parameter will be ignored and only the specified script will be loaded!
Warning: Warning: If the device has a folder named «flash», then the confscript.rsc file must be stored in that folder to work with «run-after-reset» command. Everything outside this folder is stored on the RAM drive which contents are deleted on reboot or power cycle.
Warning: If the router has been installed using netinstall and had a script specified as the initial configuration, the reset command executes this script after purging the configuration. To stop it doing so, you will have to reinstall the router.
Example
Import troubleshooting
Things that should be removed from export files that were created with: «/export», before attempting import on new device.
In case of problematic import, attempt the following:
Startup delay
If your configuration relies on interfaces that might not yet have started up upon command execution, it is suggested to introduce delays, or to monitor until all needed interfaces are available. This example script allows you to set how many interfaces you are expecting, and how long to wait until they become available:
The above script will wait until there are 10 interfaces visible, or 30 seconds. If there are no 10 interfaces in this time, it will put a message in the log. Modify the variables according to your needs.
Manual:Reset
Contents
Note: RouterOS password can only be reset by reinstalling the router or using the reset button (or jumper hole) in case the hardware is RouterBOARD. For X86 devices, only complete reinstall will clear the password, along with other configuration. For RouterBOARD devices, several methods exist, depending on our model.
Reset from RouterOS
If you still have access to your router and want to recover its default configuration, then you can:
Using reset button
RouterBOARD devices are fitted with a reset button which has several functions:
Note: You can also do the previous three functions without loading the backup loader, simply push the button immediately after you apply power. You might need the assistance of another person to push the button and also plug the power supply at the same time
How to reset configuration
1) unplug the device from power
2) press and hold the button right after applying power
Note: hold the button until LED will start flashing
3) release the button to clear configuration.
Jumper hole reset
Some devices might need opening of the enclosure, RB750/RB951/RB751 have the jumper hole under one of the rubber feet of the enclosure.
Using: Close the jumper with a metal screwdriver, and boot the board until the configuration is cleared.
Jumper reset for older models
The below image shows the location of the Reset Jumper on older RouterBOARDs like RB133C:
Note: Don’t forget to remove the jumper after the configuration has been reset, or it will be reset every time you reboot.
Safe mode mikrotik
Tue Dec 12, 2017 7:42 pm
Re: Feature Request: SAFE MODE time based
Thu Dec 14, 2017 7:47 am
Ubiquiti equipment allows you to ‘test’ a change.
If you mess up, just Wait the 120 seconds!!
Phew!
Sent from my iPhone using Tapatalk
Re: Feature Request: SAFE MODE time based
Mon Dec 25, 2017 2:23 pm
Re: Feature Request: SAFE MODE time based
Fri Dec 29, 2017 4:06 am
I hope mikrotik team need to think about this functionality
Enviado de meu XT1580 usando Tapatalk
Re: Feature Request: SAFE MODE time based
Fri Dec 29, 2017 2:18 pm
Re: Feature Request: SAFE MODE time based
Mon Dec 17, 2018 8:15 pm
Re: Feature Request: SAFE MODE time based
Tue Dec 18, 2018 12:42 pm
Re: Feature Request: SAFE MODE time based
Tue Dec 18, 2018 1:51 pm
A slight difference between what’s achievable now and what people ask for is that certain changes will cause disconnect which is expected. Example: change of bridge MAC address while administrator is using MAC-telnet or MAC-winbox to connect. Current implementation will revert the changes made in safe mode while administrator would want to keep the change if he is able to connect using new MAC address within 120 seconds.
I understand that there are workarounds to keep safe mode working and still making changes, but there are different cases each requiring different workaround and it’s not simple to plan to use appropriate workaround in advance.
Re: Feature Request: SAFE MODE time based
Tue Dec 18, 2018 1:53 pm
That is the point..
If you are remotely and make some changes, like move interface into a bridge or something similar, sometime you get disconnected and the safe mode is triggered..
Why just put a timer setting like
Set 5 min make some changes if you made a mistake and get locked in 5 safe mode is trigger and everything is back as before the changes.
Sent from my XT1580 using Tapatalk
Re: Feature Request: SAFE MODE time based
Tue Dec 18, 2018 2:00 pm
A slight difference between what’s achievable now and what people ask for is that certain changes will cause disconnect which is expected. Example: change of bridge MAC address while administrator is using MAC-telnet or MAC-winbox to connect. Current implementation will revert the changes made in safe mode while administrator would want to keep the change if he is able to connect using new MAC address within 120 seconds.
I understand that there are workarounds to keep safe mode working and still making changes, but there are different cases each requiring different workaround and it’s not simple to plan to use appropriate workaround in advance.
Sent from my XT1580 using Tapatalk
Re: Feature Request: SAFE MODE time based
Tue Dec 18, 2018 2:30 pm
Re: Feature Request: SAFE MODE time based
Tue Dec 18, 2018 3:43 pm
A simple flap on a interface (wan) cause safe mode to trigger.
So not always a brief loss of connection means that safe mode need to be triggered
Sent from my XT1580 using Tapatalk
Re: Feature Request: SAFE MODE time based
Tue Dec 18, 2018 3:52 pm
Re: Feature Request: SAFE MODE time based
Tue Dec 18, 2018 7:37 pm
Re: Feature Request: SAFE MODE time based
Wed Dec 19, 2018 2:31 am
Re: Feature Request: SAFE MODE time based
Wed Dec 19, 2018 3:49 am
It could certainly be handy in some situations for remote devices.
Re: Feature Request: SAFE MODE time based
Wed Dec 19, 2018 9:02 am
Re: Feature Request: SAFE MODE time based
Wed Mar 18, 2020 10:11 pm
Re: Feature Request: SAFE MODE time based
Tue Jun 22, 2021 11:10 am
Re: Feature Request: SAFE MODE time based
Tue Jun 22, 2021 12:17 pm
I can see the point. Sometimes when you perform a change, maybe a routing-change or vlan-change. The break of the TCP-connection is expected, however it’s reachable via another IP, then a timeout-based rollback would be prefered.
Re: Feature Request: SAFE MODE time based
Tue Jun 22, 2021 5:17 pm
Re: Feature Request: SAFE MODE time based
Tue Jun 22, 2021 5:31 pm
My aproach on normal routine
0) Connect with winbox
1) Enable Safe Mode
2) do what must be do
3) Exit Safe Mode
4) Close winbox
Re: Feature Request: SAFE MODE time based
Sat Jun 26, 2021 1:57 am
We are asking for a way to ‘resume’ safe mode by reconnecting after loss of connection. A more simple example:
Say you are helping configure a remote CPE with new username and password in PPPoE, you are connecting via the WAN.
Re: Feature Request: SAFE MODE time based
Mon Oct 04, 2021 2:50 am
Why not have a timer that can be set on safe mode. If you lose your connection you have X seconds to re-establish the connection before safe mode reverts everything? This would cover instances if you have a remote router and need to change a configuration that will break the connection until a configuration is changed on a local router.
I will say the next best option I saw was to set up a scheduled restore from a backup file. Although, Safe Mode with some kind of timer for reconnection grace period would be nice.
Manual:RouterBOARD settings
Contents
General
Sub-menu level: /system routerboard
On RouterBOARD devices, the following menu exists which gives you some basic information about your device:
Properties
All properties are read-only
| Property | Description |
|---|---|
| model (string) | If this device is a MikroTik RouterBOARD, this describes the model name |
| serial-number (string) | Serial number of this particular device |
| current-firmware (string) | The version of the RouterBOOT loader that is currently in use. Not to be confused with RouterOS operating system version |
| upgrade-firmware (string) | RouterOS upgrades also include new RouterBOOT version files, but they have to be applied manually. This line shows if a new RouterBOOT file has been found in the device. The file can either be included via a recent RouterOS upgrade, or a FWF file which has been manually uploaded to the router. In either case, the newest found version will be shown here |
Upgrading RouterBOOT
RouterBOOT upgrades usually include minor improvements to overall RouterBOARD operation. It is recommended to keep this version upgraded. If you see that upgrade-firmware value is bigger than current-firmware, you simply need to perform the upgrade command, accept it with y and then reboot with /system reboot
After rebooting, the current-firmware value should become identical with upgrade-firmware
Settings
Sub-menu level: /system routerboard settings
Warning: If CPU or memory is overclocked and that is the reason why router is not performing as suspected, then this is not considered as a warranty case and you should return both frequencies to nominal value..
Protected bootloader
When you use the button for a complete reset, following actions are taken:
Note: RouterBOARD that has the protected RouterBOOT setting enabled will blink the LED every second, to make counting easier. The LED will turn off for one second, and turn on for the next second.
Mode and Reset buttons
Reset button additional functionality is supported by all MikroTik devices running RouterOS
Some RouterBOARD devices have a mode button that allows you to run any script when the button it pushed.
The list of supported devices:
Example
With mode button:
Upon pressing the button, the message 1234567890 will be logged in the system log.
Warning: Starting from RouterOS 6.47beta60 reset-button functionality and hold-time option has been added
Example for RouterOS version over 6.47beta60:
Reset button works in same way, but menu is moved under /system routerboard reset-button :
CRS3xx and CSS326-24G-2S+ series Manual
This table clarifies the main differences between switch models.
| Model | Switch Chip | Serial console | Dual Boot | PoE-in support | PoE-out support | Health monitor | ||||||||||||||||||||||||||||||||||||||||||||||||||||||||||||||||||||||||||||||||||||||||||||||||||||||||||||||||||||||||||||||||||||||||||||||||||||||||||||||||||||||||||||||||||||||||||||||||||||||||||||||||||||||||||||||||||||||||||||||||||||||||||||||||||||||||||||||||||||||||||||||||||||||||||||||||||
| Property | Description | |||||||||||||||
|---|---|---|---|---|---|---|---|---|---|---|---|---|---|---|---|---|
| Trusted Ports | Group of ports, which allows DHCP or PPPoE servers to provide a requested information. When enabled, it allows forwarding DHCP client packets towards the DHCP server through this port. Mainly used to limit unauthorized servers to provide malicious information for users, access ports usually do not configure as trusted. Ports that receive DHCP client packets with already added Option-82 must also be trusted, otherwise these packets are dropped. | |||||||||||||||
| Add Information Option |
| Property | Description |
|---|---|
| Enabled | Enable or disable port |
| Name | Editable port name |
| Link Status | Current link status (read-only) |
| Auto Negotiation | Enable or disable auto-negotiation |
| Speed | Specify speed setting of the port (requires auto-negotiation to be disabled) |
| Full Duplex | Specify the duplex mode of the port (requires auto-negotiation to be disabled) |
| Flow control Tx/Rx | Enable or disable 802.3x Flow control |
The switch supports Jumbo frames up to 10218 bytes. Manually decreasing the MTU settings is not supported for SwOS devices.
Devices with PoE-out support have some configuration options and certain monitoring features, like PoE-out current, voltage, etc. For more details about PoE, see the PoE-Out manual.
Specifies PoE-Out state:
Highest priority is 1, lowest priority is 8. If there are 2 or more ports with the same priority then port with the smallest port number will have a higher priority. For example, if ether2 and ether3 have the same priority and over-current is detected then PoE-Out on ether3 will be turned off.
Every 6 seconds ports will be checked for a possibility to provide PoE-Out if it was turned off due to port priority.
Shows current PoE-Out status on port:
PD uses a second power source which has a higher voltage than PSE, so all current is taken from the second DC source, not PSE PoE-Out port.
If the Voltage Level is set to «auto» and PoE Out is set to «on», the low voltage will be used by default. If the PD supports only high voltage, make sure you also set Voltage Level to «high» when forcing the PoE output.
SFP tab allows you to monitor the status of SFP/SFP+ modules.
Port Isolation
The Port Isolation table allows or restricts traffic forwarding between specific ports. By default, all available switch chip ports can communicate with any other port, there is no isolation used. When the checkbox is enabled/ticked you allow to forward traffic from this port towards the ticked port. Below are some port isolation examples.
In some scenarios, you might need to isolate a group of devices from other groups. In this example devices on Port1-Port5 are not able to communicate with Port6-Port10 devices, and vice versa.
In some scenarios, you might need to forward all traffic to an uplink port while all other ports are isolated from each other. This kind of setup is called a Private VLAN configuration. The switch will forward all Ethernet frames only to the uplink Port1, while uplink can reach all other ports
Individual isolated Port1 (e.g. for management purpose), it cannot send or receive traffic from any other port
It is possible to check/uncheck multiple checkboxes by checking one of them and then dragging horizontally (Click & Drag).
(R)STP will only work properly in Private VLAN setups. In setups with multiple isolated switch groups (R)STP might not properly receive BPDUs and therefore fail to detect network loops.
IEEE 802.3ad (LACP) compatible link aggregation is supported, as well as static link aggregation to ensure failover and load balancing based on Layer2, Layer3 and Layer4 hashing. Up to 16 link aggregation groups with up to 8 ports per group are supported. Each individual port can be configured as Passive LACP, Active LACP, or a Static LAG port.
Forwarding
Forwarding Tab provides advanced forwarding options among switch ports, port locking, port mirroring, bandwidth limit, and broadcast storm control features.
It is possible to limit ingress traffic per-port basis with traffic policer. The ingress policer controls the received traffic with packet drops. Everything that exceeds the defined limit will get dropped. This can affect the TCP congestion control mechanism on end hosts and achieved bandwidth can be actually less than defined.
Per-port and global RSTP configuration and monitoring are available in the RSTP menu.
Stats, Errors and Histogram
These menus provide detailed information about received and transmitted packets.
Statistics for SFP+ interface are cleared whenever an active SFP+ link is established.
VLAN and VLANs
VLAN configuration for switch ports.
VLAN membership configuration for switch ports.
| Property | Description |
|---|---|
| VLAN ID (integer: 1..4095; Default: 0) | VLAN ID to which assign ports. |
| Name (text; Default: ) | Short description of the VLAN. |
| Port Isolation (yes | no; Default: yes) | Use settings from Port Isolation menu to isolate the defined VLAN to only certain ports. When disabled, the switch will ignore port isolation configuration and forward traffic with the defined VLAN ID only to ports that are checked as members. |
| Learning (yes | no; Default: yes) | Enables or disables MAC address learning on the defined VLAN. If disabled, then all learned MAC addresses will appear as they have had been learned from VLAN 1. |
| Mirror (yes | no; Default: no) | Enables or disables VLAN-based mirroring. When enabled and Mirror To is set in the Forwarding menu, then all traffic from the defined VLAN will be mirrored to the selected port. |
| IGMP Snooping (yes | no; Default: no) | Enables or disables IGMP Snooping on the defined VLAN. When enabled, the switch will listen to IGMP Join and Leave requests from the defined VLAN and only forward traffic to ports, which have sent IGMP membership requests from the defined VLAN. When disabled, the switch will flood all VLAN member ports with Multicast traffic. |
| Members (ports; Default: none) | Group of ports, which are allowed to forward traffic on the defined VLAN. |
VLAN Configuration Example
Trunk and Access Ports
1. In the System menu enable independent VLAN learning (IVL).
2. In the VLANs menu add VLAN entries and specify port membership.
3. In the VLAN menu configure Default VLAN ID on planned access ports (untagged), select the correct VLAN Receive setting (Port2 only tagged, Port6-8 only untagged) and enable strict VLAN filtering to ensure only allowed VLANs can pass through the ports.
Trunk and Hybrid Ports
1. In the System menu enable independent VLAN learning (IVL).
2. In the VLANs menu add VLAN entries and specify port membership.
3. In the VLAN menu configure Default VLAN ID on planned hybrid ports (for untagged VLAN), select the correct VLAN Receive setting (Port2 only tagged, Port6-8 any) and enable strict VLAN filtering to ensure only allowed VLANs can pass through the ports.
Management access
In this example, switch management access on VLAN 200 will be created. The configuration scheme is the same as «Trunk and Access Ports» and 1., 2., 3. configuration steps are identical. The additional 4th step requires to specify the management VLAN ID in the System menu. After applying the configuration, switch will only respond to tagged VLAN 200 packets on Port2 and untagged packets on Port6. The DHCP client will also work in the specified VLAN ID.
Changing management VLAN can completely disable access to the switch management if VLAN settings are not correctly configured. Save a configuration backup before changing this setting and use Reset in case management access is lost.
Hosts
This table represents dynamically learned MAC address to port mapping entries. It can contain two kinds of entries: dynamic and static. Dynamic entries get added automatically, this is also called a learning process: when a switch receives a packet from a certain port, it adds the packet’s source MAC address and port it received the packet from to the host table, so when a packet comes in with a certain destination MAC address it knows to which port it should forward the packet. If the destination MAC address is not present in the host table then it forwards the packet to all ports in the group. Dynamic entries take about 5 minutes to time out.
Static entries will take over dynamic if dynamic entry with same mac-address already exists. Also by adding a static entry you get access to more functionality.
| Property | Description |
|---|---|
| Ports | Ports the packet should be forwarded to |
| MAC | MAC address |
| VLAN ID | VLAN ID |
| Drop | A packet with certain MAC address coming from certain ports can be dropped |
| Mirror | A packet can be cloned and sent to mirror-target port |
| Port (read-only) | Ports the packet should be forwarded to |
| MAC (read-only) | Learned MAC address |
| VLAN ID (read-only) | Learned VLAN ID |
IGMP Snooping
IGMP Snooping which controls multicast streams and prevents multicast flooding is implemented in SwOS starting from version 2.5. The feature allows a switch to listen in the IGMP conversation between hosts and routers.
Enable this option under the System tab. Since SwOS 2.13 version, IGMP Fast Leave option can also be configured.
Available IGMP snooping data can be found under the IGMP tab.
It is possible to enable IGMP Snooping for a specific VLAN ID under the VLANs menu.
IGMP Snooping for VLANs requires enabled «Independent VLAN Lookup» in the System menu.
SwOS supports SNMP v1 and uses IF-MIB, SNMPv2-MIB, BRIDGE-MIB and MIKROTIK-MIB (only for health, PoE-out and SFP diagnostics).
Available SNMP data:
| Property | Description |
|---|---|
| Enabled | Enable or disable SNMP service |
| Community | SNMP community name |
| Contact Info | Contact information for the NMS |
| Location | Location information for the NMS |
ACL Tab
An access control list (ACL) rule table is a very powerful tool allowing wire-speed packet filtering, forwarding, and VLAN tagging based on L2,L3, and L4 protocol header field conditions. Each rule contains a conditions part and an action part.
Conditions part parameters
| Property | Description | |||||||||||||||||||||||||||||||||||||||||||||||||||||||||||||||||||||||||||||||||||||||||||||||||||||||||||||||||||||||||||||||||||||||||||||||||||||||||||||||||||||||||||||||||||||||||||||||||||||||||||||||||||||||||||||||||||||
|---|---|---|---|---|---|---|---|---|---|---|---|---|---|---|---|---|---|---|---|---|---|---|---|---|---|---|---|---|---|---|---|---|---|---|---|---|---|---|---|---|---|---|---|---|---|---|---|---|---|---|---|---|---|---|---|---|---|---|---|---|---|---|---|---|---|---|---|---|---|---|---|---|---|---|---|---|---|---|---|---|---|---|---|---|---|---|---|---|---|---|---|---|---|---|---|---|---|---|---|---|---|---|---|---|---|---|---|---|---|---|---|---|---|---|---|---|---|---|---|---|---|---|---|---|---|---|---|---|---|---|---|---|---|---|---|---|---|---|---|---|---|---|---|---|---|---|---|---|---|---|---|---|---|---|---|---|---|---|---|---|---|---|---|---|---|---|---|---|---|---|---|---|---|---|---|---|---|---|---|---|---|---|---|---|---|---|---|---|---|---|---|---|---|---|---|---|---|---|---|---|---|---|---|---|---|---|---|---|---|---|---|---|---|---|---|---|---|---|---|---|---|---|---|---|---|---|---|---|---|---|
| From | A port that packet came in from | |||||||||||||||||||||||||||||||||||||||||||||||||||||||||||||||||||||||||||||||||||||||||||||||||||||||||||||||||||||||||||||||||||||||||||||||||||||||||||||||||||||||||||||||||||||||||||||||||||||||||||||||||||||||||||||||||||||
| MAC Src | Source MAC address and mask | |||||||||||||||||||||||||||||||||||||||||||||||||||||||||||||||||||||||||||||||||||||||||||||||||||||||||||||||||||||||||||||||||||||||||||||||||||||||||||||||||||||||||||||||||||||||||||||||||||||||||||||||||||||||||||||||||||||
| MAC Dst | Destination MAC address and mask | |||||||||||||||||||||||||||||||||||||||||||||||||||||||||||||||||||||||||||||||||||||||||||||||||||||||||||||||||||||||||||||||||||||||||||||||||||||||||||||||||||||||||||||||||||||||||||||||||||||||||||||||||||||||||||||||||||||
| Ethertype | Protocol encapsulated in the payload of an Ethernet Frame | |||||||||||||||||||||||||||||||||||||||||||||||||||||||||||||||||||||||||||||||||||||||||||||||||||||||||||||||||||||||||||||||||||||||||||||||||||||||||||||||||||||||||||||||||||||||||||||||||||||||||||||||||||||||||||||||||||||
| VLAN |
| Property | Description |
|---|---|
| Redirect To | Force new packets destination port |
| Mirror | Clones packet and sends it to mirror-target port |
| Rate | Limits bandwidth (bps) |
| Drop | Drop packet |
| Set VLAN ID | Changes the VLAN tag ID, if VLAN tag is present |
| Priority | Changes the VLAN tag priority bits, if VLAN tag is present |
Health
This menu provides different health-related properties.
For devices with only a CPU temperature sensor (CRS326-24G-2S+, CRS305-1G-4S+, CRS309-1G-8S+, CRS318-1Fi-15Fr-2S) health information is available under System menu.
Configuring SwOS using RouterOS
This option is not available for the CSS326-24G-2S+ device.
Dual Boot
The “Dual Boot” feature allows you to choose which operating system you prefer to use, RouterOS or SwOS. You can boot RouterOS under the System menu with the «Boot RouterOS» button.
Different options are available to change the operating system to SwOS:
Записки IT специалиста
Технический блог специалистов ООО»Интерфейс»
Базовая настройка роутера MikroTik

Научиться настраивать MikroTik с нуля или систематизировать уже имеющиеся знания можно на углубленном курсе по администрированию MikroTik. Автор курса, сертифицированный тренер MikroTik Дмитрий Скоромнов, лично проверяет лабораторные работы и контролирует прогресс каждого своего студента. В три раза больше информации, чем в вендорской программе MTCNA, более 20 часов практики и доступ навсегда.
В сети имеется достаточное количество инструкций по настройке роутеров этой марки, с разными подходами к этому процессу, поэтому мы не будем претендовать на истину в последней инстанции, а выразим наше видение этого вопроса. В первую очередь мы считаем, что возможности не должны опережать знания, поэтому не следует сразу браться за настройку сложных сетевых конфигураций. Лучше всего сначала разобраться в базовых настройках и только потом, по мере появления опыта переходить к более сложным схемам.
В свое время, когда вчерашний студент приходил на производство, ему говорили: «Забудь все чему тебя учили, и слушай сюда». Этот подход как никогда справедлив, если вы первый раз берете в руки Mikrotik, забудьте о предыдущем опыте с другими роутерами и готовьтесь осваивать новые подходы.
Прежде всего абсолютно неважно какая именно модель роутера у вас в руках, главное, что внутри находится RouterOS, а значит вам подойдет любая инструкция по настройке, за небольшими поправками, связанными с аппаратными ограничениями (скажем, если в вашей модели отсутствует Wi-Fi, то часть инструкции посвященную настройке беспроводной сети вы можете просто пропустить).
Поэтому для подготовки материалов по Mikrotik мы будем использовать виртуальные машины с RouterOS, прибегая к реальному оборудованию только чтобы показать какие-то специфичные моменты.
Подготовка к настройке
Во-вторых, начиная с RouterOS 6.41 были изменены настройки коммутации и если вы хотите использовать актуальные инструкции, перед настройкой версию ОС следует обязательно обновить.
Настройка портов и коммутация
Открыв раздел Switch можно посмотреть какие чипы коммутации установлены в вашем роутере и какие порты они обслуживают:
Настройка подключения к интернет
В зависимости от вашего провайдера способ подключения к интернет может быть разным. Чаще всего встречается прямое подключение, когда провайдер раздает настройки по DHCP или PPPoE подключение (используется федеральным провайдером Ростелеком). Мы будем рассматривать далее прямое подключение, однако если у вас коммутируемый доступ (PPPoE или VPN), то вам потребуется перейти в раздел PPP и создать коммутируемое подключение типа Client, ниже показан пример для PPPoE Ростелеком. В качестве используемого интерфейса укажите внешний интерфейс ether5:
Более подробно про настройку VPN-подключений в Mikrotik вы можете прочитать в нашей статье Настройка VPN-подключения в роутерах Mikrotik.
Настройка сетевых служб (DHCP, DNS) и раздача интернета в локальную сеть
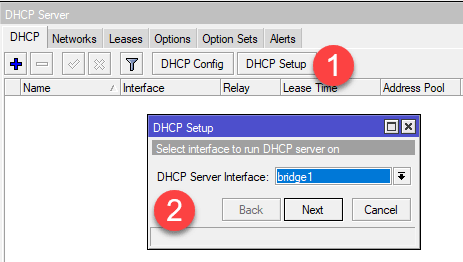
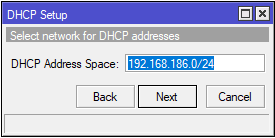
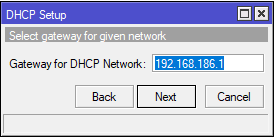
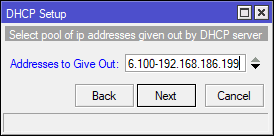
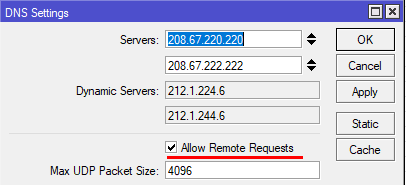
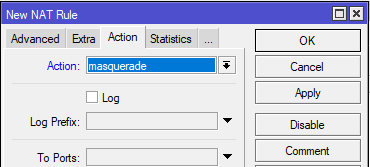
 Настройка межсетевого экрана
Начнем с подключений к самому роутеру или цепочки input. В первую очередь добавим правило-пустышку разрешающее подключение к устройству из локальной сети. Почему «пустышку»? Потому что это и так разрешено, но данное правило будет нашей страховкой от случайного «выстрела в ногу», когда мы случайно запретим себе доступ к устройству. Правило-пустышка расположенное первым сработает раньше всех добавленных позже правил, в отличие от действия по умолчанию, которое сработает только тогда, если ни одно правило не подошло.
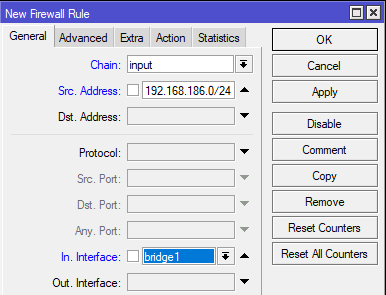
Если у вас коммутируемое подключение, то продублируйте правило для интерфейса, который смотрит в сеть провайдера, в большинстве случаев это избыточно, но вполне оправдано с точки зрения безопасности.
В последствии дополнительные разрешающие правила следует размещать ниже правила запрещающего invalid, но выше правила блокирующего все входящие подключения.
Закончим с собственными соединениями роутера и перейдем к транзитным, т.е. от клиентов локальной сети в интернет и обратно. За это отвечает цепочка forward, но прежде, чем переходить к правилам следует обратить внимание на еще одну фирменную технологию. Она называется Fasttrack и предусматривает упрощенную передачу пакетов, что позволяет значительно повысить производительность роутера. Однако это достигается ценой того, что к такому трафику не могут быть применены многие правила брандмауэра и иные сетевые технологии (подробнее можно прочитать на официальном сайте).
Так нужен ли Fasttrack? Смотрите сами, мы взяли RB2011 и прокачали через него при помощи Speedtest поток в 90 Мбит/с (при тарифе в 100 Мбит/с) сначала с отключенным Fasttrack:
Включим Fasttrack и повторим тест:
Как видим, картина существенно изменилась, полная утилизация канала уже не вызывает предельной загрузки роутера и остается вполне достаточно ресурсов для реализации каких-то продвинутых сетевых конфигураций или создания сложных правил обработки трафика.
Таким образом мы пустим через Fasstrack все пакеты уже установленных транзитных соединений, и скажем честно, особой потребности как-то сложно обрабатывать такой трафик на роутере нет. Простую фильтрацию можно легко достичь предварительной обработкой и маркировкой пакетов, а на что-то более сложное у Mikrotik не хватит ресурсов, в этом случае есть смысл задуматься о полноценном роутере с прокси на базе Linux.
Настройка безопасности роутера
Основная настройка нашего роутера закончена, он уже может быть введен в эксплуатацию и обслуживать запросы клиентов локальной сети. А мы тем временем перейдем к дополнительным настройкам, которые существенно влияют на безопасность устройства.
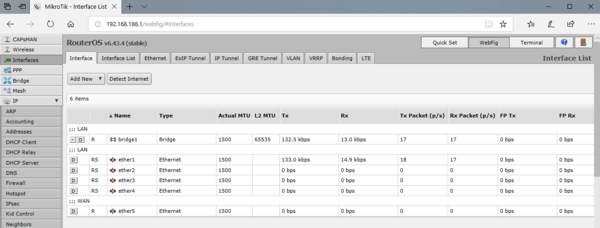
 Настройка беспроводной сети Wi-Fi
Если мы откроем раздел Wireless то увидим один или два беспроводных интерфейса (для моделей 2,4 + 5 ГГц), которые будут из коробки выключены. Но не будем спешить их включать, перед тем как настраивать Wi-Fi будет не лишним изучить обстановку в эфире. Для этого сначала нажмем кнопку Freq. Usage и оценим загрузку каналов.

Более подробно о настройке беспроводных сетей вы можете прочитать в нашей статье: Расширенная настройка Wi-Fi на роутерах Mikrotik. Режим точки доступа
Что нужно сделать после настройки
После того, как вы все настроили и убедились в работоспособности всех функций роутера следует сделать резервную копию настроек, это позволит в случае чего быстро развернуть готовую конфигурацию, что важно, если настройки вашего роутера сложнее чем базовые. Для этого перейдите в раздел Files и нажмите кнопку Backup, укажите имя резервной копии и пароль к файлу, после чего скачайте и сохраните резервную копию в надежном месте.
Мы рекомендуем создавать резервную копию после каждого изменения настроек роутера, это не займет много времени, но позволит существенно его сэкономить в нештатной ситуации.
Несмотря на то, что статья получилась весьма обширная, особых сложностей при настройке роутеров Mikrotik нет, если вы понимаете, что делаете, то с приобретением опыта настройка не будет занимать у вас много времени. В наших последующих статьях мы также будем подразумевать, что читатель владеет базовой настройкой на уровне данной статьи и не будем возвращаться к описанным здесь вопросам.
Научиться настраивать MikroTik с нуля или систематизировать уже имеющиеся знания можно на углубленном курсе по администрированию MikroTik. Автор курса, сертифицированный тренер MikroTik Дмитрий Скоромнов, лично проверяет лабораторные работы и контролирует прогресс каждого своего студента. В три раза больше информации, чем в вендорской программе MTCNA, более 20 часов практики и доступ навсегда.
Дополнительные материалы:
Mikrotik
The Dude
Помогла статья? Поддержи автора и новые статьи будут выходить чаще:
Или подпишись на наш Телеграм-канал:
Safe mode mikrotik
Tue Oct 18, 2016 3:39 pm
RouterBOARD RB3011UiAS-RM
Firmware: 3.27
RouterOS: 6.36.3
I have closed these connections long ago, but they are still active. How can i actually close these sessions to be able enter Safe mode again?
I have already tried to remove user that has record at Active User tab, but it has no effect, records are still exists.
Tue Oct 18, 2016 5:22 pm
Only option is to reboot the router as far as I know. You can steal safe-mode away from a user though.
MTCNA, MTCRE, MTCINE, MTCTCE, MTCIPv6E, MTCUME, MTCSE
Discord MikrotikZA Server: https://discord.gg/CvaGbjP
Tue Oct 18, 2016 11:28 pm
Only option is to reboot the router as far as I know. You can steal safe-mode away from a user though.
Wed Oct 19, 2016 12:19 pm
MTCNA, MTCRE, MTCINE, MTCTCE, MTCIPv6E, MTCUME, MTCSE
Discord MikrotikZA Server: https://discord.gg/CvaGbjP
Wed Oct 19, 2016 5:40 pm
I have same problem. Even worse because one of this hunged sessions increase one of the cpus to 100% due a management process. Then, some requests of SNMP give time out.
Rebooting the router just because it’s no possible to kill an active session it’s no very optimum.
Is there any way to restart just the management process?
Command line
Вы просматриваете старую версию данной страницы. Смотрите текущую версию.
Версия 1 Следующий »
The console is used for accessing the MikroTik Router’s configuration and management features using text terminals, either remotely using serial port, telnet, SSH or console screen within Winbox, or directly using monitor and keyboard. The console is also used for writing scripts. This manual describes the general console operation principles. Please consult the Scripting Manual on some advanced console commands and on how to write scripts.
Login Options
Console login options enables or disables various console features like color, terminal detection and many other.
Additional login parameters can be appended to login name after ‘+’ sign.
If parameter is not present, then default value is used. If number is not present then implicit value of parameter is used.
| Param | Default | Implicit | Description |
|---|---|---|---|
| «w» | auto | auto | Set terminal width |
| «h» | auto | auto | Set terminal height |
| «c» | on | off | disable/enable console colors |
| «t» | on | off | dDo auto detection of terminal capabilities |
| «e» | on | off | Enables «dumb» terminal mode |
Banner and Messages
Login process will display MikroTik banner and short help after validating user name and password.
After the banner can be printed other important information, like system note set by another admin, last few crytical log messages, demo version upgrade reminder and default configuration description.
For example, demo license prompt and last crytical messages are printed
Command Prompt
At the end of successful login sequence login process prints banner, shows command prompt and hands over control to the user.
Default command prompt, consists of user name, system identity, and current command path />
For example, change current path from root to interface then go back to root
Easiest way to log out of console is to press Control-D at the command prompt while command line is empty (You can cancel current command and get an empty line with Control-C, so Control-C followed by Control-D will log you out in most cases).
It is possible to write commands that consist of multiple lines. When entered line is not a complete command and more input is expected, console shows continuation prompt that lists all open parentheses, braces, brackets and quotes, and also trailing backslash if previous line ended with backslash-whitespace.
When you are editing such multiple line entry, prompt shows number of current line and total line count instead of usual username and system name.
Sometimes commands ask for additional input from user. For example, command ‘/password’ asks for old and new passwords. In such cases prompt shows name of requested value, followed by colon and space.
Hierarchy
The console allows configuration of the router’s settings using text commands. Since there is a lot of available commands, they are split into groups organized in a way of hierarchical menu levels. The name of a menu level reflects the configuration information accessible in the relevant section.
For example, you can issue the /ip route print command:
Instead of typing ip route path before each command, the path can be typed only once to move into this particular branch of menu hierarchy. Thus, the example above could also be executed like this:
Notice that the prompt changes in order to reflect where you are located in the menu hierarchy at the moment. To move to the top level again, type » / «
Item Names and Numbers
Many of the command levels operate with arrays of items: interfaces, routes, users etc. Such arrays are displayed in similarly looking lists. All items in the list have an item number followed by flags and parameter values.
To change properties of an item, you have to use set command and specify name or number of the item.
Item Names
Some lists have items with specific names assigned to each of them. Examples are interface or user levels. There you can use item names instead of item numbers.
You do not have to use the print command before accessing items by their names, which, as opposed to numbers, are not assigned by the console internally, but are properties of the items. Thus, they would not change on their own. However, there are all kinds of obscure situations possible when several users are changing router’s configuration at the same time. Generally, item names are more «stable» than the numbers, and also more informative, so you should prefer them to numbers when writing console scripts.
Item Numbers
You can specify multiple items as targets to some commands. Almost everywhere, where you can write the number of item, you can also write a list of numbers.
General Commands
There are some commands that are common to nearly all menu levels, namely: print, set, remove, add, find, get, export, enable, disable, comment, move. These commands have similar behavior throughout different menu levels.
| Property | Description |
|---|---|
| add | This command usually has all the same arguments as set, except the item number argument. It adds a new item with the values you have specified, usually at the end of the item list, in places where the order of items is relevant. There are some required properties that you have to supply, such as the interface for a new address, while other properties are set to defaults unless you explicitly specify them. |
Input Modes
It is possible to switch between several input modes:
Safe mode mikrotik
Fri Jan 27, 2017 11:21 am
I am just trying to use and understand Safe Mode.
The goal is to go back to a working config if i do something stupid.
Test 2:
— Activate Safe Mode in Winbox
— Do something stupid (remove IP from interface)
— Powercycle Device
—> Stupid config change seems to be committed!!
Is this really the desired behaviour of RouterOS?
Do I always need to wait for the timeout, or is there any additional option like the reset button?
Fri Jan 27, 2017 11:42 am
Fri Jan 27, 2017 12:08 pm
I saw this long time in some szenarios where I connected over WAN.
On local devices, the reconnect happens in less than 30s.
Fri Jan 27, 2017 12:16 pm
Well, safe mode just puts a marker in the change history and rolls back all changes when the
login session (telnet, webfig, winbox) is inadvertently closed. Powercycling apparently does not
count as inadvertently closing the session.
In my experience it works well, but I would like to see an additional mode where the rollback is not
initiated by the session close, but by a timer elapse. I frequently work on systems via a VPN and
it is sometimes unavoidable that the change that I make will reset and re-establish the VPN.
This makes it impossible to use safe mode for such changes. E.g. I have devices that have
a USB stick for 4G to connect back to the central office using L2TP/IPsec, and alternatively they
can use locally available WiFi at higher priority.
When the boxes have been brought to the location, I can login remotely via the 4G VPN and enter
the details of the WiFi, but it is risky because when the WiFi establishes and gets a route but turns
out to be not transparent for L2TP/IPsec I have locked myself out and have to go to the site.
I cannot use safe mode because the switchover will always close my login session.
It would be good to have «safe mode for 5 minutes», then change the setting, and when I am unable
to login again within 5 minutes to «cancel safe mode», it reverts to the previous setting.
Manual:Securing Your Router
The following steps are recommendation how to protect your router. We strongly suggest to keep default firewall, it can be patched by other rules that fullfils your setup requirements. Other tweaks and configuration options to harden your router’s security are described later. To learn what security methods are used by RouterOS internally, read the security article.
Contents
RouterOS version
Start by upgrading your RouterOS version. Some older releases have had certain weaknesses or vulnerabilities, that have been fixed. Keep your device up to date, to be sure it is secure. Click «check for updates» in Winbox or Webfig, to upgrade. We suggest you to follow announcements on our security announcement blog to be informed about any new security issues.
Access to a router
Access username
Change default username admin to different name, custom name helps to protect access to your rotuer, if anybody got direct access to your router.
Warning: Use secure password and different name for your router’s username.
Access password
MikroTik routers requires password configuration, we suggest to use pwgen or other password generator tool to create secure and non-repeating passwords,
Another option to set a password,
We strongly suggest to use second method or Winbox interface to apply new password for your router, just to keep it safe from other unauthorised access.
Access by IP address
Besides the fact that default firewall protects your router from unauthorized access from outer networks, it is possible to restrict username access for the specific IP address
Note: login to router with new credentials to check that username/password are working.
Router services
All production routers have to be administred by SSH, secured Winbox or HTTPs services. Use the latest Winbox version for secure access. Note, that in newest Winbox versions, «Secure mode» is ON by default, and can’t be turned off anymore.
RouterOS services
Most of RouterOS administrative tools are configured at
Keep only secure ones,
and also change the default port, this will immediately stop most of the random SSH bruteforce login attempts:
Additionaly each /ip service entity might be secured by allowed IP address (the address service will reply to)
RouterOS MAC-access
RouterOS has built-in options for easy management access to network devices. The particular services should be shutdown on production networks.
MAC-Telnet
Disable mac-telnet services,
MAC-Winbox
Disable mac-winbox services,
MAC-Ping
Disable mac-ping service,
Neighbor Discovery
MikroTik Neighbor discovery protocol is used to show and recognize other MikroTik routers in the network, disable neighbor discovery on all interfaces,
Bandwidth server
Bandwidth server is used to test throughput between two MikroTik routers. Disable it in production enironment.
DNS cache
Router might have DNS cache enabled, that decreases resolving time for DNS requests from clients to remote servers. In case DNS cache is not required on your router or another router is used for such purposes, disable it.
Other clients services
RouterOS might have other services enabled (they are disabled by default RouterOS configuration). MikroTik caching proxy,
MikroTik socks proxy,
MikroTik UPNP service,
MikroTik dynamic name service or ip cloud,
More Secure SSH access
RouterOS utilises stronger crypto for SSH, most newer programs use it, to turn on SSH strong crypto:
Router interface
Ethernet/SFP interfaces
It is good practice to disable all unused interfaces on your router, in order to decrease unauthorised access to your router.
Some RouterBOARDs have LCD module for informational purpose, set pin or disable it.
Firewall
We strongly suggest to keep default firewall on. Here are few adjustment to make it more secure, make sure to apply the rules, when you understand what are they doing.
IPv4 firewall to a router
IPv4 firewall for clients
Currently IPv6 package is disabled by default. Please enable package with care, as RouterOS will not create any default firewall rules for IPv6 at the moment.
IPv6 ND
Disable IPv6 Neighbour Discovery
IPv6 firewall to a router
IPv6 firewall for clients
Enabled IPv6 puts your clients available for public networks, set proper firewall to protect your customers.
Safe mode mikrotik
Разбор множества мелких, относительно связанных между собой, тем: программный и аппаратный сброс настроек, функция Protected RouterBoot, бекапы и экспорт конфигурации, разбивка flash памяти на разделы.
Программный сброс настроек
Если есть доступ к роутеру от пользователя с full правами, то можно сбросить все настройки через [System] → [Reset Configuration]
Аппаратный сброс настроек
Все зависит от модели роутера, возможно три варианта:
Присутствует кнопка reset
Для начала отключаем питание, зажимаем reset и включаем питание. Отпускаем через:
Контактная площадка
На wiki утверждают, что все девайсы оснащены подобной площадкой. Ради интереса вскрыл RB491-2nD и не обнаружил таковой.
Технология сброса: отключаем питание, замыкаем площадку(бипер издает хрипящий писк) и не отпускаем до полной загрузки.
Перемычка
Присутствует на старых моделях.
Технология сброса: отключаем питание, замыкаем перемычку, ждем полной загрузки, убираем перемычку.
Protected RouterBoot
Может случится ситуация, когда после сброса чужого(иначе вы бы знали) роутера он не будет загружаться дальше «первого пика» — это новая фитча от Mikrotik затирающая всю флеш память( включая RouterOS), для восстановления потребуется netinstall.
Про RouterBoot
RouterBoot — начальный загрузчик на девайсах Mikrotik, с ним можно взаимодействовать через Serial интерфейс и одно из предназначений Protected RouterBoot не давать вмешиваться в процесс загрузки.
Загрузчик разделен на две части:
Посмотреть текущие версии можно в [System] → [RouterBoard]. Кнопкой [Upgrade] производится обновление Current загрузчика. Если система работает плохо и загружается только с резервного(как написано разделом выше), то в [Settings] можно явно указать recovery загрузчик в качестве постоянного, опция Auto Upgrade для обновления current загрузчика вместе с RouterOS. И раз мы тут — опция Silent Boot отключает звуки во время загрузки.
Даунгрейд до Bugfix и спец. версия загрузчика
Копируйте на устройство, если у вас bugfix ветка то достаточно перезагрузиться, если нет читаем дальше.
Откат прошивки. Вариант 1:
[System] → [Packages] → [Check for updates]
Channel: Bugfix Only
нажимаем [Download and Install]
Консольный вариант:
Откат прошивки. Вариант 2:
Далее: [System] → [Packages] → [Downgrade]
[System] → [RouterBoard] → [Settings]
Включаем Protected RouterBoot=yes, что теперь.
Я не призываю вас включать эту опцию в обязательном порядке, думайте сами когда оно вам надо, а когда можно обойтись без подобных мер.
Восстановление прошивки средствами netinstall
Netinstall — универсальный инструмент для прошивки и предварительной настройки роутеров MikroTik. При использовании происходит ворматирование внутренней памяти и конфигурации, без изменения останутся только настройки в [System] → [RouterBOARD]
Порядок действий
На что еще способен netinstall
Бекап и экспорт конфигурации в Mikrotik
Бинарный бекап
[Files] → [Подсветить необходимый файл] → [Restore]
Экспорт и импорт конфигурации
export не сохраняет конфигурацию в файл, если явно не задать ключ file= расширение rsc будет добавлено автоматически.
DualBoot в Mikrotik(Partition)
Flash накопитель можно разбить на несколько разделов и установить несколько копий RouterOS(в том числе различных). В случае неудачной загрузки с основного раздела будет загружаться следующий указанный. Функция доступна на девайсах с MIPS, PowerPC и CCR серии.
Разбивка на разделы:
Необходимо указать итоговое число разделов. Есть два ограничения: максимальное число разделов — 8 и минимальный размер раздела: 32MB on MIPS; 40MB on PowerPC; 48MB on CCR.
Новый раздел будет пустым, необходимо скопировать на него текущую прошивку через [Copy to].
В консоли лучше видны свойства разделов: Активный(A) — с которого будет произведена следующая загрузка и раздел с которого была загружена система®.
Смена активного раздела происходит в его свойствах кнопкой [Activate]. Опция Fallback to отвечает за выбор раздела, если загрузка не удалась.
[Save Config To] — Сохранить конфигурацию с текущего® раздела на выбранный.
[Restore Config From] — Сохранить конфигурацию с выбранного раздела на текущий®.
Функционал интересный, но имеет два недостатка: Не все роутеры комплектуются достаточным количеством flash памяти. Сбои в RouterOS, даже при обновлении, не такое частое явление.
Overview
This article describes a set of commands used for configuration management.
Configuration Undo/Redo
A simple example to demonstrate the addition of firewall rule and how to undo and redo the action:
We have added firewall rule and in /system history we can see all what is being done.
Let’s undo everything:
As you can see firewall rule disappeared.
Now redo the last change:
System history is capable of showing exact CLI commands that will be executed during Undo or Redo actions even if we perform the action from GUI, for example, detailed history output after adding TCP accept rule from WinBox:
Safe Mode
Sometimes it happens that the router’s configuration is changed in a way that will make the router inaccessible (except local console). Usually, this is done by accident, but there is no way to undo the last change when the connection to the router is already cut. Safe mode can be used to minimize such risk.
Safe mode is entered by pressing Ctrl-X. To save changes and quit safe mode, press Ctrl-X again. To exit without saving the made changes, hit Ctrl-D

Message Safe Mode taken is displayed and prompt changes to reflect that session is now in safe mode. In WinBox safe mode is enabled by toggling the Safe Mode toggle button on the left side of the toolbar.
All configuration changes that are made (also from other login sessions), while the router is in safe mode, are automatically undone if the safe mode session terminates abnormally. You can see all such changes that will be automatically undone tagged with an F flag in system history:
Now, if telnet connection, WinBox terminal (if the safe mode was enabled on WinBox terminal window), or WinBox connection is cut, then after a while (TCP timeout is 9 minutes) all changes that were made while in safe mode will be undone. Exiting session by Ctrl-D also undoes all safe mode changes, while /quit does not.
If another user tries to enter safe mode, he’s given the following message:
If too many changes are made while in safe mode, and there’s no room in history to hold them all (currently history keeps up to 100 most recent actions), then the session is automatically put out of the safe mode, no changes are automatically undone. Thus, it is best to change the configuration in small steps, while in safe mode. Pressing Ctrl—X twice is an easy way to empty the safe mode action list.
System Backup/Restore
System backup is the way to completely clone routers configuration in binary format. The backup file contains not just configuration, but also statistics data, logs, etc. The backup file is best used to save and restore configuration on the same device, for moving configuration to other devices, use export files instead.
Backup files contain sensitive information (passwords, keys, certificates). The file can be encrypted, but even then backups should be stored only in a secure location.
Restoring backup files should be done only on the same router or on a similar router when the previous router fails. A backup must not be used to clone configuration on multiple network routers.
Example to save and load backup file:
Import/Export
RouterOS allows to export and import of parts of the configuration in plain text format. This method can be used to copy bits of configuration between different devices, for example, clone the whole firewall from one router to another.
An export command can be executed from each individual menu (resulting in configuration export only from this specific menu and all its sub-menus) or from the root menu for complete config export.
Following command parameters are accepted:
| Property | Description |
|---|---|
| compact | Output only modified configuration, the default behavior |
| file | Export configuration to a specified file. When the file is not specified export output will be printed to the terminal |
| hide-sensitive | Hide sensitive information, like passwords, keys, etc. |
| verbose | With this parameter, the export command will output whole configuration parameters and items including defaults. |
For example export configuration from /ip address menu and save it to file:
By default export command writes only user-edited configuration, RouterOS defaults are omitted.
For example, IPSec default policy will not be exported, and if we change one property then only our change will be exported:
Notice the * flag, it indicates that entry is system default and cannot be removed manually.
Here is the list of all menus containing default system entries
| Menu | Default Entry |
|---|---|
| /interface wireless security-profiles | default |
| /ppp profile | «default», «default-encryption» |
| /ip hotspot profile | default |
| /ip hotspot user profile | default |
| /ip ipsec policy | default |
| /ip ipsec policy group | default |
| /ip ipsec proposal | default |
| /ip ipsec mode-conf | read-only |
| /ip smb shares | pub |
| /ip smb users | guest |
| /ipv6 nd | any |
| /mpls interface | all |
| /routing bfd interface | all |
| /routing bgp instance | default |
| /routing ospf instance | default |
| /routing ospf area | backbone |
| /routing ospf-v3 instance | defailt |
| /routing ospf-v3 area | backbone |
| /snmp community | public |
| /tool mac-server mac-winbox | all |
| /tool mac-server | all |
| /system logging | «info», «error», «warning», «critical» |
| /system logging action | «memory», «disk», «echo», «remote» |
| /queue type | «default», «ethernet-default», «wireless-default», «synchronous-default», «hotspot-default», «only-hardware-queue», «multi-queue-ethernet-default», «default-small» |
Configuration Import
Root menu command import allows running configuration script from the specified file. Script file (with extension «.rsc») can contain any console command including complex scripts.
For example, load saved configuration file
Import command allows to specify following parameters:
| Property | Description |
|---|---|
| from-line | Start executing the script from the specified line number |
| file-name | Name of the script (.rsc) file to be executed. |
| verbose | Reads each line from the file and executes individually, allowing to debug syntax or other errors more easily. |
Auto Import
It is also possible to automatically execute scripts after uploading to the router with FTP or SFTP. The script file must be named with extension *.auto.rsc. Once the commands in the file are executed, a new *.auto.log file is created which contains import success or failure information.
Configuration Reset
RouterOS allows resetting configuration with /system reset-configuration command
This command clears all configuration of the router and sets it to the factory defaults including the login name and password (‘admin’ with an empty password). For more details on the default configuration see the list.
After the configuration reset command is executed router will reboot and load the default configuration.
The backup file of the existing configuration is stored before reset. That way you can easily restore any previous configuration if reset is done by mistake.
If the router has been installed using Netinstall and had a script specified as the initial configuration, the reset command executes this script after purging the configuration. To stop it from doing so, you will have to reinstall the router.
It is possible to override default reset behavior with the parameters below:
For example hard reset configuration without loading default config and skipping backup file:
And the same using Winbox:

Manual:Console login process
Applies to RouterOS: 2.9, v3, v4
Contents
Description
There are different ways to log into console:
Input and validation of user name and password is done by login process. Login process can also show different informative screens (license, demo version upgrade reminder, software key information, default configuration).
At the end of successful login sequence login process prints banner and hands over control to the console process.
Console process displays system note, last critical log entries, auto-detects terminal size and capabilities and then displays command prompt]. After that you can start writing commands.
Use up arrow to recall previous commands from command history, TAB key to automatically complete words in the command you are typing, ENTER key to execute command, and Control-C to interrupt currently running command and return to prompt.
Easiest way to log out of console is to press Control-D at the command prompt while command line is empty (You can cancel current command and get an empty line with Control-C, so Control-C followed by Control-D will log you out in most cases).
Console login options
Starting from v3.14 it is possible to specify console options during login process. These options enables or disables various console features like color, terminal detection and many other.
Additional login parameters can be appended to login name after ‘+’ sign.
If parameter is not present, then default value is used. If number is not present then implicit value of parameter is used.
| Param | Default | Implicit | Description |
|---|---|---|---|
| «w» | auto | auto | Set terminal width |
| «h» | auto | auto | Set terminal height |
| «c» | on | off | disable/enable console colors |
| «t» | on | off | Do auto detection of terminal capabilities |
| «e» | on | off | Enables «dumb» terminal mode |
Different information shown by login process
Banner
Login process will display MikroTik banner after validating user name and password.
Actual banner can be different from the one shown here if it is replaced by distributor. See also: branding.
License
After logging in for the first time after installation you are asked to read software licenses.
Answer y to read licenses, n if you do not wish to read licenses (question will not be shown again). Pressing SPACE will skip this step and the same question will be asked after next login.
Demo version upgrade reminder
After logging into router that has demo key, following remonder is shown:
Software key information
If router does not have software key, it is running in the time limited trial mode. After logging in following information is shown:
After entering valid software key, following information is shown after login:
Applying and removing of the default configuration is done using console script (you can press ‘v’ to review it).
Different information shown by console process after logging in
System Note
It is possible to always display some fixed text message after logging into console.
Critical log messages
Console will display last critical error messages that this user has not seen yet. See log for more details on configuration. During console session these messages are printed on screen.
Prompt
Console can show different prompts depending on enabled modes and data that is being edited. Default command prompt looks like this:
Default command prompt shows name of user, ‘@’ sign and system name in brackets, followed by space, followed by current command path (if it is not ‘/’), followed by ‘>’ and space. When console is in safe mode, it shows word SAFE in the command prompt.
Hotlock mode is indicated by an additional yellow ‘>’ character at the end of the prompt.
It is possible to write commands that consist of multiple lines. When entered line is not a complete command and more input is expected, console shows continuation prompt that lists all open parentheses, braces, brackets and quotes, and also trailing backslash if previous line ended with backslash-whitespace.
When you are editing such multiple line entry, prompt shows number of current line and total line count instead of usual username and system name.
Sometimes commands ask for additional input from user. For example, command ‘/password’ asks for old and new passwords. In such cases prompt shows name of requested value, followed by colon and space.
Q: How do I turn off colors in console?
A: Add ‘+c’ after login name.
Q: After logging in console prints rubbish on the screen, what to do?
Q: My expect script does not work with newer 3.0 releases, it receives some strange characters. What are those?
A: These sequences are used to automatically detect terminal size and capabilities. Add ‘+t’ after login name to turn them off.
Q: Thank you, now terminal width is not right. How do I set terminal width?
A: Add ‘+t80w’ after login name, where 80 is your terminal width.
Reset Button
RouterOS password can only be reset by reinstalling the router OS or using the reset button (or jumper hole) in case the hardware is RouterBOARD. For X86(CHR) devices, an only complete reinstall will clear the password, along with other configurations. For RouterBOARD devices, several methods exist, depending on our model.
If you still have access to your router and want to recover its default configuration, then you can:
Using Reset Button
RouterBOARD devices are fitted with a reset button which has several functions:
You can also do the previous three functions without loading the backup loader, simply push the button immediately after you apply power. You might need the assistance of another person to push the button and also plug the power supply at the same time!
How to reset configuration
1) Unplug the device from power;
2) Press and hold the button right after applying power;
Note: hold the button until LED will start flashing;
3) Release the button to clear configuration;
Jumper hole reset
All RouterBOARD current models are also fitted with a reset jumper hole. Some devices might need an opening of the enclosure, RB750/RB951/RB751 have the jumper hole under one of the rubber feet of the enclosure.
Close the jumper with a metal screwdriver, and boot the board until the configuration is cleared:

Jumper reset for older models
The below image shows the location of the Reset Jumper on older RouterBOARDs like RB133C:
Don’t forget to remove the jumper after the configuration has been reset, or it will be reset every time you reboot!
Mikrotik winbox, где скачать и как использовать
Для настройки RouterOS Mikrotik существует удобная и простая программа winbox. Скачать последнюю версию можно с официального сайта Mikrotik https://download.mikrotik.com/routeros/winbox/3.18/winbox.exe, а так же с web интерфейса маршрутизатора Микротик, для этого подключитесь к lan сети роутера, запустите браузер, наберите в строке поиска ip адрес шлюза на открывшейся странице кликните значок winbox.
Нужно разобраться с MikroTik, но не определились с чего начать? В курсе «Настройка оборудования MikroTik» все по порядку. Подойдет и для начала работы с этим оборудованием, и для того, чтобы систематизировать знания. Это видеокурс из 162 уроков и 45 лабораторных работ, построен на официальной программе MTCNA. Проходить можно, когда удобно и пересматривать по необходимости – материалы курса выдаются бессрочно. Также есть 30 дней на личные консультации с автором. На пробу выдают 25 уроков бесплатно, заказать их можно на странице курса.
К сожалению, русского языка у приложения нет, но интерфейс интуитивно понятен, сложностей в работе не возникает. Так же работает winbox только в windows, если захотите запустить его, например под Ubuntu, то придется делать это только через wine. Для Linux утилиты winbox нет.
Как подключиться к Микротик через winbox
Для подключения к маршрутизатору запустите файл winbox.exe, в открывшемся окне введите ip адрес маршрутизатора, логин/пароль, в дефолтных настройках логин admin пароль пустой.
Для подключения нажмите кнопку «Connect», Каждый раз для подключения вводить ip адрес с логином и паролем не совсем удобно, нажмите кнопку Add/Set, для сохранения подключения. В дальнейшем достаточно два раза кликнуть по нужному подключению, что бы подключиться к маршрутизатору.
Еще одна интересная вкладка Neighbors, поиск доступных маршрутизаторов Mikrotik, при переходе на нее открывается список всех доступных в сети роутеров Микротик.
Для подключения кликните два раза по нужному маршрутизатору, введите логин и пароль.
Рабочее окно winbox
После подключения к маршрутизатору, мы попадаем в рабочее окно утилиты винбокс
Рассмотрим основные области
1.Главное рабочее окно, здесь открываются все окна настроек.
2. информация о подключении, адрес и модель маршрутизатора
3. Основное меню
4. Подменю
5. Кнопка «назад» отменяет предыдущий шаг настройки
6. Кнопка «вперед» возвращает отмененную настройку
7. Кнопка Safe Mode безопасный режим
Safe Mode-очень полезная функция winbox для включения нажмите на кнопку «Safe Mode». Функция этой кнопки заключается в том, что при потери связи между маршрутизатором Mikrotik и программой winbox, все настройки возвращаются к настройкам до нажатия на эту кнопку. Это полезно если идет удаленная настройка роутера через интернет, если в результате настройки, имеется возможность потерять связь с маршрутизатором, тогда при потери связи настройки вернуться к исходным и можно будет подключиться к Микротику заново. Не забудьте после всех манипуляций отжать кнопку Safe Mode, иначе после отключения от роутера все сделанные настройки будут сброшены.
Вопросы, проблемы и их решения
Какой порт используется для подключения к роутеру?
Для подключения к маршрутизатору Микротик винбокс использует по умолчанию порт 8291. Этот порт можно сменить в настройках, зайдите в меню ip-services, выберите winbox,
Так же можно изменить другие сервисные порты ssh, telnet, web.
Winbox не подключается к маршрутизатору.
1.Если программа не видит Микротик, проверьте не закрыт ли порт 8291, можно подключиться через web интерфейс по ssh или telnet, при подключении по ssh или telnet в консоли даем команду
и ищем строку наподобие
если такая строка имеется то даем команду
В открывшемся окне измените «drop» на «accept» и нажмите ctr^o
Цифра 2 берется из номера строки по первой команде.
2.проверьте настройку порта для винбокс, зайдите телнетом, ssh, через web интерфейс на Микротик и в ip-services проверьте настройку порта и включен ли сервис винбокс.
Телнет, ssh команда выглядет так
Что бы прописать порт 8291 введите команду
3.Попробуйте отключить все запрещающие правила в firewall. Зайдите через web интерфейс, ip-firewall, напротив каждого правила, где action=drop нажмите значок « — « удалить, или нажмите на это правило и снимите галочку enable.
Ошибка ERROR: router requires newer winbox, please upgrade
Означает, что необходимо обновить winbox, Скачайте последнюю версию с официального сайта http://mikrotik.com
Обучающий курс по настройке MikroTik
Нужно разобраться с MikroTik, но не определились с чего начать? В курсе «Настройка оборудования MikroTik» все по порядку. Подойдет и для начала работы с этим оборудованием, и для того, чтобы систематизировать знания. Это видеокурс из 162 уроков и 45 лабораторных работ, построен на официальной программе MTCNA. Проходить можно, когда удобно и пересматривать по необходимости – материалы курса выдаются бессрочно. Также есть 30 дней на личные консультации с автором. На пробу выдают 25 уроков бесплатно, заказать их можно на странице курса.
Если вы нашли ошибку, пожалуйста, выделите фрагмент текста и нажмите Ctrl+Enter.
MikroTik: типичные проблемы новичков

нужно менять пароль; делать резервное копирование; использовать безопасный режим; блокировать входящие DNS (и не только) запросы из Интернета; пользоваться Winbox-ом; цепочки input & prerouting; не нужно удалять стандартные настройки.
Всегда меняйте пароль
Куча роботов непрерывно сканирует сеть в поисках открытых портов. После того, как вы подключите своё устройство к Интернету, скорее всего не пройдёт и часа, как какой-нибудь робот его найдёт и попытается залогиниться, перебирая самые простые пароли, поэтому необходимо как можно быстрее поставить свой пароль (System → Users → admin → Password…)
Winbox
Управлять маршрутизатором через веб-интерфейс может и привычно, но он не столь функционален как Winbox. Скачать его можно из веб-интерфейса, но лучше с официального сайта, т.к. там всегда новейшая версия.
Резервное копирование
В RouterOS оно бывает двух разных видов: собственно бэкап и экспорт конфигурации. Бэкап удобен для быстрого восстановления работоспособности, а экспорт удобен для переноса конфигурации на другое устройство.
Проще говоря, имея бэкап (или экспорт), вы можете быть уверены в том, что что бы не случилось, вы можете вернуть «как было».
Чтобы сделать бэкап, нужно зайти в меню Files → Backup. После создания файла, его можно (и нужно) будет перетащить из Winbox мышкой на компьютер.
Экспорт делается через терминал (Winbox → New Terminal) командой:
Импорт делается аналогично:
Безопасный режим
При изменении настроек маршрутизатора, особенно если он находится физически далеко от вас, необходимо использовать «безопасный» режим. Он включается кнопкой «Safe Mode» в левом верхнем углу Winbox.
Когда этот режим включен, то в случае обрыва связи все изменения откатываются на момент до его включения. Таким образом по сути это страховка от обрыва связи при ошибочных изменениях конфигурации. Использование безопасного режима вместе с резервным копированием может сэкономить кучу времени и нервов.
DNS-сервер
По умолчанию встроенный в RouterOS DNS-сервер используется только для нужд самого маршрутизатора, однако если вы поставите эту галочку:
то маршрутизатор начнёт отвечать на любые входящие DNS-запросы. С одной стороны это нормальное использование маршрутизатора и часто это довольно удобно для решения типовых задач, с другой стороны, это может стать причиной больших проблем.
Как я уже говорил, куча роботов непрерывно сканирует сеть, и в случае нахождения неправильно настроенного DNS сервера, он может быть втянут в DDoS-атаку с помощью механизма DNS Amplification. Для пользователя Микротика это означает высокую загрузку процессора маршрутизатора и возможно полностью «забитый» канал в Интернет.
Защититься от этого просто. Для этого нужно в терминале создать такое правило, где вместо «INTERNET» указать ваш интерфейс, с помощью которого вы подключаетесь к провайдеру:
Затем нужно в Winbox убедиться, что это правило находится в самом низу, и выше него нет правил, разрешающих такой трафик.
Впрочем, иногда провайдеры сами осуществляют такую защиту и запрещают входящие запросы к адресам абонентов.
Цепочка input
Название цепочки может вводить многих в заблуждение, тем не менее эта цепочка не является местом, куда попадает весь входящий трафик. Весь входящий трафик попадает в prerouting, а затем уже по решению маршрутизации идёт либо в forward либо в input. Подробнее в соответствующем посте.
Стандартные настройки
Если инструкция, которую вы нашли в Интернете, говорит о том, что нужно удалять стандартные настройки фаервола, то это плохая инструкция.
Mikrotik: сброс настроек, бекапы и DualBoot
Разбор множества мелких, относительно связанных между собой, тем: программный и аппаратный сброс настроек, функция Protected RouterBoot, бекапы и экспорт конфигурации, разбивка flash памяти на разделы.
Программный сброс настроек
Если есть доступ к роутеру от пользователя с full правами, то можно сбросить все настройки через [System] → [Reset Configuration]
Аппаратный сброс настроек
Все зависит от модели роутера, возможно три варианта:
Присутствует кнопка reset
Для начала отключаем питание, зажимаем reset и включаем питание. Отпускаем через:
На wiki утверждают, что все девайсы оснащены подобной площадкой. Ради интереса вскрыл RB491-2nD и не обнаружил таковой.
Технология сброса: отключаем питание, замыкаем площадку(бипер издает хрипящий писк) и не отпускаем до полной загрузки.
Присутствует на старых моделях.
Технология сброса: отключаем питание, замыкаем перемычку, ждем полной загрузки, убираем перемычку.
Protected RouterBoot
Может случится ситуация, когда после сброса чужого(иначе вы бы знали) роутера он не будет загружаться дальше «первого пика» — это новая фитча от Mikrotik затирающая всю флеш память( включая RouterOS), для восстановления потребуется netinstall.
RouterBoot — начальный загрузчик на девайсах Mikrotik, с ним можно взаимодействовать через Serial интерфейс и одно из предназначений Protected RouterBoot не давать вмешиваться в процесс загрузки.
Загрузчик разделен на две части:
Посмотреть текущие версии можно в [System] → [RouterBoard]. Кнопкой [Upgrade] производится обновление Current загрузчика. Если система работает плохо и загружается только с резервного(как написано разделом выше), то в [Settings] можно явно указать recovery загрузчик в качестве постоянного, опция Auto Upgrade для обновления current загрузчика вместе с RouterOS. И раз мы тут — опция Silent Boot отключает звуки во время загрузки.
На каких версиях Firmware работает Protected RouterBoot
Гарантированную работу обещают для девайсов с Factory Firmware 3.24 и выше, если ваш девайс более старый, то функцию возможно активировать установив специальный пакет, но только на Bugfix версии RouterOS.
Даунгрейд до Bugfix и спец. версия загрузчика
[System] → [RouterBoard] → [Settings]
Включаем Protected RouterBoot=yes, что теперь.
Я не призываю вас включать эту опцию в обязательном порядке, думайте сами когда оно вам надо, а когда можно обойтись без подобных мер.
Восстановление прошивки средствами netinstall
Netinstall — универсальный инструмент для прошивки и предварительной настройки роутеров MikroTik. При использовании происходит ворматирование внутренней памяти и конфигурации, без изменения останутся только настройки в [System] → [RouterBOARD]
Конфликтует с некоторыми фаерволами и антивирусами(добавлять в исключения), могут быть проблемы при запуске от пользователей с ограниченными правами — запускаем «От администратора».
На что еще способен netinstall
Бекап и экспорт конфигурации в Mikrotik
Name — имя файла. по умолчанию будет —
Password — пароль. По умолчанию используется пароль текущего пользователя.
Don’t encrypt — не шифровать бекап.
[Files] → [Подсветить необходимый файл] → [Restore]
Экспорт и импорт конфигурации
export не сохраняет конфигурацию в файл, если явно не задать ключ file= расширение rsc будет добавлено автоматически.
DualBoot в Mikrotik(Partition)
Flash накопитель можно разбить на несколько разделов и установить несколько копий RouterOS(в том числе различных). В случае неудачной загрузки с основного раздела будет загружаться следующий указанный. Функция доступна на девайсах с MIPS, PowerPC и CCR серии.
Разбивка на разделы:
Необходимо указать итоговое число разделов. Есть два ограничения: максимальное число разделов — 8 и минимальный размер раздела: 32MB on MIPS; 40MB on PowerPC; 48MB on CCR.
Новый раздел будет пустым, необходимо скопировать на него текущую прошивку через [Copy to].
В консоли лучше видны свойства разделов: Активный(A) — с которого будет произведена следующая загрузка и раздел с которого была загружена система®.
Смена активного раздела происходит в его свойствах кнопкой [Activate]. Опция Fallback to отвечает за выбор раздела, если загрузка не удалась.
[Save Config To] — Сохранить конфигурацию с текущего® раздела на выбранный.
[Restore Config From] — Сохранить конфигурацию с выбранного раздела на текущий®.
Функционал интересный, но имеет два недостатка: Не все роутеры комплектуются достаточным количеством flash памяти. Сбои в RouterOS, даже при обновлении, не такое частое явление.
MikroTik Protection (basic device security setting)
Basic configuration of MikroTik router protection: device configuration, firewall configuration, port scan protection, password guessing protection.
🔔 The article gives examples of commands in the MikroTik terminal. If, when pasting a command into the terminal, commands are automatically inserted (while executing you get a bad command name or expected end of command error), press Ctrl+V to disable this feature.
Content
Users
Create a new user with a unique name and remove the built-in default system user account – admin.
Do not use simple usernames, the password must meet security requirements.
If several users have access to the device, you can specify the rights to the selected user in more detail. Create a new group and define the rights of users of this group.
Services
Disable unused services
Disable MikroTik services that we do not plan to use.
Change Winbox Port
When changing the port, make sure not to assign Winbox a port used by another service, the list is here.

Update
Vulnerabilities are periodically found in MikroTik equipment (as in the equipment of other network vendors) – timely updates are a necessary measure to ensure device security.
If a version update is found, update the device.
🔗 Script Checking for RouterOS update, will send a notification about the release of a new firmware version.
Interfaces
Let’s combine internal (trusted) and external (untrusted) interfaces into lists for the convenience of further management.
List “Internal interfaces”
We put in this list the interfaces of the local network, VPN connections, etc.
List “External interfaces”
We put external interfaces (Internet, etc.) into this list.

Neighbors
Let’s configure device discovery using Neighbor Discovery only for internal interfaces or allowed interfaces.
Allow detection only from the interfaces listed in the InternalInterfaces list.

Firewall
We configure access restrictions to the router and network devices using the MikroTik firewall.
⚠️ Before adding restrictive rules – enable MikroTik Safe Mode!
Allow established and related connections
Rule “Trusted” – allow already established and related connections to reduce the load on the central processor of the router.
Place the rule first in the Filter Rules list (place the rule based on its number in the comment).
Drop invalid packages
Rule “Drop Invalid Packet” – drops invalid packets.
Place the rule after the Trusted rule, in the Filter Rules list (place the rule based on its number in the comment).
Allow ICMP
Rule “ICMP” – allows ICMP traffic to the device.
Place the rule based on its number in the comment.
Black list
Create list
We create a BlackList, in which we will put IP addresses, which for some reason are denied access to MikroTik or protected devices.
Create rule
Let’s create a “BlackList” rule that rejects requests from IP addresses from the BlackList.
To save CPU resources, place the prohibiting rule in the Prerouting table.
⚠️ Rules placed in Prerouting are executed before dividing traffic into Input and Forward chains!
Place the rule based on its number in the comment.

The screenshot shows additional rules:
Block port scanners
Rule of preventive blocking – we block bots/users of devices scanning ports on the Internet to search for vulnerabilities. Let’s make a list of unused ports by our router, add the IP addresses of devices who are trying to access the specified ports in the BlackList.
To protect against scanners that are purposefully looking for MikroTik devices, we will add unused ports (MikroTik services) and the standard Winbox port 8291 (which we changed according to the recommendation) to the list. Let’s add popular vulnerable ports (if the attacker checks these ports on the router, we block all his further actions).
We will apply the rule only for new connections.
Trap TCP ports
Create rule
We put the IP address of the untrusted device in the BlackList, for 10 hours:
Place the rule by its number in the comment.

🚯 For 10 hours in BlackList there are about 500 IP addresses performing attempts to scan “vulnerable ports” of the MikroTik device.
Allow Winbox Port
Rule “Winbox” – allow connection to the Winbox port (in the example – 30122).
Place the rule based on its number in the comment.
Drop not allowed connections
Rule “Drop all” – we will drop all connections that were not allowed before and are not included in the list of trusted (internal) interfaces (InternalInterfaces).

Place the rule at the last position in the Firewall Filter Rules
Blocking Bruteforce
Rule “Bruteforce” – put the device’s IP address in the BlackList, if an second attempt to authorize on the device fails.
If an authorization attempt is unsuccessful, MikroTik sends a response with the text “invalid user name or password” to the requesting device.
We put the IP address of the device in the BlackList, for 70 minutes.

🟢 MikroTik protection (basic device security setting), discussed in this article. I hope you have now been able to configure router services and firewall rules by improving the protection of the MikroTik router and LAN devices. However, if you run into any problems while setting up, feel free to write in the comments. I will try to help.
MikroTik настройка Firewall: Правильная настройка безопасности роутера
В роутерах MikroTik настройка firewall имеет много тонкостей и нюансов. Из этой статьи мы узнаем, как правильно настроить firewall на MikroTik. Научимся защищать роутер от перебора паролей, сканирования портов, DDoS и других видов атак.
Научиться настраивать MikroTik с нуля или систематизировать уже имеющиеся знания можно на углубленном курсе по администрированию MikroTik. Автор курса, сертифицированный тренер MikroTik Дмитрий Скоромнов, лично проверяет лабораторные работы и контролирует прогресс каждого своего студента. В три раза больше информации, чем в вендорской программе MTCNA, более 20 часов практики и доступ навсегда.
Разберем примеры того, как нельзя настраивать брандмауэр и какие ошибки допускают системные администраторы при конфигурировании безопасности роутера.
А также расскажу, что не умеет firewall MikroTik, поговорим о видах правил, почему важен порядок их расположения и способах организации файрвола.
Схема прохождения трафика MikroTik
Схема прохождения пакетов нужна для понимания того, как движется трафик внутри маршрутизатора, через какие логические блоки он проходит. Написание сложных конфигураций возможно только при понимании данной схемы.

Трафик должен принадлежать определенной цепочке, которые бывают:
Описание содержимого цепочек:
Пакеты, направленные маршрутизатору (chain: input):
Пакеты проходящий через роутер (chain: forward):
Трафик исходящий от MikroTik (chain: output):
MikroTik настройка firewall. Connection Tracker
Connection Tracker выполняет следующие функции:
Место Connection Tracker на схеме Traffic Flow:
По умолчанию Connection Tracker работает в режиме auto. Это значит, что он будет работать тогда, когда для firewall будет создано хотя бы одно правило. Помимо этого, могут быть установлены следующие режимы:
Connection State. Состояние соединений
С помощью правил мы можем обрабатывать пакеты на основании их состояния. Любое соединение будет находиться в одном из следующих состояний:
Connection State не совпадает с TCP State.
Connection List
На вкладке “Connections”, можно увидеть информацию о всех подключениях. Выглядит это следующим образом:
Давайте посмотрим какие данные мы можем получить:
Все свойства, указанные во вкладке Connection List, предназначены только для чтения.
MikroTik firewall. Общее описание
Основное назначение брандмауэра является то, что на основании правил разрешать или запрещать передачу данных из одной сети в другую.
Что не умеет брандмауэр MikroTik:
Настройка безопасности маршрутизатора MikroTik может быть реализована двумя способами:
Для данной статьи мы рассмотрим пример нормально закрытого брандмауэра. Так как, на мой взгляд, нормально открытый имеет ряд недостатков:
Важно! Рекомендуем выполнять настройку firewall при удаленном подключении к MikroTik используя режим Safe Mode.
В случае неправильной настройки бранмауэра и потери доступа к устройству, данная функция поможет восстановить подключение, отменив внесенные изменения. Подробнее узнать о безопасном режиме можно в материале: MikroTik Safe Mode.
Место брандмауэра на Packet Flow:
Firewall на MikroTik. Порядок расположения правил
Работу брандмауэра MikroTik условно можно разделить на две части: условие (если…) и действие (то…). Могут содержать несколько условий, при этом, чтобы правило сработало должны быть выполнены все условия.
Правила должны состоять в цепочке (chain):
А также подразделяются на терминирующие и нетерминирующие:
Терминирующие правила содержат окончательное действие – принять, отклонить.
Нетерминирующие – просто производят какой-то процесс – занести в лог, добавить в address list.
При настройке firewall MikroTik важно соблюдать последовательность правил, так как обрабатываются они по порядку и сразу с нужной цепочки.
Обработка заканчивается после первого совпадения с терминирующим правилом. Если совпадения нет, то пакет отправляется на следующий этап обработки по схеме прохождения трафика.
RAW Filter
Назначение RAW Filter – пропускать или отклонять пакеты до их попадания в Connection Tracker. За счет этого может быть снижена нагрузка для ЦП во время DoS-атак.
В RAW-Filter только две цепочки – Prerouting и Output – и меньше возможностей настройки по сравнению с «классическим» файрволом. Место Raw Filter на Traffic Flow:
MikroTik настройка firewall. Базовая защита роутера
Приступим к настройке firewall на MikroTik. Как говорилось ранее мы будем настраивать нормально закрытый тип брандмауэра.
Во время настройки безопасности маршрутизатора будем придерживаться следующих принципов:
Настройка WAN-интерфейса
Чтобы избежать ошибок и получить универсальный конфиг, давайте создадим новый interface list и добавим туда WAN интерфейс:
Создали новый interface List с именем “ISP”, добавим в него WAN-интерфейс:
В нашем примере WAN настроен на порту ether1, если у вас интернет настроен на другом порту или PPPoE-подключение, то подставьте свое значение.
Connection Tracker
Следующим шагом изменим время жизни для установленных подключений, по умолчанию у MikroTik данный параметр равен одному дню. Откроем:
Установим параметру TCP Established Timeout значение равное 2-м часам:
Настройка безопасности цепочки INPUT
Откроем вкладку Filter Rules и настроим firewall для входящего трафика на роутер MikroTik (chain: input).
Первым создадим условие, разрешающее established, related и untracked-трафик:
Переходим на меню «Action»:
Следующее условие будет запрещающее, чтобы заблокировать неидентифицированный трафик (invalid):


Открыв порт 8291 мы разрешим к Mikrotik удаленный доступ по Winbox, для оперативной настройки роутера:

Следующим шагом разрешим DNS-запросы со всех интерфейсов, кроме “ISP”:
Обратите внимание, что перед ISP стоит “!”. Это очень важно!
Если вы разрешим запросы извне на 53 порт, то любой внешний хост сможет оправлять запросы нашему DNS-Серверу, тем самым сильно увеличивая нагрузку на роутер и использовать его для проведения атак. Подробнее об этом можно узнать из статьи: MikroTik настройка DNS Server.
Текущая настройка закрывает 53 порт для внешних интерфейсов.
Последним правилом для цепочки Input, мы заблокируем остальной трафик:

Переходим к настройке цепочки forward.
Настройка безопасности цепочки FORWARD
Напомним, что цепочка forward участвует в обработке пакетов, проходящие через маршрутизатор.
Первым условием разрешим established, related и untracked-соединения:

Заблокируем неидентифицированный трафик (invalid):

Запрещаем все извне, кроме DSTNAT:

На этом базовая настройка firewall MikroTik завершена. Окончательный вариант конфигурации и расположения правил firewall должен быть следующий:
Для удобства сохраню данную конфигурацию. Скачать файл конфигурации базовой настройки Firewall MikroTik можно тут.
Для доступа компьютеров из локальной сети в интернет необходимо настроить NAT. Как это сделать — подробно написано в статье MikroTik проброс портов и настройка NAT для доступа в интернет.
Отключить firewall на MikroTik
Рассмотрим как в MikroTik отключить firewall. Если при конфигурировании роутера или проверки работы сервиса возникает необходимость отключить файрвол, то сделать это довольно просто. Мы можем выключить все активные правила нажатием кнопки «Disable», предварительно выделив их:
Либо вовсе удалить их, предварительно сохранив конфигурацию. По умолчанию брандмауэр Микротик настроен как правильно открытый, по этому все что не запрещено — разрешено.
MikroTik настройка firewall. Как защитить роутер от DDoS-атаки
DoS или DDoS-атака если говорить простыми словами представляет из себя множественную отправку запросов на атакуемый хост, что выводит систему из строя или значительно затрудняет доступ к ней.
Защитить MikroTik от DDoS атак можно с помощью двух методов:
Рассмотрим эти способы подробнее.
Защита MikroTik от DDoS-атак с помощью Connection Limit
Выполним настройку firewall, чтобы MikroTik мог выделять IP-адреса, одновременно открывшие 30 и более соединений, заносить их в черный список и блокировать доступ.
Обработка большого количества соединений с помощью Connection Limit вызывает большую нагрузку на процессор.
Рекомендуется использовать вместе с connection-state=new или с tcp-flags=syn.
Откроем пункт меню «Advanced»:
Следующим условием мы укажем количество подключений с одного IP-адреса при достижении которого хост попадет в черный список:
Добавляем в черный список:
Создадим запрещающее правило для адресов из черного списка «BAN_black_list»:


Расположим правила firewall следующим образом:
Если у вас внутри локальной сети есть сервис “смотрящий” наружу и подверженный DDoS атаке, то необходимо создать аналогичное правило для цепочки «Forward», как показано на рисунке выше.
На этом настройка защиты MikroTik от DDoS-атаки методом Connection Limit закончена.
Защита MikroTik от DDoS-атаки с помощью Destination Limit
Настроим защиту firewall MikroTik от DDoS атак так, что роутер будет передавать все новые попытки подключения на пользовательскую цепочку, которая проверяет условие:
Перенаправляем новые попытки подключения в пользовательскую цепочку:
Перейдем к конфигурированию пользовательской цепочки:

Добавляем хосты, которые подошли под условия в черный список:

Создадим запрещающее правило блокирующее данный лист:

Расположим правила firewall так:
Не забывайте, если у вас есть сервис внутри локальной сети, “смотрящий” наружу, то необходимо добавить правило в “Forward”.
На этом настройка firewall MikroTik от DDoS-атак закончена.
MikroTik настройка firewall. Защита от брутфорса
Рассмотрим, как защитить MikroTik от перебора паролей (брутфорс). Покажем это на примере попыток перебора паролей для входа на MikroTik через Winbox.
Аналогичным образом можно защищать сервисы, к которым можно получить доступ брутфорс-атакой.
Но также хочется отметить, что в настоящее время, на практике данные способы защиты показывают себя малоэффективно, альтернативным способом защиты от Brute-force атак можно ознакомиться в статье настройка Port Knocking MikroTik.
Повысим безопасность роутера MikroTik, добавив условие в конфигурацию firewall:
Направим все новые подключения адресованные на порт 8291 с внешнего интерфейса в пользовательский набор правил (anti-BruteForce):
Дальше создадим пользовательский набор правил, который будет проверять поведение хостов на предмет перебора паролей и блокировать такие попытки.

Откроем меню “Action”:
Следующим шагом добавляем хост, подходящий под условие в черный список:

Блокируем все соединения из черного списка «BAN-BruteForce» в RAW Filter:
Далее вкладка “Advanced”:
Создадим запрещающее правило:
Расположим ранее созданные правила firewall следующим образом:
С защитой от перебора паролей для RDP-подключений дела обстоят сложнее и требует более детального и гибкого подхода. Например, аналогичное правило при разрыве подключения и попытках восстановления, заблокирует пользователя.
Как защитить RDP соединение от брутфорс-атак мы поговорим в отдельной статье.
На этом настройка защиты Mikrotik от перебора паролей закончена.
Настройка безопасности MikroTik. Защита от сканирования портов
Давайте немного модифицируем нашу конфигурацию firewall, что позволит защитить MikroTik от сканирования портов. Сканирование портов – это попытки подключиться на разные порты с целью определения их доступности.
Сканирование портов может осуществляться разными способами, каждый из которых имеет свои особенности. Настроим защиту от большинства известных видов сканирования.
Не буду вдаваться в теорию, а просто покажу готовое решение, которое успешно работает многие годы.
Чтобы не запутаться перед каждым новым условием я буду писать заголовок, который, будет служить комментарием к нему.
Port scanners to list:
Защиту от сканирования портов для MikroTik можно настроить с помощью опции Port Scan Detection (PSD):


NMAP FIN Stealth scan:


SYN/FIN scan:


SYN/RST scan:


FIN/PSH/URG scan:


ALL/ALL scan:


NMAP NULL scan:


Осталось создать запрещающее правило, которое заблокирует соединения для IP-адресов из списка “ BAN_black_list”:
Меню “Advanced” в пункте Src. Address List из выпадающего меню выберем наш адрес лист (BAN_black_list):
Данное условие firewall необходимо добавить в цепочки “Input” и ”Forward”. Правильное расположение всех правил можно посмотреть на рисунке ниже:
Скачать полную конфигурацию firewall MikroTik с настроенной защитой от сканирования, перебора паролей и DoS-атак можно тут.
А также рекомендуем изучить статьи:
Настройка firewall на MikroTik закончена. Надеюсь, данная статья была вам полезна. Если возникли вопросы пишите в комментарии.
Научиться настраивать MikroTik с нуля или систематизировать уже имеющиеся знания можно на углубленном курсе по администрированию MikroTik. Автор курса, сертифицированный тренер MikroTik Дмитрий Скоромнов, лично проверяет лабораторные работы и контролирует прогресс каждого своего студента. В три раза больше информации, чем в вендорской программе MTCNA, более 20 часов практики и доступ навсегда.
Стена огня. Учимся настраивать файрвол на примере MikroTik
Партнер
Содержание статьи
Файрвол, как и многое другое в RouterOS, пришел из Linux и представляет собой доработанный iptables. Поэтому многие мануалы по настройке iptables легко можно сконвертировать в формат RouterOS. Файрвол состоит из следующих таблиц:
Таблицы состоят из цепочек. Цепочки в разных таблицах могут отличаться. Чуть позже станет ясно почему. В нашей таблице Filter три цепочки:
Два важных момента, о которых нужно помнить.
Момент первый. У трафика в forward всегда есть входящий и исходящий интерфейсы — трафик влетел в input, обработался процессом маршрутизации и должен вылететь в output. У входного трафика не может быть исходящего интерфейса — он обработается внутри роутера и никуда дальше не полетит. Также у выходного трафика не может быть входящего интерфейса — этот трафик генерируется самим роутером (это либо новый трафик, либо созданный роутером ответ на трафик, пришедший в input).
Момент второй. У трафика не существует «внешнего» или «внутреннего» интерфейсов. Роутеру плевать, что ты считаешь внешним, — для него есть интерфейс, в который трафик вошел, и интерфейс, с которого трафик уйдет.
Правила образуют цепочки. У каждого правила может быть только одна цепочка. По умолчанию политика у всех цепочек — все разрешено. Правила срабатывают в таблицах в зависимости от их порядка: сначала пакет обработается первым правилом, затем вторым и так далее. Хорошим тоном считается упорядочивать правила внутри таблиц по цепочкам: сначала — пачка правил input, затем — forward, в конце — output.
Трафик будет проходить по правилам только в пределах своей цепочки. И если сначала идет input, потом forward, затем снова input, то трафик input все равно никогда не попадет в forward, то есть такое расположение правил не повлияет на прохождение трафика, а только запутает админа. В пределах одной таблицы пакет не перепрыгнет из одной цепочки в другую, пока админ это явно не укажет.
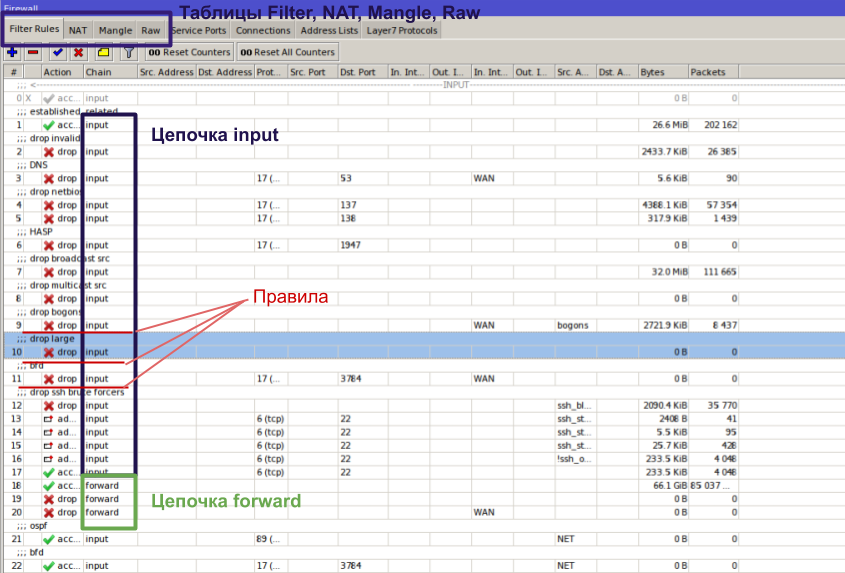
Xakep #253. Сканеры уязвимостей
Connection Tracking
Еще одна важная вещь для понимания работы файрвола — механизм определения состояния соединений — Connection Tracking (или просто ConnTrack). У RouterOS есть специальная таблица, в которой хранятся данные о состоянии соединений. Благодаря ей работает NAT и многие другие части файрвола.
Механизмы ConnTrack проверяют, принадлежит ли пришедший на роутер пакет какому-либо из потоков, чтобы применить к нему политики всего потока или как-то упорядочить пакеты в пределах одного или нескольких потоков (например, для нарезки скорости).
Для ConnTrack существуют четыре состояния пакетов:
Состояние потока не связано с флагами TCP: SYN, ACK, FIN. Для UDP и других stateless-протоколов в таблице ConnTrack тоже содержатся все возможные состояния.
Работа ConnTrack требует ресурсов процессора и при больших объемах трафика может существенно нагрузить CPU. Но ConnTrack нужен не везде, и его можно отключить. Например, у провайдеров на стыке с вышестоящим провайдером стоят роутеры, которые молотят десятки гигабит трафика. На этих роутерах, как правило, нет NAT (прямая маршрутизация), а трафик фильтруется уровнем ниже, чтобы не перегружать и без того нагруженный бордер. То есть в этом случае ни к чему проверять каждый пакет на принадлежность какому-либо потоку.
WARNING
Выключенный ConnTrack ломает NAT и фичи файрвола, основанные на трекинге потоков: connection-bytes, connection-mark, connection-type, connection-state, connection-limit, connection-rate, layer7-protocol, new-connection-mark, tarpit.
Рекомендации по настройке
Переходим к практике настройки. В этой статье я расскажу о таблице Filter — той, что занимается фильтрацией трафика. Как мы выяснили чуть выше, за трафик к самому роутеру отвечает цепочка input, а за трафик, который проходит через роутер, — forward. Займемся защитой самого роутера.
Первое и самое главное, что нужно помнить при работе с файрволом, было описано еще в утерянной главе «Слова о полку Игореве»: «удаленная настройка файрвола — к дальней дороге». Так что уважай предков — чти их заветы и используй Safe Mode.
Работает этот режим так: ты нажимаешь кнопку Safe Mode в интерфейсе, и она остается нажатой. Дальше ты делаешь все, что собирался, но применятся эти изменения, только когда ты снова кликнешь по кнопке. Если они приведут к обрыву взаимодействия роутера и конфигуратора WinBox (например, если ты зафильтровал свои же пакеты или отключил интерфейс), то роутер вернется в состояние, которое было до входа в Safe Mode.
Запоминается только 100 действий, но этого хватит на большинство случаев. Перезагрузки не будет — откат мгновенный. Из консоли этот режим активируется по Ctrl-X.
Есть два подхода к настройке файрвола:
Ни один из них нельзя назвать однозначно правильным. Я приверженец второго подхода, но в незнакомых сетях применяю первый.
Чтобы разрешить нужный трафик, нужно определиться с этим самым трафиком. В случае с input это сделать довольно просто. Вот что нужно для корректной работы роутера.
Определились? Открываем нужное и закрываем все остальное.
Файрвол работает по принципу «если [условие], то [действие]». Если выполняются условия, заданные во вкладках General, Advanced, Extra, то к пакету применяется действие из вкладки Action. На сегодня нам будет достаточно условий src/dst address, protocol, src/dst port, in/out interface, connection-state. Их значения понятны по названию, но если вдруг неясно — вперед, читать про основы TCP/IP. Самые распространенные действия: accept — разрешено, drop — запрещено (пакет просто уничтожится), reject — запрещено, но отправитель получит информацию, что пакет был уничтожен по причине, указанной в reject-with.
Каждое правило на пути пакета отнимает процессорное время. И если в небольших сетях это некритично, то при серьезных объемах трафика нужно учитывать этот момент. Рассмотрим на примере.
В этом случае при попытке подключиться к роутеру по SSH с адреса 10.11.0.11 файрвол будет шесть раз обращаться к CPU с вопросом, пропустить ли этот трафик. Выглядит это примерно так: «8291 — не наш порт — пропускаем дальше. 10.0.0.0/24 — не наша подсеть, пропускаем дальше. То же для 10.10.0.0/24, и только шестое правило подходит». На шестом шаге файрвол поймет, что трафик легитимный и его можно пропустить.
Пакеты FTP и весь другой неразрешенный трафик будет дергать CPU семь раз — первые шесть и последний дроп. И это в выдуманном примере из семи правил. В реальной жизни правил на порядок или два больше.
Первое, что мы можем сделать, — объединить два порта в одном правиле:
Немного снизили нагрузку. Но осталось три идентичных правила с разницей лишь в адресах. С помощью списка адресов (Address List) мы можем объединить их в одно.
Address List — фича RouterOS, которая позволяет объединять IP-адреса, подсети и DNS-имена в одну запись.
Создаем три записи в одном Address List.
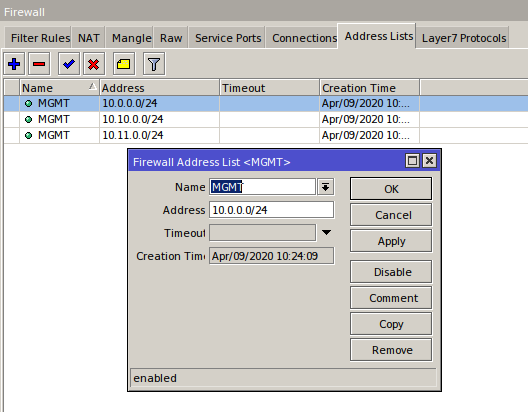
И применяем его к нашему правилу.
Так из семи правил мы получили два и избавились от лишней нагрузки. По аналогии со списками адресов работают списки интерфейсов (я рассматривал их в предыдущей статье — «Защищаем MikroTik»): объединяем в один interface list интерфейсы разных провайдеров и вешаем правила уже не на сами интерфейсы, а на списки. Так мы не только уменьшим нагрузку, но и упростим жизнь админа: чем меньше правил, тем удобнее обслуживать систему.
Еще один способ облегчить работу файрволу — использовать ConnTrack. Понятно, что established-пакетов будет намного больше, чем new, related и invalid, вместе взятых. А раз мы разрешили первый пакет из потока, то все остальные пакеты в этом потоке можно считать легитимными. Поэтому просто создаем правило «разрешить established» и помещаем его в самом верху.
Выбирай нужные тебе протоколы и порты, создай соответствующие списки адресов и интерфейсов. Открой все, что нужно, и поставь последним правилом drop all. На этом основную настройку цепочки input можно считать завершенной.
К слову, по умолчанию файрвол снабжен достаточно крепкой настройкой — ее вполне хватит, чтобы нормально работала сеть практически любых размеров. Но всегда есть какие-то особенности и любой конфиг можно улучшить с учетом своих условий.
Для примера конфигурации можешь взять мой шаблон.
Траблшутинг
Когда файрвол не работает или работает не так, как подразумевалось при настройке, виноват админ. Магии не бывает. Первое, на что стоит обратить внимание при траблшутинге, — счетчики пакетов. Если счетчик не увеличивается, значит, трафик в него не попадает. А если трафик не попадает, значит, либо этого трафика просто нет, либо он был обработан стоящим выше правилом.
Ты же помнишь, что правила файрвола работают по принципу «кто первый встал — того и тапки»? Если пакет попал под действие правила, то дальше он уже не пойдет. Значит, нужно искать проблему выше. Просто копируем наше правило, action ставим accept (для траблшутинга не делай дроп — так при проверке можно сломать себе доступ или нарушить работу сети) и постепенно двигаем его наверх до первого увеличения счетчиков в этом правиле. Если через это правило уже проходил трафик, то счетчики будут ненулевые и можно пропустить нужные нам пакеты, — просто сбрось счетчики в этом правиле или во всех кнопками Reset Counters.
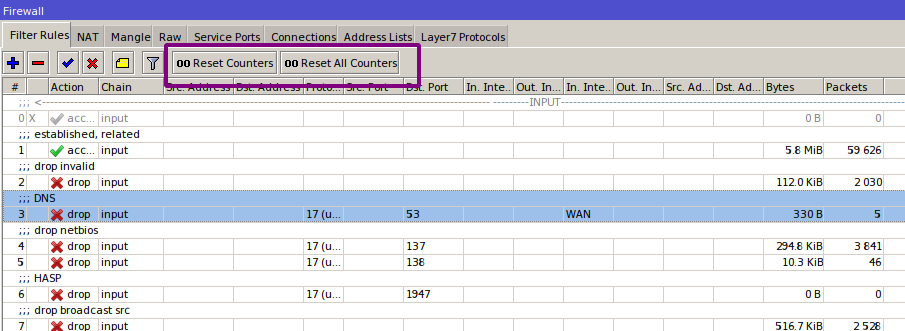
Предположим, мы нашли правило, в которое попадает наш трафик, а попадать не должен. Нужно понять, почему так происходит. В этом нам поможет опция Log. Во вкладке Action ставим галочку Log (можно написать префикс для правила, чтобы было проще отлавливать его в логах) и смотрим логи, где написаны все характеристики пакетов, попадающих под правило. Среди характеристик: цепочка, входящий и исходящий интерфейсы, адреса и порты источника и получателя, протокол, флаги, размер пакета, действия NAT.
Если даже в самом верху в правиле не будут увеличиваться счетчики, убирай правила из условия по одному. Начинай с интерфейсов — админы часто путаются в своих представлениях о том, откуда или куда должен идти трафик (например, при коннекте к провайдеру через PPPoE или в туннелях между филиалами или сложном роутинге). Счетчики пошли? Включаем лог и смотрим интерфейсы и другие параметры.
Если и это не помогает — пришло время тяжелой артиллерии. Идем в Tools → Torch и изучаем трафик на роутере. Может, ожидаемого трафика вовсе нет. Еще один крутой инструмент — аналог tcpdump — Tools → Packet Sniffer. Разбор работы этих инструментов тянет на отдельную статью (если она тебе интересна — сообщи об этом в комментариях к статье).
Чтобы упростить траблшутинг, можно использовать функцию комментирования. Если из-за комментов окно становится слишком большим и это мешает смотреть на правила, воспользуйся инлайновыми комментариями (Inline Comments). Так комменты встанут с правилом в одну строку и в окно будет умещаться больше правил.
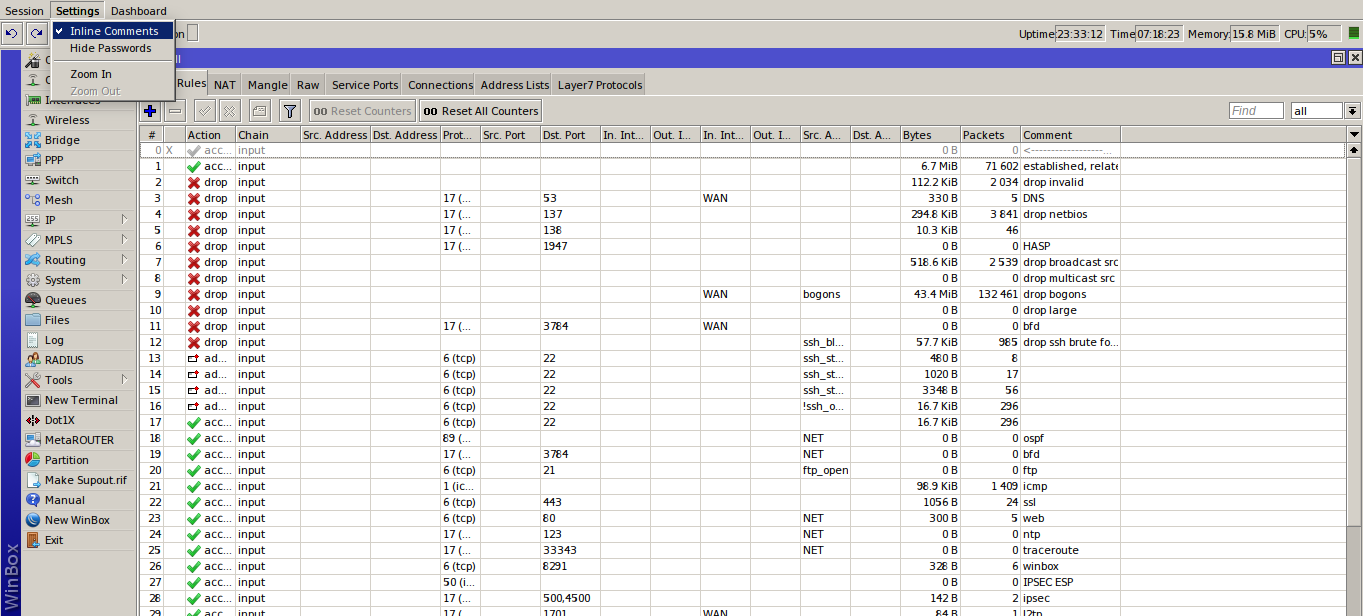
Также рекомендую распределять правила по порядку, следуя какой-то определенной логике. И старайся ее поддерживать на всех роутерах.
Итоги
В этой статье приведены только основы настройки файрвола и главные методы диагностики. Кроме RouterOS, эти принципы применимы и для Linux. В следующей статье разберем более сложные правила, которые позволяют защититься от не самых простых атак, и разберем цепочку Forward, а также создадим свои цепочки.
Overview
This article describes a set of commands used for configuration management.
Configuration Undo/Redo
A simple example to demonstrate the addition of firewall rule and how to undo and redo the action:
We have added firewall rule and in /system history we can see all what is being done.
Let’s undo everything:
As you can see firewall rule disappeared.
Now redo the last change:
System history is capable of showing exact CLI commands that will be executed during Undo or Redo actions even if we perform the action from GUI, for example, detailed history output after adding TCP accept rule from WinBox:
Safe Mode
Sometimes it happens that the router’s configuration is changed in a way that will make the router inaccessible (except local console). Usually, this is done by accident, but there is no way to undo the last change when the connection to the router is already cut. Safe mode can be used to minimize such risk.
Safe mode is entered by pressing Ctrl-X. To save changes and quit safe mode, press Ctrl-X again. To exit without saving the made changes, hit Ctrl-D

Message Safe Mode taken is displayed and prompt changes to reflect that session is now in safe mode. In WinBox safe mode is enabled by toggling the Safe Mode toggle button on the left side of the toolbar.
All configuration changes that are made (also from other login sessions), while the router is in safe mode, are automatically undone if the safe mode session terminates abnormally. You can see all such changes that will be automatically undone tagged with an F flag in system history:
Now, if telnet connection, WinBox terminal (if the safe mode was enabled on WinBox terminal window), or WinBox connection is cut, then after a while (TCP timeout is 9 minutes) all changes that were made while in safe mode will be undone. Exiting session by Ctrl-D also undoes all safe mode changes, while /quit does not.
If another user tries to enter safe mode, he’s given the following message:
If too many changes are made while in safe mode, and there’s no room in history to hold them all (currently history keeps up to 100 most recent actions), then the session is automatically put out of the safe mode, no changes are automatically undone. Thus, it is best to change the configuration in small steps, while in safe mode. Pressing Ctrl—X twice is an easy way to empty the safe mode action list.
System Backup/Restore
System backup is the way to completely clone routers configuration in binary format. The backup file contains not just configuration, but also statistics data, logs, etc. The backup file is best used to save and restore configuration on the same device, for moving configuration to other devices, use export files instead.
Backup files contain sensitive information (passwords, keys, certificates). The file can be encrypted, but even then backups should be stored only in a secure location.
Restoring backup files should be done only on the same router or on a similar router when the previous router fails. A backup must not be used to clone configuration on multiple network routers.
Example to save and load backup file:
Import/Export
RouterOS allows to export and import of parts of the configuration in plain text format. This method can be used to copy bits of configuration between different devices, for example, clone the whole firewall from one router to another.
An export command can be executed from each individual menu (resulting in configuration export only from this specific menu and all its sub-menus) or from the root menu for complete config export.
Following command parameters are accepted:
| Property | Description |
|---|---|
| compact | Output only modified configuration, the default behavior |
| file | Export configuration to a specified file. When the file is not specified export output will be printed to the terminal |
| hide-sensitive | Hide sensitive information, like passwords, keys, etc. |
| verbose | With this parameter, the export command will output whole configuration parameters and items including defaults. |
For example export configuration from /ip address menu and save it to file:
By default export command writes only user-edited configuration, RouterOS defaults are omitted.
For example, IPSec default policy will not be exported, and if we change one property then only our change will be exported:
Notice the * flag, it indicates that entry is system default and cannot be removed manually.
Here is the list of all menus containing default system entries
| Menu | Default Entry |
|---|---|
| /interface wireless security-profiles | default |
| /ppp profile | «default», «default-encryption» |
| /ip hotspot profile | default |
| /ip hotspot user profile | default |
| /ip ipsec policy | default |
| /ip ipsec policy group | default |
| /ip ipsec proposal | default |
| /ip ipsec mode-conf | read-only |
| /ip smb shares | pub |
| /ip smb users | guest |
| /ipv6 nd | any |
| /mpls interface | all |
| /routing bfd interface | all |
| /routing bgp instance | default |
| /routing ospf instance | default |
| /routing ospf area | backbone |
| /routing ospf-v3 instance | defailt |
| /routing ospf-v3 area | backbone |
| /snmp community | public |
| /tool mac-server mac-winbox | all |
| /tool mac-server | all |
| /system logging | «info», «error», «warning», «critical» |
| /system logging action | «memory», «disk», «echo», «remote» |
| /queue type | «default», «ethernet-default», «wireless-default», «synchronous-default», «hotspot-default», «only-hardware-queue», «multi-queue-ethernet-default», «default-small» |
Configuration Import
Root menu command import allows running configuration script from the specified file. Script file (with extension «.rsc») can contain any console command including complex scripts.
For example, load saved configuration file
Import command allows to specify following parameters:
| Property | Description |
|---|---|
| from-line | Start executing the script from the specified line number |
| file-name | Name of the script (.rsc) file to be executed. |
| verbose | Reads each line from the file and executes individually, allowing to debug syntax or other errors more easily. |
Auto Import
It is also possible to automatically execute scripts after uploading to the router with FTP or SFTP. The script file must be named with extension *.auto.rsc. Once the commands in the file are executed, a new *.auto.log file is created which contains import success or failure information.
Configuration Reset
RouterOS allows resetting configuration with /system reset-configuration command
This command clears all configuration of the router and sets it to the factory defaults including the login name and password (‘admin’ with an empty password). For more details on the default configuration see the list.
After the configuration reset command is executed router will reboot and load the default configuration.
The backup file of the existing configuration is stored before reset. That way you can easily restore any previous configuration if reset is done by mistake.
If the router has been installed using Netinstall and had a script specified as the initial configuration, the reset command executes this script after purging the configuration. To stop it from doing so, you will have to reinstall the router.
It is possible to override default reset behavior with the parameters below:
For example hard reset configuration without loading default config and skipping backup file:
And the same using Winbox:

Command Line Interface
Вы просматриваете старую версию данной страницы. Смотрите текущую версию.
The console is used for accessing the MikroTik Router’s configuration and management features using text terminals, either remotely using serial port, telnet, SSH, console screen within WinBox, or directly using monitor and keyboard. The console is also used for writing scripts. This manual describes the general console operation principles. Please consult the Scripting Manual on some advanced console commands and on how to write scripts.
Login Options
Console login options enables or disables various console features like colour, terminal detection and many other.
Additional login parameters can be appended to login name after ‘+’ sign.
If parameter is not present, then default value is used. If number is not present then implicit value of parameter is used.
| Param | Default | Implicit | Description |
|---|---|---|---|
| «w» | auto | auto | Set terminal width |
| «h» | auto | auto | Set terminal height |
| «c» | on | off | disable/enable console colours |
| «t» | on | off | Do auto detection of terminal capabilities |
| «e» | on | off | Enables «dumb» terminal mode |
Banner and Messages
Login process will display MikroTik banner and short help after validating user name and password.
Ошибка визуализации кода макроса: задано недействительное значение для параметра «com.atlassian.confluence.ext.code.render.InvalidValueException»
After the banner can be printed other important information, like system note set by another admin, last few critical log messages, demo version upgrade reminder and default configuration description.
For example, demo license prompt and last critical messages are printed
Ошибка визуализации кода макроса: задано недействительное значение для параметра «com.atlassian.confluence.ext.code.render.InvalidValueException»
Command Prompt
At the end of successful login sequence login process prints banner, shows command prompt and hands over control to the user.
Default command prompt, consists of user name, system identity, and current command path />
For example, change current path from root to interface then go back to root
Ошибка визуализации кода макроса: задано недействительное значение для параметра «com.atlassian.confluence.ext.code.render.InvalidValueException»
Use up arrow to recall previous commands from command history, TAB key to automatically complete words in the command you are typing, ENTER key to execute command, Control-C to interrupt currently running command and return to prompt and ? to display built-in help.
Easiest way to log out of console is to press Control-D at the command prompt while command line is empty (You can cancel current command and get an empty line with Control-C, so Control-C followed by Control-D will log you out in most cases).
It is possible to write commands that consist of multiple lines. When entered line is not a complete command and more input is expected, console shows continuation prompt that lists all open parentheses, braces, brackets and quotes, and also trailing backslash if previous line ended with backslash-whitespace.
Ошибка визуализации кода макроса: задано недействительное значение для параметра «com.atlassian.confluence.ext.code.render.InvalidValueException»
When you are editing such multiple line entry, prompt shows number of current line and total line count instead of usual username and system name.
Sometimes commands ask for additional input from user. For example, command ‘/password’ asks for old and new passwords. In such cases prompt shows name of requested value, followed by colon and space.
Ошибка визуализации кода макроса: задано недействительное значение для параметра «com.atlassian.confluence.ext.code.render.InvalidValueException»
Hierarchy
The console allows configuration of the router’s settings using text commands. Since there is a lot of available commands, they are split into groups organized in a way of hierarchical menu levels. The name of a menu level reflects the configuration information accessible in the relevant section.
For example, you can issue the /ip route print command:
Ошибка визуализации кода макроса: задано недействительное значение для параметра «com.atlassian.confluence.ext.code.render.InvalidValueException»
Instead of typing ip route path before each command, the path can be typed only once to move into this particular branch of menu hierarchy. Thus, the example above could also be executed like this:
Ошибка визуализации кода макроса: задано недействительное значение для параметра «com.atlassian.confluence.ext.code.render.InvalidValueException»
Each word in the path can be separated by space (as in example above) or by «/»
Ошибка визуализации кода макроса: задано недействительное значение для параметра «com.atlassian.confluence.ext.code.render.InvalidValueException»
Notice that the prompt changes in order to reflect where you are located in the menu hierarchy at the moment. To move to the top level again, type » / «
Ошибка визуализации кода макроса: задано недействительное значение для параметра «com.atlassian.confluence.ext.code.render.InvalidValueException»
Ошибка визуализации кода макроса: задано недействительное значение для параметра «com.atlassian.confluence.ext.code.render.InvalidValueException»
You can also use / and .. to execute commands from other menu levels without changing the current level:
Ошибка визуализации кода макроса: задано недействительное значение для параметра «com.atlassian.confluence.ext.code.render.InvalidValueException»
Item Names and Numbers
Many of the command levels operate with arrays of items: interfaces, routes, users etc. Such arrays are displayed in similarly looking lists. All items in the list have an item number followed by flags and parameter values.
To change properties of an item, you have to use set command and specify name or number of the item.
Item Names
Some lists have items with specific names assigned to each of them. Examples are interface or user levels. There you can use item names instead of item numbers.
You do not have to use the print command before accessing items by their names, which, as opposed to numbers, are not assigned by the console internally, but are properties of the items. Thus, they would not change on their own. However, there are all kinds of obscure situations possible when several users are changing router’s configuration at the same time. Generally, item names are more «stable» than the numbers, and also more informative, so you should prefer them to numbers when writing console scripts.
Item Numbers
You can specify multiple items as targets to some commands. Almost everywhere, where you can write the number of item, you can also write a list of numbers.
General Commands
There are some commands that are common to nearly all menu levels, namely: print, set, remove, add, find, get, export, enable, disable, comment, move. These commands have similar behavior throughout different menu levels.
| Property | Description |
|---|---|
| add | This command usually has all the same arguments as set, except the item number argument. It adds a new item with the values you have specified, usually at the end of the item list, in places where the order of items is relevant. There are some required properties that you have to supply, such as the interface for a new address, while other properties are set to defaults unless you explicitly specify them. |
Input Modes
It is possible to switch between several input modes:
Quick Typing
/inte[Tab]_ becomes /interface _
If there is more than one match, but they all have a common beginning, which is longer than that what you have typed, then the word is completed to this common part, and no space is appended:
/interface set e[Tab]_ becomes /interface set ether_
If you’ve typed just the common part, pressing the tab key once has no effect. However, pressing it for the second time shows all possible completions in compact form:
Another way to press fewer keys while typing is to abbreviate command and argument names. You can type only beginning of command name, and, if it is not ambiguous, console will accept it as a full name. So typing:
It is possible to complete not only beginning, but also any distinctive substring of a name: if there is no exact match, console starts looking for words that have string being completed as first letters of a multiple word name, or that simply contain letters of this string in the same order. If single such word is found, it is completed at cursor position. For example:
Источники:
- http://smartadm.ru/mikrotik-safe-mode/
- http://interface31.ru/tech_it/2020/02/bezopasnyy-rezhim-v-mikrotik-ili-kak-vsegda-ostavatsya-na-svyazi.html
- http://help.mikrotik.com/docs/display/ROS/Configuration+Management
- http://vedernikoff.ru/mikrotik-safe-mode/
- http://wiki.mikrotik.com/wiki/Manual:Console
- http://bite-byte.ru/shpargalki/mikrotik-safe-mode/
- http://www.irwx.ru/mikrotik-razbiraemsya-s-safe-mode/
- http://blog.ligos.net/2018-02-22/Making-Mikrotik-Safe.html
- http://help.mikrotik.com/docs/display/ROS/Console
- http://help.mikrotik.com/docs/display/ROS/Command+Line+Interface
- http://tikdis.com/mikrotik-routeros/hardware/safe-mode-history/
- http://blog.danielisz.org/2019/12/28/mikrotik-safe-mode/
- http://ixnfo.com/bezopasnaya-udalennaya-rabota-s-mikrotik-kak-ne-poteryat-svyaz-s-ustroystvom.html
- http://disnetern.ru/%D1%87%D1%82%D0%BE-%D0%BD%D0%B0%D0%B4%D0%BE-%D1%81%D0%B4%D0%B5%D0%BB%D0%B0%D1%82%D1%8C-%D0%BF%D1%80%D0%B8-%D1%83%D0%B4%D0%B0%D0%BB%D1%91%D0%BD%D0%BD%D0%BE%D0%B9-%D1%80%D0%B0%D0%B1%D0%BE%D1%82%D0%B5/
- http://help.mikrotik.com/docs/display/ROS/Winbox
- http://forum.mikrotik.com/viewtopic.php?t=50735
- http://voxlink.ru/kb/linux/osnovnye-principy-raboty-v-komandnoj-stroek-routeos/
- http://forum.mikrotik.com/viewtopic.php?t=101714
- http://forum.mikrotik.com/viewtopic.php?t=134
- http://forum.mikrotik.com/viewtopic.php?t=132036
- http://forum.mikrotik.com/viewtopic.php?t=49275
- http://wiki.mikrotik.com/wiki/Manual:Initial_Configuration
- http://help.mikrotik.com/docs/display/ROS/First+Time+Configuration
- http://wiki.mikrotik.com/wiki/Manual:Etherboot
- http://wiki.mikrotik.com/wiki/Manual:Configuration_Management
- http://wiki.mikrotik.com/wiki/Manual:Reset
- http://forum.mikrotik.com/viewtopic.php?t=128601
- http://wiki.mikrotik.com/wiki/Manual:RouterBOARD_settings
- http://help.mikrotik.com/docs/pages/viewpage.action?pageId=76415036
- http://interface31.ru/tech_it/2018/11/bazovaya-nastroyka-routera-mikrotik.html
- http://forum.mikrotik.com/viewtopic.php?t=113623
- http://help.mikrotik.com/docs/pages/viewpage.action?pageId=328240
- http://forum.mikrotik.com/viewtopic.php?t=117456
- http://wiki.mikrotik.com/wiki/Manual:Securing_Your_Router
- http://asp24.ru/mikrotik/mikrotik-sbros-nastroek-bekapy-i-dualboot/
- http://help.mikrotik.com/docs/plugins/viewsource/viewpagesrc.action?pageId=84902039
- http://wiki.mikrotik.com/wiki/Manual:Console_login_process
- http://help.mikrotik.com/docs/display/ROS/Reset+Button
- http://itproffi.ru/mikrotik-winbox-gde-skachat-i-kak-ispolzovat/
- http://vikilpet.wordpress.com/2017/07/01/mikrotik-newbie/
- http://kev.su/mikrotik-%D1%81%D0%B1%D1%80%D0%BE%D1%81-%D0%BD%D0%B0%D1%81%D1%82%D1%80%D0%BE%D0%B5%D0%BA-%D0%B1%D0%B5%D0%BA%D0%B0%D0%BF%D1%8B-%D0%B8-dualboot/
- http://mhelp.pro/mikrotik-protection-basic-device-security-setting/
- http://smartadm.ru/mikrotik-nastrojka-firewall/
- http://xakep.ru/2020/05/06/mikrotik-firewall/
- http://help.mikrotik.com/docs/plugins/viewsource/viewpagesrc.action?pageId=84902015
- http://help.mikrotik.com/docs/pages/viewpage.action?pageId=1409114


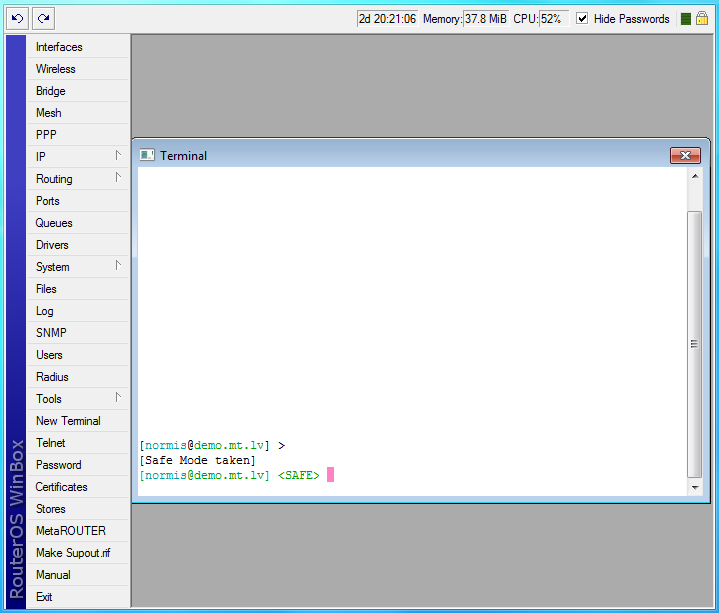
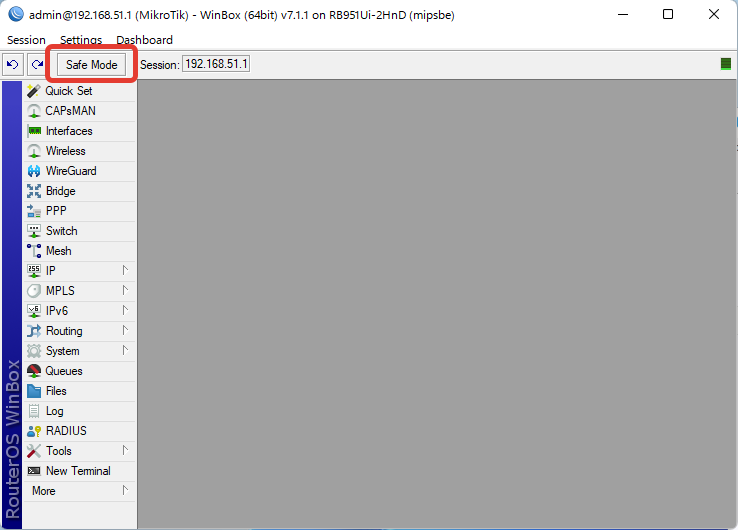
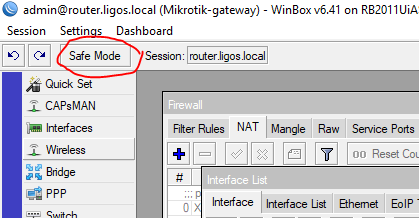
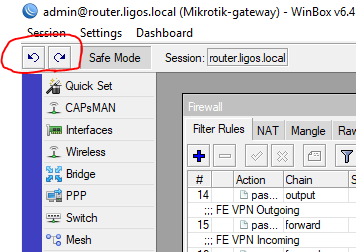
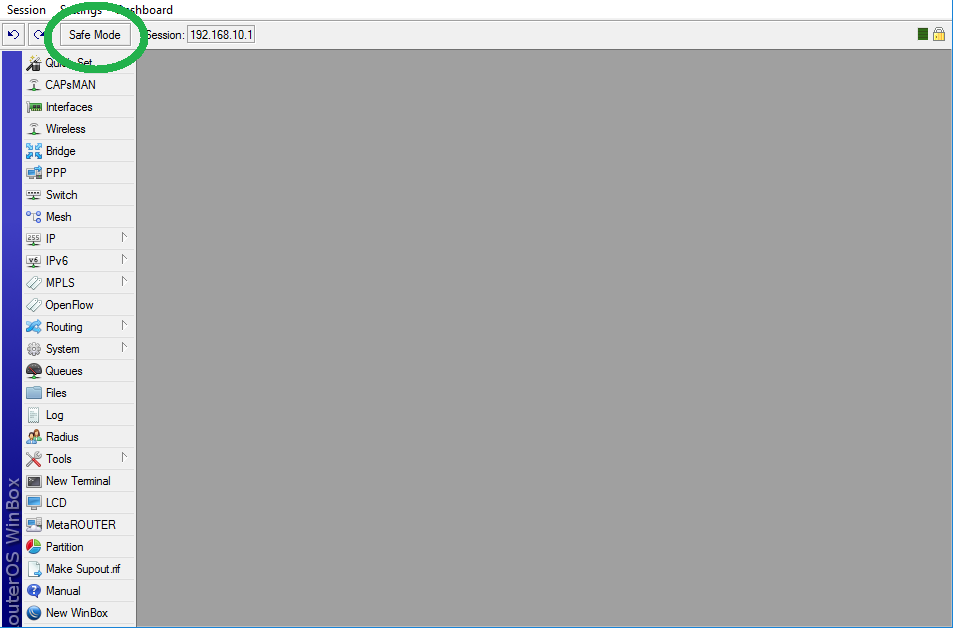


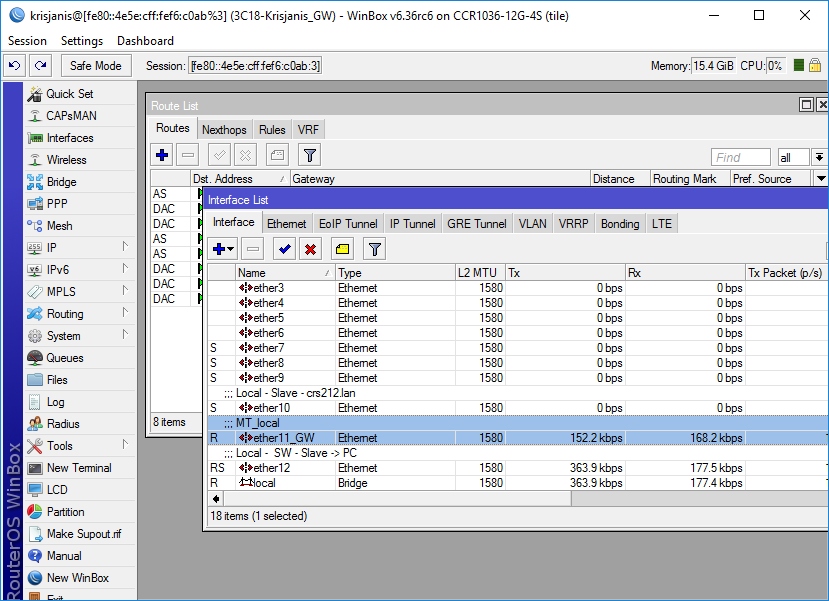


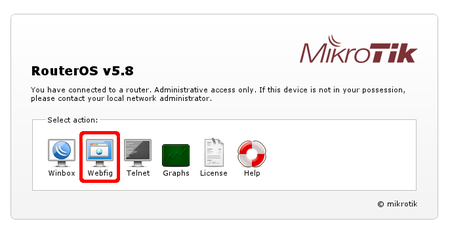
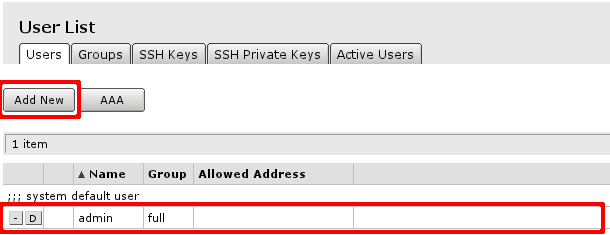
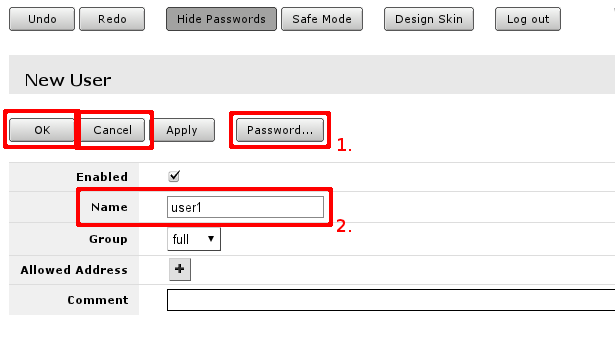
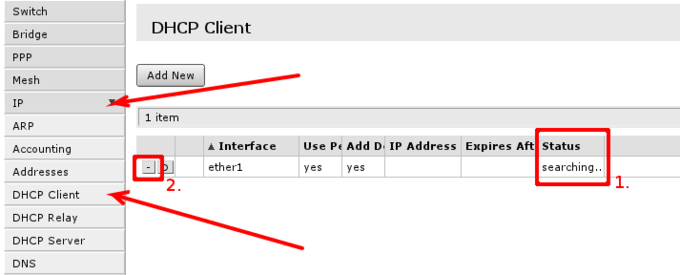
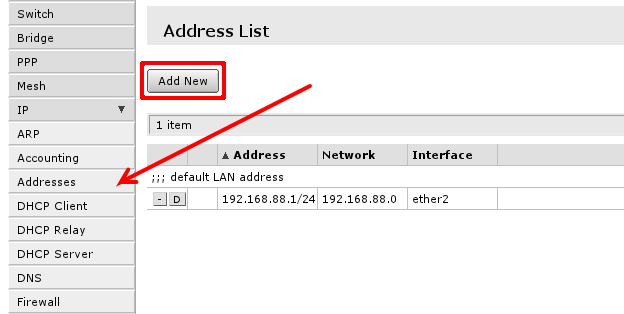


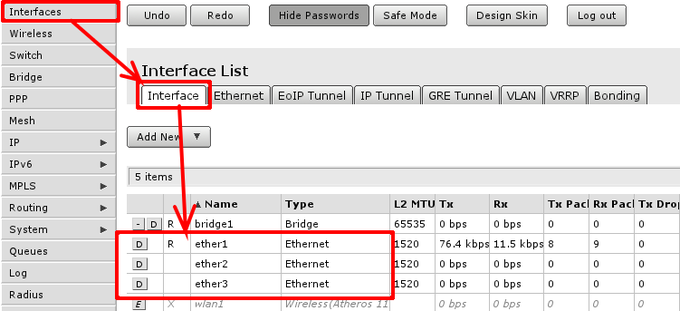
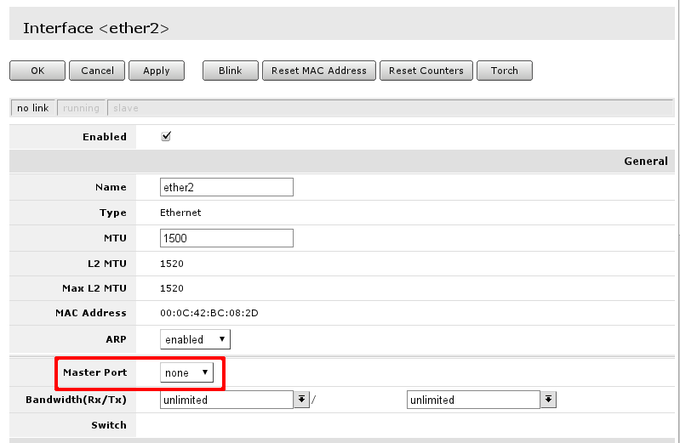
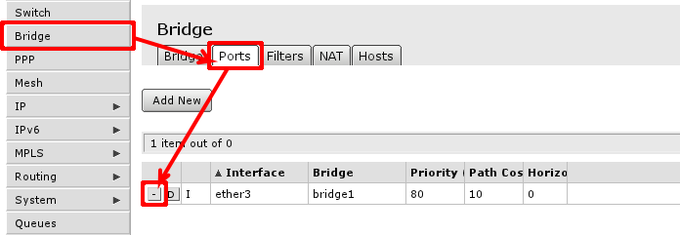
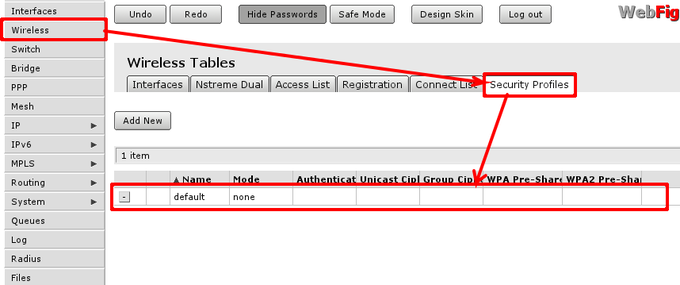
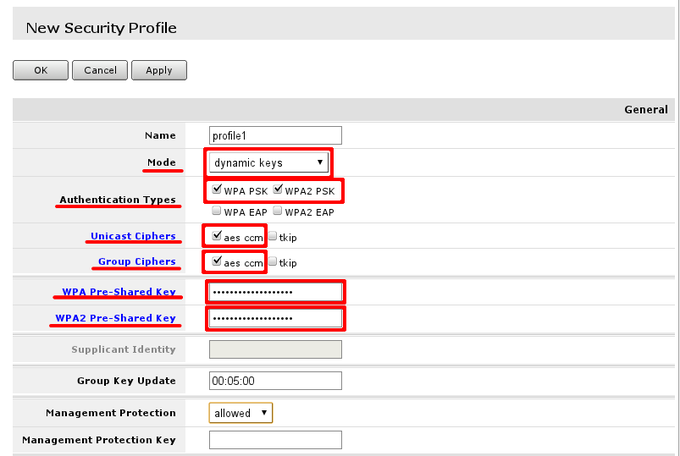
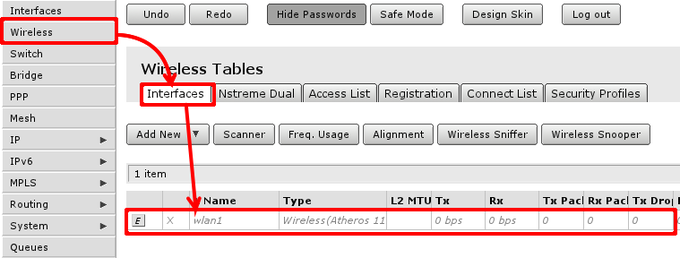

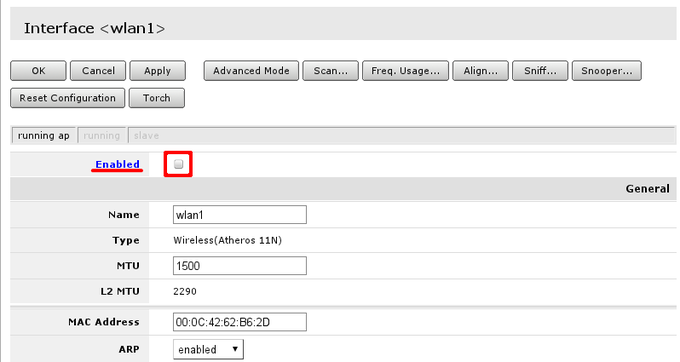
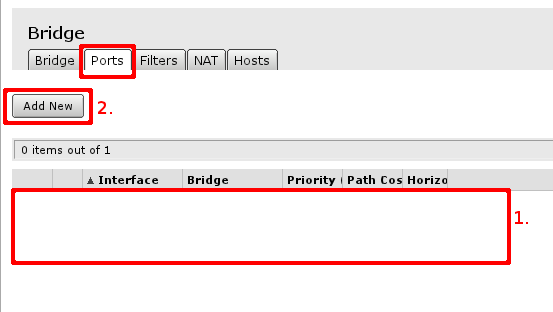
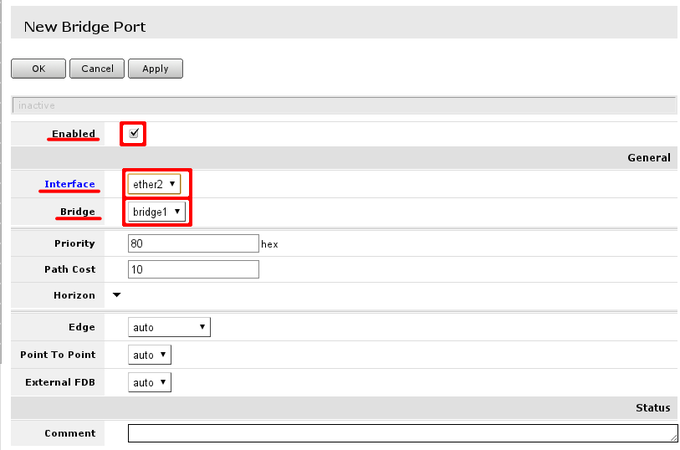

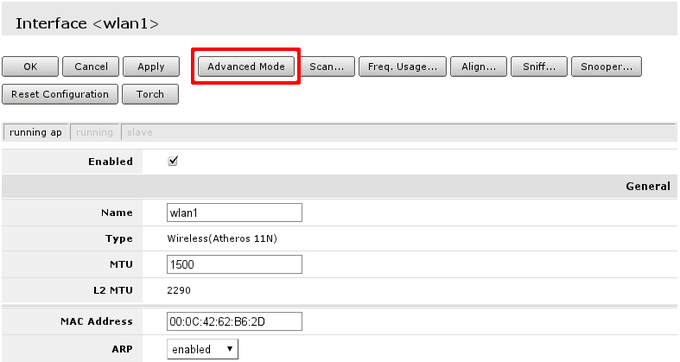
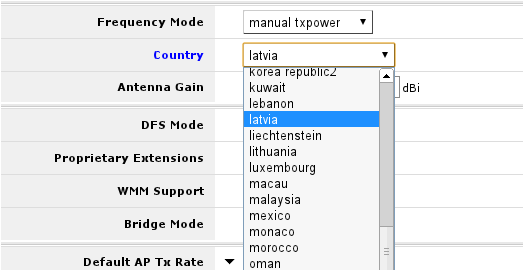
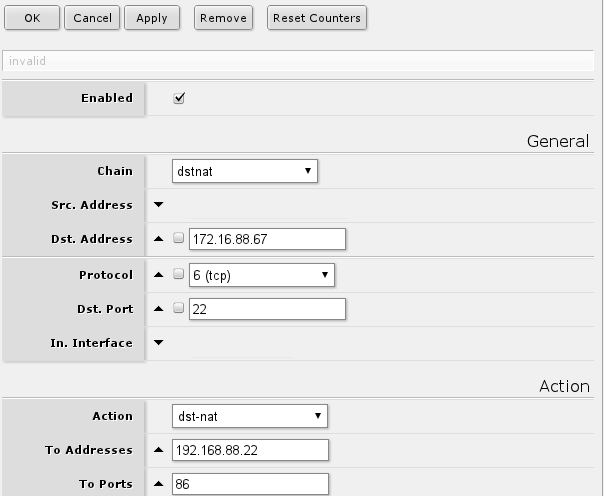
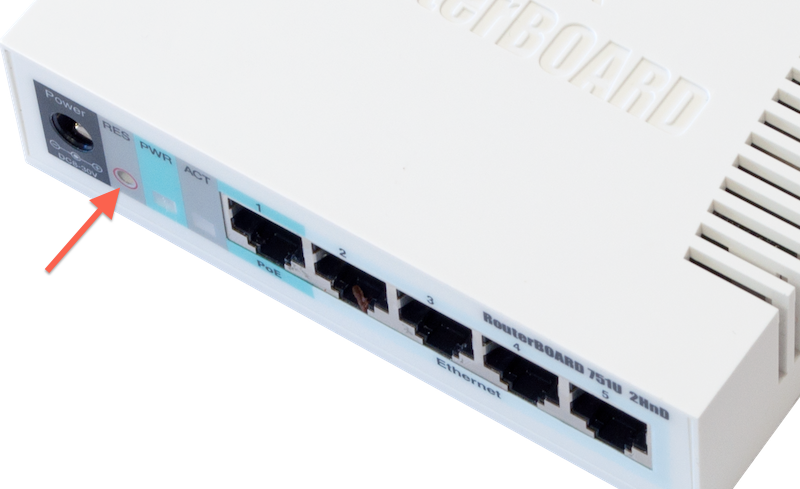
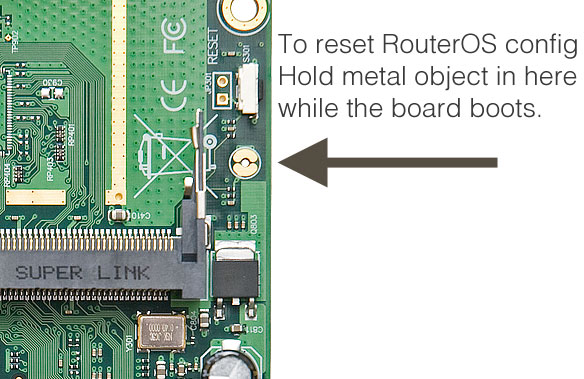
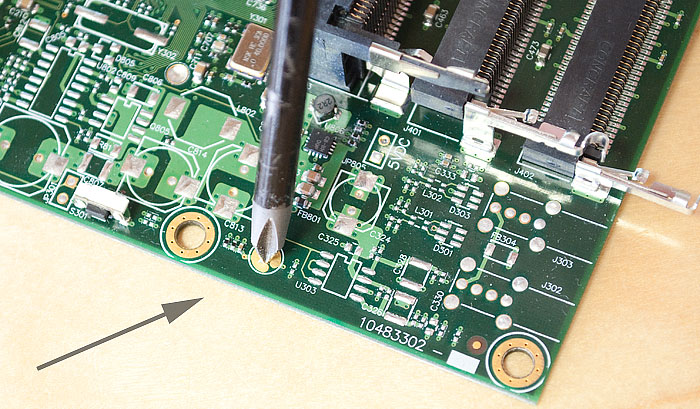
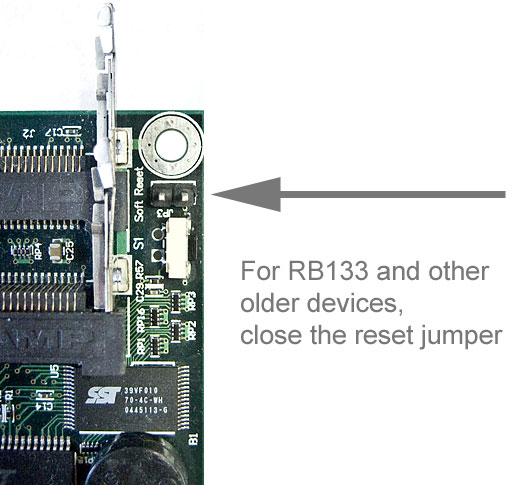







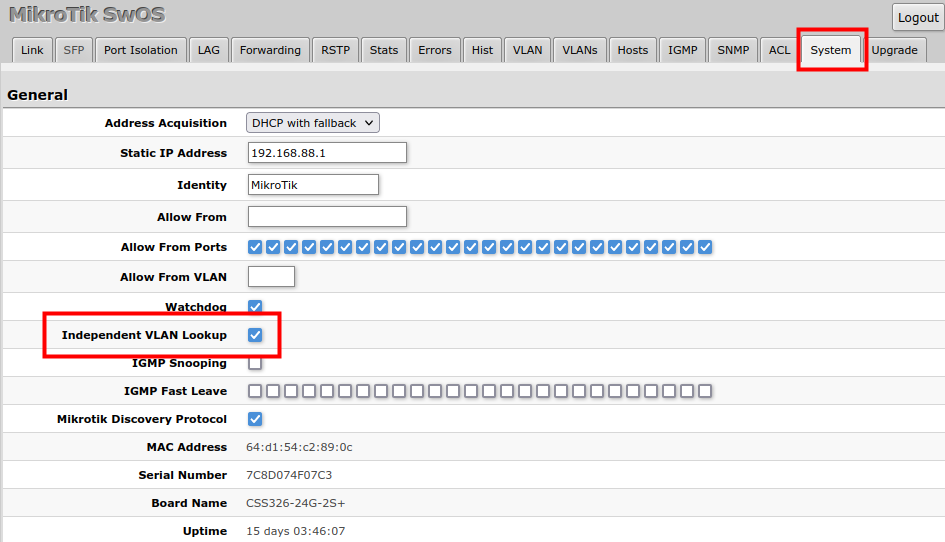

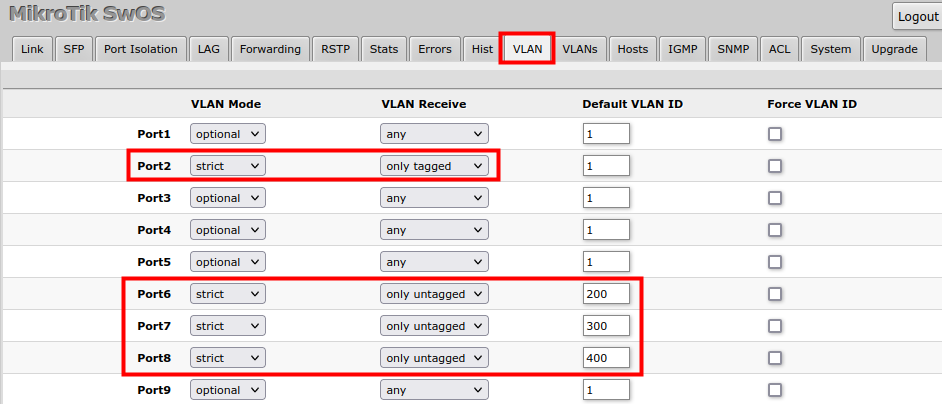
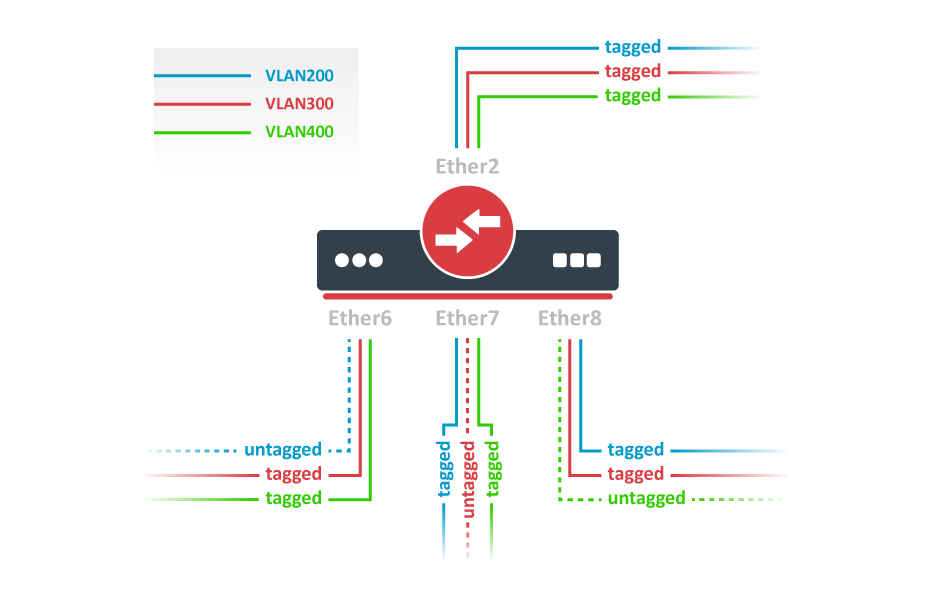

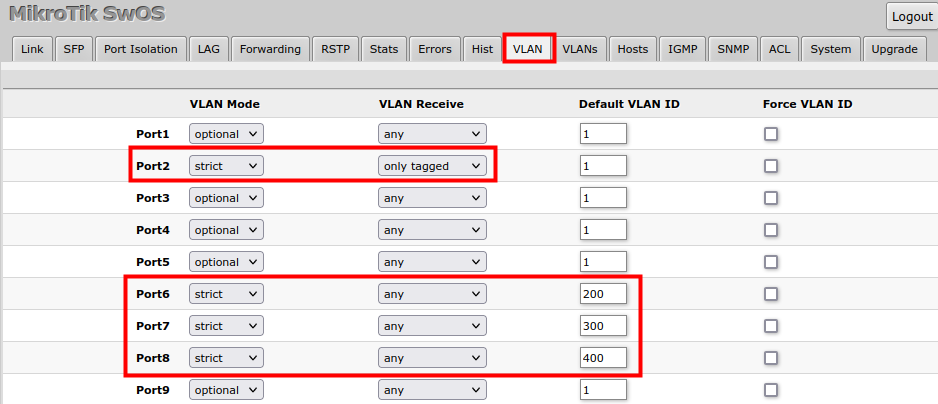


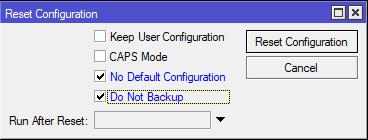


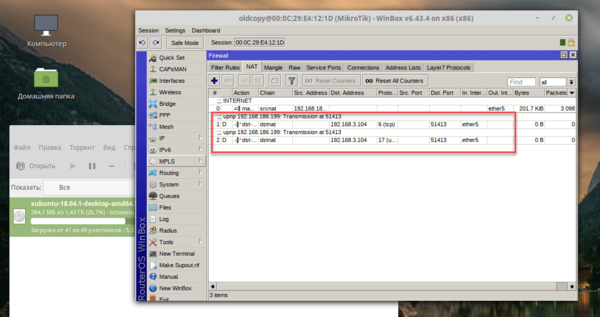 Настройка межсетевого экрана
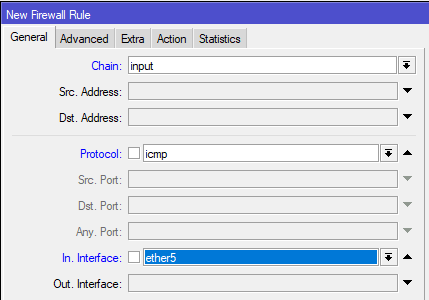
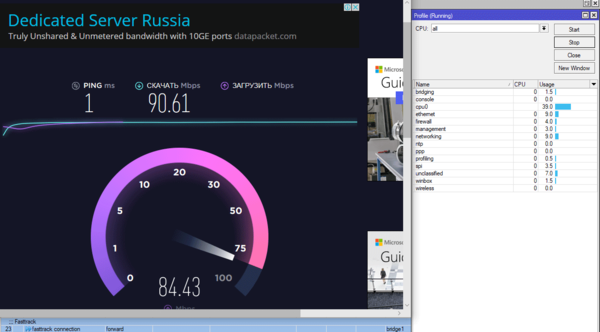
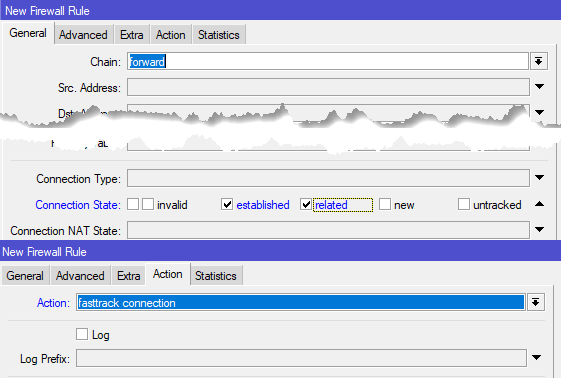
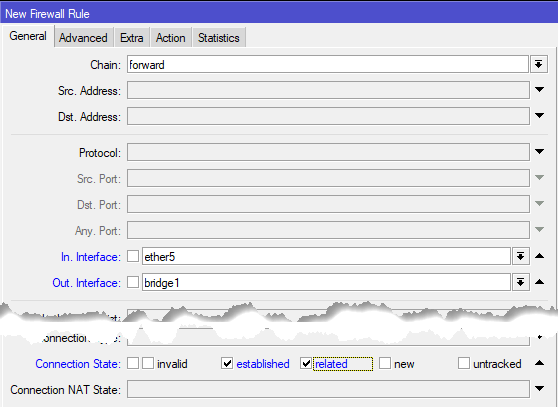
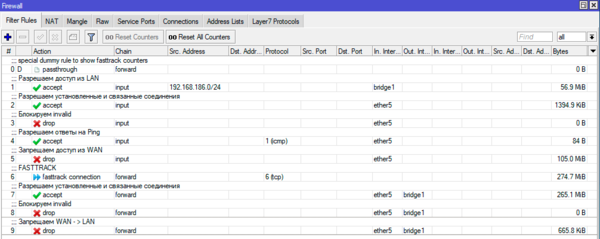
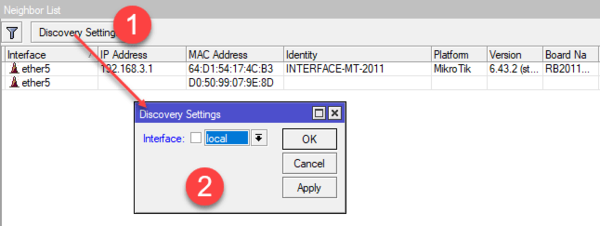
 Настройка беспроводной сети Wi-Fi